
UmbralMonument
Endfield's Permanent Endgame Mode. Series 5: Contention of Deathly Silences
Last updated: 2026-07-02
Complete guide to Umbral Monument in Arknights: Endfield, featuring the current 5th series, Contention of Deathly Silences (launched July 2, 2026). Covers unlock requirements, the new six-stage series and its Monumental Etching: Dirge of Grief event window, Normal vs Agony modes, medal rewards, team building fundamentals, and the full Series 4 Turbidity Manifest stage archive with deep dives for Stages 3, 5, and 6.
*TL;DR - Key Points
- * Permanent Endgame Mode -- New series rotates in roughly every 6-8 weeks
- * Unlock: Complete Paving the Way + Authority Level 30
- * 4-Operator Teams -- Each stage limits you to 4 operators
- * Current Series 5: Contention of Deathly Silences -- Launched July 2, 2026 with version 1.3, six new stages
- * Normal & Agony Modes -- Clear Normal to unlock Agony (tacticals banned)
- * Series 4 Archive: Turbidity Manifest -- Stage 3, 5, and 6 deep dives further down this page
- * Monumental Etching: Dirge of Grief -- Bonus event runs July 2 to July 15, 17:00 (UTC-5)
Video Guides
Full-run video walkthroughs for the Series 4 Turbidity Manifest stages: Stage 3 (Tidal Grief), Stage 5 (Blood Debased), and Stage 6 (Cryostatic Connection) with commentary. All three stages remain permanently playable.
Turbidity Manifest Video Guides
Tidal Grief Stage 3: Ardelia Solo Cheese
May 26

Blood Debased Stage 5: Turbidity Manifest Guide
May 26

Cryostatic Connection Stage 6: Turbidity Manifest Guide
May 26
Series 5: Contention of Deathly Silences
Full-run video walkthroughs for the Series 5 Contention of Deathly Silences stages. First up: Stage 3 (Ritual Vortex), the caster boss day-one players kept dying to, cleared with a free-to-play heat comp that tanks the boss's ultimate with Ember. More stages to follow.
Contention of Deathly Silences Video Guides

Deathly Silences Stage 3: Ritual Vortex F2P Team
2 weeks ago
Contents
What is Umbral Monument?
Umbral Monument is Arknights: Endfield's permanent high-difficulty endgame combat mode, originally released February 12, 2026. It is designed for players who have completed the main story progression and want challenging content that tests team building and combat execution. New themed series rotate into the same hub every 6-8 weeks. The current rotation is the 5th series, Contention of Deathly Silences, launched July 2, 2026.
Permanent Mode
Past series stay accessible permanently. Only the bonus event reward windows are time-gated.
Series System
Each themed series brings new stage mechanics. So far: Those Forsaken by the Land, Inorganic Construct, Searing Scars, Turbidity Manifest, and Contention of Deathly Silences.
4-Operator Teams
Each battle is limited to 4 operators. Every slot matters -- bring the right tools for each stage's mechanics.
Medal System
Earn Engraved Medals for clearing a series in Normal. Trimmed medals require all-Agony clears -- the ultimate flex.
Pro Tip: Check Enemy Intel
Before starting a stage, check the Enemy Intel button in the stage selection screen. It shows enemy types, resistances, and attack patterns — essential for building the right team for each stage. For full enemy rosters across every series (Normal Lv 60 and Agony Lv 90 tiers), see the Umbral Monument Database.
How to Unlock
1. Complete Paving the Way
Finish the main mission Chapter I Process II: Paving the Way. This is a story progression requirement that ensures you have completed the main campaign before tackling endgame content.
2. Reach Authority Level 30
Earn Operational EXP by spending Sanity, completing missions, and finishing daily tasks. Authority Level 30 represents significant account progression and ensures you have the resources to build competitive teams.
Current Series: Contention of Deathly Silences (Series 5)
Contention of Deathly Silences is the fifth Umbral Monument series, launched July 2, 2026 at 12:00 server time as part of the 1.3 Sketches of Lost Heirlooms update. Six new stages join the permanent hub, each with Normal and Agony modes, alongside the limited-time Monumental Etching: Dirge of Grief event. For the full launch breakdown, unlock checklist, and reward details, see the Contention of Deathly Silences launch guide; for the confirmed event deadline and reward benchmarks, see the day-one Dirge of Grief coverage.
Series Timeline
Series 1: Those Forsaken by the Land · Series 2: Inorganic Construct · Series 3: Searing Scars · Series 4: Turbidity Manifest · Series 5: Contention of Deathly Silences (current)
Launch
July 2, 2026, 12:00 server time across all regions. Stages remain permanently playable.
Event Window
Monumental Etching: Dirge of Grief runs July 2, 12:00 to July 15, 17:00 (UTC-5); the Asia server closes at the same instant, July 16, 06:00 (UTC+8). Bonus rewards vanish after the event closes.
Six Stages
Each stage has Normal (Lv. 60) and Agony (Lv. 90, no tacticals) modes. Clear all six in Agony for the trimmed medal.
Series Rewards
Complete all stage challenges to earn the Mark of Perseverance, Advanced Cognitive Carrier, an Arms INSP Set, and Protohedron.
Six-Stage Overview
Stage order confirmed from day-one CN community clears. Stage 3's English name is still unconfirmed; its CN name translates to roughly "Ritual Vortex". Enemy data below is cross-referenced against the Talos wiki bestiary; treat the rest as day-one intel and verify with the in-game Enemy Intel screen.
| Stage | Theme |
|---|---|
| Stage 1: Phalanx of Thorns | Shielded enemy formations, guard-break check |
| Stage 2: Eyes of Solvent Kind | Twin Tidewalker elites, Cryo + Solidification pressure |
| Stage 3: (name TBC) | Caster enemies with lethal explosion burst |
| Stage 4: Wading in Raker Turf | Rakerbeast pack, enrage + stealth mechanics |
| Stage 5: Harrowing Æthillu | Æthillu phantom waves, revive + self-detonation |
| Stage 6: Raging Drummer | Skydrummer boss, enrage interrupt loop |
Stage 1: Phalanx of Thorns
Expected Mechanic: Shield Wall
The stage name (CN: a "thorn shield formation") points at shielded enemy lines that punish frontal attacks. Series openers have historically been roster checks rather than gimmick puzzles.
- * Bring guard-break tools: stagger-heavy operators and skills that punish blocking enemies.
- * Flank instead of face-tanking: shield formations in Endfield block from the front; positioning beats raw damage.
- * Check Enemy Intel first: confirm the roster and resistances before locking your team.
Stage 2: Eyes of Solvent Kind
Enemy: Two Tidewalkers (Elite Aggeloi)
A dual-elite fight against two Tidewalkers, the large hovering humanoid Aggeloi ("solvent kind" is the fluid Aggeloi family). They mix tentacle melee strings with Cryo laser volleys that leave delayed detonations, and their hits apply Solidification, freezing the operator they connect with.
Key Numbers (Lv. 90)
- * Base Tidewalker: 825,447 HP / 4,130 ATK; the energized δ variant runs 1,238,171 HP / 4,543 ATK. Both share stagger HP 320, 9-second recovery, and a 1.5x finisher paying 50 SP.
- * Resist Electric and Cryo at 0.8x; Physical, Heat, and Nature all hit at full value.
- * The nine-area ground extension attack is interruptible; the triple laser volley knocks back, applies Cryo Infliction, and leaves delayed detonation marks on the ground.
- * Fight them one at a time: two elites sharing the arena means positioning so only one can reach you; getting sandwiched between tentacle strings is how teams die.
- * Bring a Solidification answer: Xaihi's ultimate cleanses the freeze team-wide, the same panic button that carried Cryostatic Connection.
- * Don't stand on the marks: the laser volley's ground marks detonate late; keep moving after every volley.
Stage 3: Name TBC ("Ritual Vortex")
Day-One Intel: Explosion Burst
The stage day-one players are talking about. Early CN clears flag caster-type enemies whose explosion damage can delete a squishy point operator outright, and successful Agony runs lean on survival-oriented teams over glass cannons.
- * Respect the burst: this is not a stage to face-check with a fragile point operator. Keep HP topped instead of healing reactively.
- * Survival comps are proving out: early Agony clears favor shields and healers over maximum damage.
- * Prioritize the casters: ranged explosive enemies are the kill-first targets; leaving them free-casting is how runs end.
Stage 4: Wading in Raker Turf
Enemy: Rakerbeasts (Elite Wildlife)
The Rakerbeast family headlines this stage. The Glaring Rakerbeast elite runs 1.24M HP at Lv. 90 with fast Physical claw strings, an Enraged state that spams charge-up skills, and a low-HP stealth phase that only ends when you interrupt it.
Key Numbers (Glaring Rakerbeast, Lv. 90)
- * 1,238,171 HP / 4,543 ATK, stagger recovery 9 seconds, finisher pays 1.5x ATK and 50 SP.
- * Resists Cryo and Nature at 0.8x; Physical, Heat, and Electric all hit at full value. Leave the Cryo carries home.
- * Every charge-up is interruptible, including the enrage leaps and the stealth-entry cast.
- * Bring interrupt tools: Chen Qianyu's Momentum Breaker and other stagger skills shut down both the enrage and the stealth phase.
- * Don't chase during stealth: hold your interrupt for the charging animation and it pops the beast straight out.
Stage 5: Harrowing Æthillu
Enemy: Æthillu Phantoms (Revive + Detonate)
Æthillu are ranged phantom wildlife, "manifestations of destruction" summoned by Ardashir's call. Each one revives once after dying, comes back with longer attack range, and can detonate itself for massive damage. The stage is a wave-management fight, not a boss race.
Key Numbers (Æthillu, Lv. 90)
- * 73,373 HP / 3,097 ATK per phantom, 7-meter attack range, short 6-second stagger recovery.
- * 0.8x resistance to every player element (Physical, Heat, Electric, Cryo, Nature). Only Ether hits at 1x, and no playable operator deals Ether, so there is no element cheese: pick your best-built team.
- * Kill everything twice: budget damage for the revive. A wave is not clear until the revived forms are down.
- * Spread out for detonations: the self-destruct is the run-killer; never stack your team on top of a low-HP revived phantom.
- * AoE over single-target: 73k HP phantoms die fast to splash; wave-clear comps (Zhuang Fangyi, Laevatain) fit the enemy density.
Stage 6: Raging Drummer
Boss: Skydrummer (Alpha Howlerbeast)
The Skydrummer is an Alpha-tier howlerbeast whose head and neck membranes unleash hill-shaking howls. Its defining mechanic is the Enraged state at low HP: more frequent charge-up attacks, higher damage, and damage reduction, all of which end when you interrupt it.
Key Numbers (Skydrummer, Lv. 90)
- * 1,100,596 HP / 4,130 ATK, stagger HP 320 with 9-second recovery, finisher pays 1.5x ATK and 50 SP.
- * No resistances at all: every element hits at 1x. Bring your hardest-hitting team regardless of color.
- * Save SP for the enrage: the low-HP Enraged phase is the fight. Interrupt the charge-ups to strip its damage reduction instead of trying to out-DPS it.
- * Same playbook as the Tidalklast: build stagger during charge animations, then dump ultimates in the open window. If you cleared Cryostatic Connection, the rhythm transfers.
Series 4 Archive: Turbidity Manifest
The Turbidity Manifest is the fourth Umbral Monument series. Six stages of escalating water- and corruption-themed challenge, launched May 8, 2026 and permanently playable. The deep-dive guides below cover Stages 3, 5, and 6.
Launch
May 8, 2026, 12:00 server time across all regions. Stages remain permanently playable.
Event Window
Monumental Etching: Corrupting Surge ran May 8 to May 22, 04:00 server time. The bonus Oroberyl window has closed.
Six Stages
Each stage has Normal (Lv. 60) and Agony (Lv. 90, no tacticals) modes. Clear all six in Agony for the trimmed medal.
Equal Resistances
Most enemies share resistances across elements — your most-built team is your best team. No off-element scramble required.
Six-Stage Overview
| Stage | Theme | Guide |
|---|---|---|
| Stage 1 — Silent Horizon | Enemies gain ATK the longer the fight runs | — |
| Stage 2 — Withered Sea | Enhanced enemy stats, wave endurance check | — |
| Stage 3 — Tidal Grief | Solo-cheeseable, crystal-defense gimmick | Ardelia Solo Cheese → |
| Stage 4 — Underflow Chasm | Effigy boss summons waves of Aggeloi | — |
| Stage 5 — Blood Debased | Imbued Quillbeast boss + endless add spawns | Imbued Quillbeast Guide → |
| Stage 6 — Cryostatic Connection | Tidalklast boss, freeze-buff stagger loop | Tidalklast Guide → |
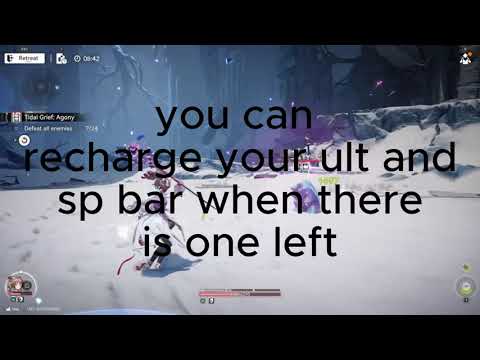
Stage 3: Tidal Grief
Stage Mechanic: Crystal Defense
Blue goos spawn from 24 points and march toward a central crystal. If they pile up there, they detonate together — an unsurvivable damage spike. Win condition is spatial control, not raw DPS.
Ardelia Solo Cheese — Key Points
- * Solo Ardelia run — no other operators in the squad.
- * Lynx set is mandatory — the treatment bonus turns Ardelia's self-heals from "decent" into "literal wall."
- * Push goos away from the central crystal — spread the damage across time.
- * Bank 3 ATB bars before the 8/24 and 12/24 enemy spawn waves.
- * Save Ardelia's ult for the 12/24 wave — the breakpoint where the run lives or dies.
Stage 5: Blood Debased
Stage Mechanic: Add Spam
The Imbued Quillbeast summons regular Quillbeasts on a timer, with the spawn rate ramping up at low boss HP. Lock onto the boss, let your AoE clean the trash, and interrupt the lava-spit charge.
Recommended Teams
Zhuang Fangyi (Electric AoE)
Perlica + Fangyi + Arclight + Antal/Alesh — high-stack AoE turns add spam into free damage stacks.
Yvonne (Cryo Freeze)
Yvonne + Xaihi + Gilberta + Tangtang — Solidification locks adds, Yvonne ults the boss in peace.
Laevatain (Heat Brute Force)
Laevatain + Akekuri + Wulfgard + Ardelia — massive AoE doesn't care how many adds spawn.
Core Loop
- * Tunnel the Imbued Quillbeast — chasing adds wastes damage cycles.
- * Save SP for the lava-spit charge — interrupt the inflate animation for massive Stagger.
- * Use the boss as a shield — position so its body soaks the regular Quillbeasts' projectiles.
Stage 6: Cryostatic Connection
Stage Mechanic: Freeze-Buff Damage Reduction
The Tidalklast hardens its body with ice to gain massive damage reduction. DPS-racing the buff is throwing damage into a wall — the win condition is interrupting its charging animations to build Stagger, then dumping ultimates in the open window.
Recommended Teams
Mono Physical (Best Answer)
Endministrator + Pogranichnik + Chen Qianyu + Lifeng — high base Stagger + Swordmancer Set punches through the buff phase.
Yvonne Cryo (Safe Ranged)
Yvonne + Tangtang + Xaihi + Gilberta — stay out of melee, dump ult during Stagger. Xaihi cleanses Solidification.
F2P Endministrator
Endministrator + Akekuri + Chen Qianyu + Ardelia — budget Mono Physical with Ardelia as the sustain swap.
Core Loop
- 1. Dodge the boss's attacks during the buffed phase.
- 2. Save skills/ults for its charging animations.
- 3. Interrupt to pump Stagger gauge — Chen's Momentum Breaker adds +10 per interrupt.
- 4. Break the buff when the gauge fills.
- 5. Dump damage in the open window before it re-freezes.
Xaihi Is Your Cleanse Button
Xaihi's ultimate dispels Cryo Inflictions and Solidification across the team. Save it for emergencies in Agony — the moment an operator gets frozen, ult Xaihi to break the chain wipe before the auto-swap puts another operator into the freeze zone.
Difficulty Modes
Normal Mode
- -- Tacticals allowed during combat
- -- Recommended Lv. 60
- -- Practice stages and learn mechanics
- -- Required to unlock Agony mode
- -- Rewards: First-clear items, Engraved Medal
Agony Mode
- -- Tacticals prohibited
- -- Lv. 90 enemies, significantly harder stats
- -- Stage 6 twist: Enhanced enemy DMG instantly applies Solidification on hit
- -- More aggressive boss patterns and lower margin for sloppy positioning
- -- Rewards: Trimmed Engraved Medal
Critical Warning: Always practice a stage in Normal mode before attempting Agony. Agony mode requires perfect execution and punishes mistakes severely — especially Stage 6, where a single missed dodge can chain-freeze your entire team.
Rewards
First-Clear Rewards (One-Time)
| Reward | Purpose |
|---|---|
| Mark of Perseverance | Profile medal — trimmed version for full Agony clear |
| T-Creds | Standard currency |
| Advanced Cognitive Carrier | Character ascension material |
| Arms INSP Set | Weapon upgrade materials |
| Protohedron | Rare crafting material |
Medal Rewards
Engraved Medal
Awarded for completing all six stages of a series in Normal mode. Shows you've cleared that series.
Trimmed Engraved Medal
Upgraded version awarded for clearing all six stages in Agony mode. The ultimate proof of mastery for this series.
Monumental Etching: Dirge of Grief (Current)
Limited-time event running alongside Contention of Deathly Silences. Event window: July 2, 12:00 to July 15, 17:00 (UTC-5) / July 16, 06:00 (UTC+8). Stages remain permanent after the event closes, but the bonus rewards do not. It follows the same recurring challenge structure as prior Monumental Etching events (see the Corrupting Surge table below for reference); check the in-game Event Center for this event's exact tiers.
Monumental Etching: Corrupting Surge (Ended May 22)
The Turbidity Manifest's event window, May 8, 12:00 to May 22, 04:00 server time. Kept here as a reference for how Monumental Etching challenge tiers are structured.
| Challenge | Reward |
|---|---|
| Clear each stage once | 150 Oroberyls |
| Participate in Agony Mode 5 times | 150 Oroberyls |
| Deal 500,000 damage | 150 Oroberyls |
| Deal 1,500,000 damage in Agony | 150 Oroberyls |
| Enter stages multiple times | 150 Oroberyls each |
Pro Tip: Manual Claim Required
Monumental Etching rewards are NOT automatically claimed. Visit the in-game event page after every Umbral Monument session and claim your Oroberyls. Once the next version's maintenance begins, the bonus rewards vanish even though the stages stay permanently playable.
Team Building Strategy
Essential Roles
1. Main DPS
Your primary damage dealer. Laevatain, Yvonne, Zhuang Fangyi, or Endministrator.
2. Healer
Mandatory for Agony. Ardelia, Gilberta, Xaihi, or Ember.
3. Sub-DPS/Support
Secondary damage or buffs. Wulfgard, Perlica, or Akekuri.
4. Flex Slot
Adapt to stage needs — Chen Qianyu for Stagger interrupts on Stage 6, Tangtang for AoE control on Stage 5.
Elemental Considerations
Heat (Combustion)
Good sustained damage. Slight C-tier resistance on Quillbeasts but Laevatain shrugs it off.
Electric (Electrification)
Arts DMG Taken debuff. Zhuang Fangyi AoE shines on Stage 5's Quillbeast spam.
Nature (Corrosion)
Resistance reduction. Rare and valuable team-wide buff.
Cryo (Solidification)
Freeze CC on adds. C-tier resist on Tidalklast (Stage 6) — Yvonne still works during Stagger windows.
Physical Teams
Physical teams (Crush/Breach) are self-sufficient and don't require other elements. They consume Vulnerability stacks for massive burst damage. Mono Physical is the strongest answer to Stage 6's Tidalklast thanks to its Stagger output.
Arts Intensity Priority
Arts Intensity scales reaction damage:
-- 100 Arts Intensity = 100% bonus damage to reactions
-- Also improves amplification effects (Electrification, Corrosion, Breach)
-- Diminishing returns past 100 on amplification
-- Characters who apply reactions should prioritize this stat
Common Mistakes & How to Avoid Them
1. Skipping a Healer in Agony
Agony bans tacticals and consumables — your only sustain comes from operator kits. Solution: Always include Ardelia, Gilberta, Xaihi, or Ember in your Agony team. Stage 3's solo cheese is the only exception (and even that runs Ardelia).
2. DPS-Racing the Tidalklast (Stage 6)
The freeze-buff phase has chunky damage reduction — face-tanking it is throwing damage into a wall. Solution: Wait for the Staggered window. Hit the ice refrigerator only after you've broken the buff.
3. Chasing Adds on Stage 5
The regular Quillbeasts have low HP and die to AoE splash anyway. Switching targets wastes your damage cycles and lets the boss free-cast its lava spit. Solution: Tunnel the Imbued Quillbeast and let your AoE handle the trash.
4. Using the Same Team for Every Stage
Each stage favors different compositions. Stage 5 wants AoE, Stage 6 wants Stagger control, Stage 3 is solo. Solution: Rebuild your roster between stages — operators aren't locked after use.
5. Attempting Agony Without Practice
Agony bans tacticals and significantly increases difficulty. Solution: Clear Normal first to learn enemy patterns. Don't waste Agony attempts on blind runs — Stage 6's chain-freeze will end your team in seconds if you don't know the tells.
6. Forgetting to Claim Event Rewards
Monumental Etching: Dirge of Grief rewards are not automatically claimed and expire when the next version's maintenance begins. Solution: Check the event page after every session and claim your rewards immediately.
Quick Reference Checklist
Before Starting
Complete Chapter I Process II: Paving the Way
Reach Authority Level 30
Build at least 2 different 4-operator teams
Level main DPS to recommended level
Stage 3: Tidal Grief
Equip Ardelia with full Lynx set (treatment bonus)
Run solo — no other operators in the squad
Push goos away from the central crystal
Bank 3 ATB bars before the 8/24 spawn
Save Ardelia's ult for the 12/24 wave
Stage 5: Blood Debased
Tunnel the Imbued Quillbeast — let AoE clear the adds
Save SP for the lava-spit charge interrupt
Position so the boss body shields you from add projectiles
Bring AoE: Zhuang Fangyi, Yvonne, or Laevatain
Skip tacticals planning for Agony — Ardelia replaces them
Stage 6: Cryostatic Connection
Don't DPS-race the freeze-buff phase — wait for stagger
Use Chen Qianyu's Momentum Breaker for +10 stagger interrupts
Keep melee carries away from the boss during buff phase
Hold Xaihi's ult as a Solidification cleanse panic button
Save big ultimates for the Staggered window
Series 5: Contention of Deathly Silences
Series opened July 2, 2026 at 12:00 server time (permanent)
Clear all six Normal stages for the engraved medal
Clear all six Agony stages for the trimmed medal
Collect Mark of Perseverance, Advanced Cognitive Carrier, Arms INSP Set, Protohedron
Monumental Etching: Dirge of Grief
Event runs July 2, 12:00 to July 15, 17:00 (UTC-5)
Clear each Normal stage at least once
Push into Agony mode for the higher challenge tiers
Manually claim Oroberyls from the event page, they are not automatic
Monumental Etching: Corrupting Surge (Ended May 22)
Event ran May 8 to May 22, 04:00 server time
Turbidity Manifest stages remain permanently playable
Engraved and trimmed medals are still earnable anytime
Frequently Asked Questions
What is Contention of Deathly Silences in Arknights: Endfield?
Contention of Deathly Silences is the fifth Umbral Monument series, launched July 2, 2026 at 12:00 server time with the 1.3 Sketches of Lost Heirlooms update. It adds six new stages, each with Normal and Agony modes, and stays permanently available. Clearing every stage rewards the Mark of Perseverance medal, Advanced Cognitive Carrier, an Arms INSP Set, and Protohedron. A limited-time bonus event, Monumental Etching: Dirge of Grief, runs from July 2 until July 15 (UTC-5).
What are the six stages in Contention of Deathly Silences?
In order: Phalanx of Thorns, Eyes of Solvent Kind, a third stage whose English name is still being confirmed (its CN name translates to roughly Ritual Vortex), Wading in Raker Turf, Harrowing Æthillu, and Raging Drummer. Stage 2 is a dual-elite fight against two Tidewalkers that apply Solidification, Stage 4 features the Rakerbeast elite family, Stage 5 runs waves of self-detonating Æthillu phantoms, and Stage 6 is a Skydrummer boss fight built around interrupting its Enraged state.
What is the Turbidity Manifest in Arknights: Endfield?
The Turbidity Manifest is the fourth Umbral Monument series, launched May 8, 2026 at 12:00 server time. It introduced six stages (Normal and Agony) themed around water-corrupted creatures, including the Imbued Quillbeast on Stage 5 and the Tidalklast on Stage 6. The series is permanent; its bonus event window (Monumental Etching: Corrupting Surge) closed May 22 at 04:00 server time.
When does Umbral Monument unlock?
Umbral Monument unlocks after completing Chapter I Process II: Paving the Way and reaching Authority Level 30. Each new series (currently the 5th, Contention of Deathly Silences) is added to the same Umbral Monument hub. Once unlocked, you have access to every series.
What's the difference between Normal and Agony in the Turbidity Manifest?
Normal mode is Lv. 60-recommended and allows tacticals and consumables. Agony mode is Lv. 90, bans tacticals and consumables, and adds series-specific twists — most painfully on Stage 6 (Cryostatic Connection), where every successful enemy hit instantly applies Solidification, freezing the operator. Clear all six stages on Agony for the trimmed medal.
Can I solo Stage 3: Tidal Grief?
Yes — Tidal Grief is solo-cheeseable with Ardelia in a full Lynx set. The stage's failure condition is geometric (blue goos piling on the central crystal), not raw DPS, so spatial control + Ardelia's self-heal + the Lynx treatment bonus is enough to outlast the run. Bank ATB before the 8/24 and 12/24 spawn waves and save Ardelia's ult for 12/24.
Why does Yvonne work on Stage 6 if Tidalklast resists Cryo?
The C-tier Cryo resistance is real, but Yvonne's burst windows hit during the boss's Staggered phase (when its ice-buff damage reduction drops). Her single-target damage in that window is high enough to compensate for the resistance. Pair her with Xaihi — whose ultimate cleanses Cryo Inflictions and Solidification team-wide — for an Agony-safe ranged comp.
How do I get the Monumental Etching: Dirge of Grief rewards?
Dirge of Grief runs from July 2, 2026 at 12:00 server time until July 15 at 17:00 (UTC-5), which is July 16 at 06:00 (UTC+8) on the Asia server. Like prior Monumental Etching events, you complete Umbral Monument challenges (clearing stages, entering Agony mode, hitting damage thresholds) to earn Oroberyls and other event rewards. Rewards must be claimed manually from the in-game event page. They are not automatic, and they vanish when the event closes even though the stages remain permanently playable.
Can I still get the Monumental Etching: Corrupting Surge Oroberyls?
No. The Corrupting Surge event window ran May 8 to May 22, 2026, 04:00 server time, and its bonus Oroberyls are no longer claimable. The Turbidity Manifest stages themselves remain permanently playable, and the engraved and trimmed medals can still be earned at any time.
Umbral Monument Series Guides
Contention of Deathly Silences Launch Guide (Series 5)
The current series: launch details, unlock requirements, rewards, and the Dirge of Grief event window.
Turbidity Manifest Series Overview
Launch breakdown, six-stage framing, prep checklist, and the limited-event reward window in detail.
Stage 3: Tidal Grief — Ardelia Solo Cheese
Solo YOLO with Lynx-set Ardelia. ATB management at 8/24 and 12/24 spawn waves.
Stage 5: Blood Debased — Imbued Quillbeast
AoE-friendly comps for Zhuang Fangyi, Yvonne, and Laevatain. Tunnel the boss, AoE the adds.
Stage 6: Cryostatic Connection — Tidalklast
Mono Physical and Yvonne Cryo team comps. Stagger the freeze-buff, dump damage in the open window.
Umbral Monument Database
All battle stages across every rotation with enemy rosters at Normal (Lv 60) and Agony (Lv 90) tiers — boss and elite portrait catalog included.
Series 2 Archive: Inorganic Construct Best Teams
Stage-by-stage team builds for the Inorganic Construct series — still permanent, still farmable.
Related Content

Sponsored. We may earn a commission at no extra cost to you.