

Character Profile
“Leave it to me.”
Akekuri captains Operations Team Z7 within Endfield Industries' Specialist Tech Division, having climbed from a volunteering honors student to a trusted leader who assembled her squad in a matter of months. She is an upbeat coordinator skilled at squeezing the best outcome from limited resources while placing each teammate where they shine. Off duty she channels that same care into cooking morale-boosting hot drinks and desserts, charity work, and keeping in shape.
Akekuri Lore & Story
OripathyOripathy negative, based on medical examination reports.
Operator Akekuri, also known as Shiba Momiji, graduated from the Neo Tsukushi Business School and joined Endfield Industries as a reserve operator. She now leads Operations Team Z7 in the Specialist Tech Division, overseeing both field operations and team management.
With her background, she could've walked into any renowned TGCC company with a single recommendation. Yet she chose to join Endfield. Even here, she could've opted for a desk job, but during her rotation in the Specialist Tech Division, she volunteered to take on the challenge of rebuilding Operations Team Z7, stepping into the role of a frontline operator. I believe Akekuri has always been driven by ideals and passion, she is exactly the kind of young talent Endfield needs. During her interview, she asked me: "What's Endfield's vision as a "great enterprise", and how does it plan to achieve it?" This is a question only the Endministrator can truly answer.Martin Marvin Malen, Assistant, HR Division, Endfield Industries
No wonder that girl nagged me for a whole month, asking in painstaking detail about every tactical role — its duties, skill requirements, training plans... In the end, she even put my name down in her proposal.
I'll be honest — a few of the people Operator Akekuri brought into Operations Team Z7 made HR raise their eyebrows. But, with Supervisor Perlica's green light and her personal guarantee, I'll give them a trial run for now.
Akekuri asked me to help train the new recruits — show them how to use tactical maneuvers against heavily armored targets. Oh? You got the same invite?
Archive text from in-game operator files. Endfield Hub is a fan-made resource, not affiliated with Hypergryph or Yostar.
Akekuri Gear Damage Calculator
Akekuri is an SP battery first. Her Ultimate deals no damage: it fires three Rallying Flares that recover SP, gives the team Link while it is active, and at Potential 3 raises the whole team's ATK. That team value leads this calculator, followed by the SP she generates and then her own rows, where the basic attacks and combo deal Physical DMG and only the battle skill deals Heat DMG.
Level 90 · Skill Rank 12 · Talent nodes maxed · Potential 0
Choose a Body piece to add its stats.
Choose a Hand piece to add its stats.
Choose a Kit piece to add its stats.
Choose a Kit piece to add its stats.
What the team gains from Akekuri
Staying in the Zone gives the team one Link while SQUAD! ON ME! is active. Link is its own multiplier, consumed by the next Battle Skill or Ultimate, so it lifts any element equally. Team ATK scales Attack and is reported beside the multipliers rather than in them.
No team ATK yet. Potential 3 adds +10% while the Ultimate is active, and Thermite Cutter adds its stacks under Conditional triggers.
SP and rotation economy at this build
Cheer of Victory raises the SP Flash and Dash recovers by +1.50% per 10 Intellect (max 75.00%). At 106.00 Intellect that is +15.00%.
- Flash and Dash
- 15.00 SP base (two sequences), 9.00s cooldown, banks 10.00 Ultimate Energy.
- 17.25 SP
- SQUAD! ON ME!
- Three Rallying Flares recover 26.00 + 27.00 + 27.00 SP. Costs 120.00 Ultimate Energy (Potential 4 cuts it by 10%), 20.00s cooldown.
- 80.00 SP
- Final Strike
- The fourth basic sequence, as the controlled operator.
- 19.00 SP
- One combo plus one Ultimate
- Burst of Passion costs 100.00 SP. Own Ultimate Gain Efficiency is +0.00%.
- 97.25 SP
Final Build ATK excludes the temporary regional buff granted near teleportation points. Move away from a waypoint before comparing this value with the in-game operator sheet.
| Action | Multiplier | Non-crit | Crit | Expected |
|---|---|---|---|---|
| Sword of Aspiration (Physical)The four-sequence chain, split so the Final Strike has its own row, plus the dash, dive and Staggered-target Finisher. | ||||
Sword of Aspiration: Chain (1-3)Physical | 180.00% | 5,379.26 | 8,068.89 | 5,513.74 |
Sword of Aspiration: Final Strike (4)Physical Recovers 19 SP | 111.00% | 3,317.21 | 4,975.82 | 3,400.14 |
FinisherPhysical Staggered x1.3 1 active multiplier
| 900.00% | 34,965.20 | 52,447.79 | 35,839.33 |
Dash AttackPhysical | 106.00% | 3,167.79 | 4,751.68 | 3,246.98 |
Dive AttackPhysical | 180.00% | 5,379.26 | 8,068.89 | 5,513.74 |
| Burst of Passion (Heat)A frontal slash that deals Heat DMG and applies Heat Infliction. The only Heat row in her kit. | ||||
Burst of PassionHeat Applies Heat Infliction | 320.00% | 9,563.13 | 14,344.70 | 9,802.21 |
| Flash and Dash (Physical)A returning dash with two thrust sequences. The client prints the multiplier, SP and Ultimate Energy per sequence. | ||||
Flash and Dash: one sequencePhysical | 180.00% | 5,379.26 | 8,068.89 | 5,513.74 |
Flash and Dash (both sequences) (subtotal)Physical Triggers when an enemy becomes Staggered or hits a Stagger Node | 360.00% | 10,758.52 | 16,137.78 | 11,027.48 |
Calculator assumptions
Every number uses a Level 90 Akekuri with all skills at Rank 12 and every attribute talent node unlocked through breakthrough 4, where Cheer of Victory reaches rank 2 and Staying in the Zone is unlocked. Base ATK, attributes, damage multipliers, SP values, talents and potentials are all read from the committed client tables.
Agility is the main attribute and Intellect the secondary. The attribute talent nodes grant Agility +60 in total and no Intellect; Potential 2 adds 10 of each. The ATK formula weights main at 0.005 and secondary at 0.002 after every flat source and Main and Sub Stat Boost has been applied, then truncates both. Each row's element comes from the skill text: Physical for the basic attacks and Flash and Dash, Heat for Burst of Passion.
Link from Staying in the Zone is one stack, priced with the wiki Link table (x1.30 on a Battle Skill, x1.20 on an Ultimate). Her Ultimate deals no damage, so the only row of hers a Link can reach is Burst of Passion, and that input is for a Link a teammate gave her. The talent also carries an unprinted 20.00% value (imbue_scale) that no skill text explains, so it is reported here and not applied.
Cheer of Victory counts whole 10-point steps of her final truncated Intellect, and applies to Flash and Dash only, as its text says. Positive Feedback (Potential 1) is an ATK buff on Akekuri alone after she recovers SP with a skill. Committed Team Player (Potential 3) is team ATK while the Ultimate is active; she is channelling then, so it reaches none of her own rows. Thermite Cutter's team ATK goes to the entire team, so it is applied to her rows as well as reported in the team panel.
There is no Arts Reaction row. Burst of Passion applies Heat Infliction, and a Combustion it sets off on another element's Infliction has no level or damage rate in any committed table, so Arts Intensity reaches none of these numbers. Weapon lines the kit cannot trigger (Vulnerability, Physical Statuses, Lift, Solidification, Originium Crystals, consuming an Arts Reaction) are left out rather than offered as toggles. Team-targeted set lines, such as Frontiers after recovering SP, are counted in the team panel and kept out of her own rows.
Still excluded: the SpecialBonus regional buff from teleportation waypoints, the SP a Finisher recovers (no table value), Stagger and poise values, rotation timing and DPS over time, multi-target hits, and how often each trigger is actually live when each hit lands.
Basic Info
Akekuri Sword
Sword Agi
Agi Wisd
WisdTalent Priority
This priority list applies to talents only after Lv 9.
Recommended Builds
View All BuildsTop Weapons
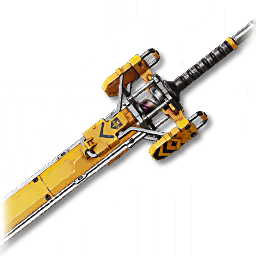 Thermite Cutter107.1%R9
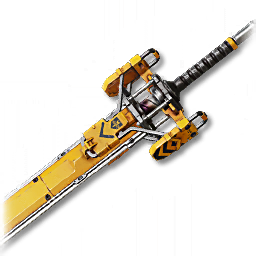 Thermite Cutter100%R4
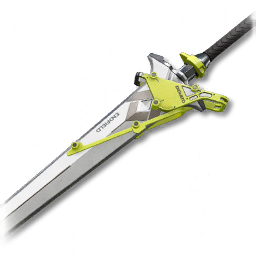 OBJ Edge of Lightness95.9%R9
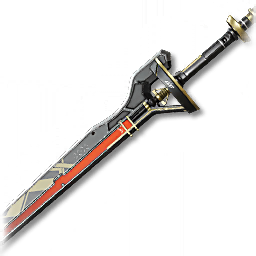 Fortmaker95.8%R9
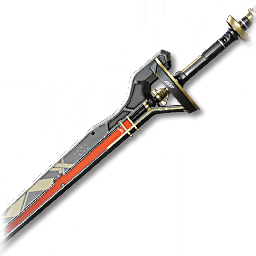 Fortmaker95.7%R4
Recommended Teams








Gear Configurations
View All Gear Sets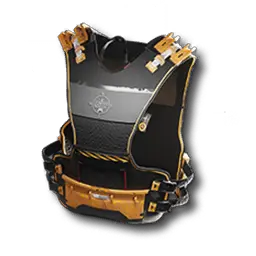 Frontiers Protection Suit
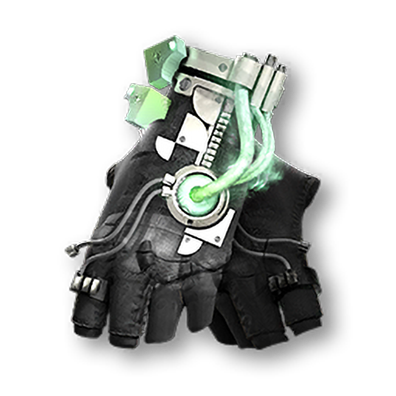 Eternal Xiranite Gloves
 Frontiers Extra O2 Tube
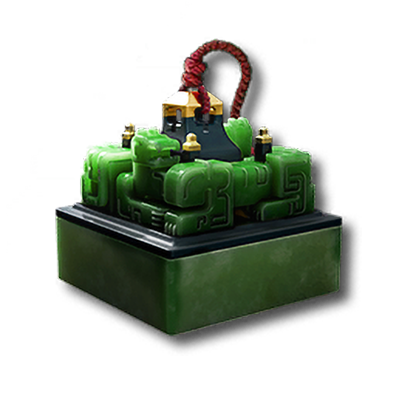 Redeemer Seal
If your rotation requires more Ultimate Gain Efficiency, which is unlikely since we keep that for our burst window, switch O2 Tube with another Redeemer Seal
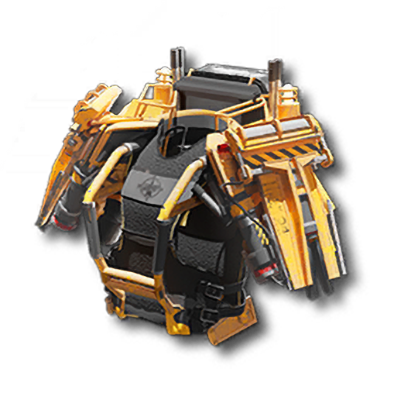 Frontiers Armor T3Eternal Xiranite GlovesFrontiers Extra O2 TubeFrontiers Extra O2 Tube
For shorter fights where ult uptime isn't "that important" you could simply run frontier, so in any 3+ enemies scenario or multiple waves
Frontiers Protection SuitEternal Xiranite GlovesFrontiers Extra O2 TubeFrontiers Extra O2 TubeMiddle point, does less damage than the other frontier build but has 42% energy.
Contingency Contract Fit
Test Criteria this kit handles well, since every criterion is a penalty or enemy buff and Akekuri sidesteps or shrugs these off. See the full dashboard for every modifier.
 Vitality · His Link buff is a major damage multiplier, helping the squad burn through inflated HP bars.
 Weaken · Team buffs and a strong economy help offset the flat stat reduction.
 Encumbered · Stays on the offensive and generates its own SP, so the paused natural regen barely registers.
 Flash Freeze · Heat skills melt the forced Solidification, and ranged operators rarely eat the enemy Cryo in the first place.
 Thermolysis · Heat skills cleanse the forced Solidification.
 Time Limit · Fast killer that beats the shortened timer rather than ramping up slowly.
Base Stats (Level 1)


Stats by Level
| Level | STR | AGI | WISD | WILL | MaxHP | ATK |
|---|---|---|---|---|---|---|
| 1 | 13.4 | 15.2 | 12.5 | 9.3 | 500 | 30 |
| 10 | 23.2 | 27.9 | 22.0 | 19.3 | 1005 | 59 |
| 20 | 34.1 | 42.0 | 32.6 | 30.4 | 1566 | 92 |
| 30 | 45.0 | 56.1 | 43.2 | 41.5 | 2128 | 124 |
| 40 | 55.9 | 70.3 | 53.8 | 52.6 | 2689 | 157 |
| 50 | 66.8 | 84.4 | 64.4 | 63.6 | 3250 | 189 |
| 60 | 77.7 | 98.5 | 75.0 | 74.7 | 3811 | 222 |
| 70 | 88.6 | 112.7 | 85.6 | 85.8 | 4372 | 254 |
| 80 | 99.5 | 126.8 | 96.2 | 96.9 | 4934 | 287 |
| 90 | 110.4 | 140.9 | 106.8 | 108.0 | 5495 | 319 |
Skills
Flash and Dash
 Combo Skill
| Lv | DMG Multiplier per SEQ | Cooldown |
|---|---|---|
| 1 | 80% | 10s |
| 2 | 88% | 10s |
| 3 | 96% | 10s |
| 4 | 104% | 10s |
| 5 | 112% | 10s |
| 6 | 120% | 10s |
| 7 | 128% | 10s |
| 8 | 136% | 10s |
| 9 | 144% | 10s |
| 10 | 154% | 10s |
| 11 | 166% | 10s |
| 12 | 180% | 9s |
Sword of Aspiration
 Attack1
| Lv | BATK SEQ 1 Multiplier |
|---|---|
| 1 | 20% |
| 2 | 22% |
| 3 | 24% |
| 4 | 26% |
| 5 | 28% |
| 6 | 30% |
| 7 | 32% |
| 8 | 34% |
| 9 | 36% |
| 10 | 39% |
| 11 | 42% |
| 12 | 45% |
Attack2| Lv | BATK SEQ 2 Multiplier |
|---|---|
| 1 | 28% |
| 2 | 30% |
| 3 | 33% |
| 4 | 36% |
| 5 | 39% |
| 6 | 41% |
| 7 | 44% |
| 8 | 47% |
| 9 | 50% |
| 10 | 53% |
| 11 | 57% |
| 12 | 62% |
Attack3| Lv | BATK SEQ 3 Multiplier |
|---|---|
| 1 | 33% |
| 2 | 36% |
| 3 | 39% |
| 4 | 42% |
| 5 | 46% |
| 6 | 49% |
| 7 | 52% |
| 8 | 55% |
| 9 | 59% |
| 10 | 63% |
| 11 | 67% |
| 12 | 73% |
Attack4| Lv | BATK SEQ 4 Multiplier |
|---|---|
| 1 | 50% |
| 2 | 54% |
| 3 | 59% |
| 4 | 64% |
| 5 | 69% |
| 6 | 74% |
| 7 | 79% |
| 8 | 84% |
| 9 | 89% |
| 10 | 95% |
| 11 | 103% |
| 12 | 111% |
Power Attack| Lv | Finisher ATK Multiplier |
|---|---|
| 1 | 400% |
| 2 | 440% |
| 3 | 480% |
| 4 | 520% |
| 5 | 560% |
| 6 | 600% |
| 7 | 640% |
| 8 | 680% |
| 9 | 720% |
| 10 | 770% |
| 11 | 830% |
| 12 | 900% |
Plunging Attack End| Lv | Dive ATK Multiplier |
|---|---|
| 1 | 80% |
| 2 | 88% |
| 3 | 96% |
| 4 | 104% |
| 5 | 112% |
| 6 | 120% |
| 7 | 128% |
| 8 | 136% |
| 9 | 144% |
| 10 | 154% |
| 11 | 166% |
| 12 | 180% |
Burst of Passion
 Normal Skill
| Lv | DMG Multiplier |
|---|---|
| 1 | 142% |
| 2 | 156% |
| 3 | 171% |
| 4 | 185% |
| 5 | 199% |
| 6 | 213% |
| 7 | 228% |
| 8 | 242% |
| 9 | 256% |
| 10 | 274% |
| 11 | 295% |
| 12 | 320% |
SQUAD! ON ME!
 Ultimate Skill
| Lv | SP Recovery |
|---|---|
| 1 | 58 |
| 2 | 60 |
| 3 | 62 |
| 4 | 64 |
| 5 | 66 |
| 6 | 68 |
| 7 | 70 |
| 8 | 72 |
| 9 | 74 |
| 10 | 76 |
| 11 | 78 |
| 12 | 80 |
Talents (Passive Skills)
 Cheer of Victory
 Protoprism2400×
  T-Creds Protoprism10800× T-Creds
 Staying in the Zone
 Protohedron32000× T-Creds
Factory Skills (Manufacturing)
Potentials
 1× Akekuri's Token1× Akekuri's Token1× Akekuri's Token1× Akekuri's Token1× Akekuri's Token
Breakthrough (Ascension)
 8× Protodisk
 3× Pink Bolete1600× T-Creds25× Protodisk
 5× Red Bolete6500× T-Creds
 24× Protoset
 5× Ruby Bolete18000× T-Creds36× Protoset
 20× D96 Steel Sample 4
 8× Cosmagaric100000× T-Creds
Favorability Attribute Bonuses
Skill Level Up Materials
6× Protoprism 1× Kalkodendra 100012× Protoprism2× Kalkodendra 270016× Protoprism
 1× Chrysodendra 320021× Protoprism1× Chrysodendra 420027× Protoprism2× Chrysodendra 54006× Protohedron
 1× Vitrodendra 82008× Protohedron1× Vitrodendra 1050015× Protohedron2× Vitrodendra 18000
 1× Mark of Perseverance15× Protohedron
 6× Metadiastima Photoemission Tube
 3× Blighted Jadeleaf 240002× Mark of Perseverance24× Protohedron16× Metadiastima Photoemission Tube6× Blighted Jadeleaf 300003× Mark of Perseverance50× Protohedron36× Metadiastima Photoemission Tube12× Blighted Jadeleaf 650006× Protoprism1× Kalkodendra 100012× Protoprism2× Kalkodendra 270016× Protoprism1× Chrysodendra 320021× Protoprism1× Chrysodendra 420027× Protoprism2× Chrysodendra 54006× Protohedron1× Vitrodendra 82008× Protohedron1× Vitrodendra 1050015× Protohedron2× Vitrodendra 180001× Mark of Perseverance15× Protohedron6× Metadiastima Photoemission Tube3× Blighted Jadeleaf 240002× Mark of Perseverance24× Protohedron16× Metadiastima Photoemission Tube6× Blighted Jadeleaf 300003× Mark of Perseverance50× Protohedron36× Metadiastima Photoemission Tube12× Blighted Jadeleaf 650006× Protoprism1× Kalkodendra 100012× Protoprism2× Kalkodendra 270016× Protoprism1× Chrysodendra 320021× Protoprism1× Chrysodendra 420027× Protoprism2× Chrysodendra 54006× Protohedron1× Vitrodendra 82008× Protohedron1× Vitrodendra 1050015× Protohedron2× Vitrodendra 180001× Mark of Perseverance15× Protohedron
 6× Triphasic Nanoflake3× Blighted Jadeleaf 240002× Mark of Perseverance24× Protohedron16× Triphasic Nanoflake6× Blighted Jadeleaf 300003× Mark of Perseverance50× Protohedron36× Triphasic Nanoflake12× Blighted Jadeleaf 650006× Protoprism1× Kalkodendra 100012× Protoprism2× Kalkodendra 270016× Protoprism1× Chrysodendra 320021× Protoprism1× Chrysodendra 420027× Protoprism2× Chrysodendra 54006× Protohedron1× Vitrodendra 82008× Protohedron1× Vitrodendra 1050015× Protohedron2× Vitrodendra 180001× Mark of Perseverance15× Protohedron6× Triphasic Nanoflake3× Blighted Jadeleaf 240002× Mark of Perseverance24× Protohedron16× Triphasic Nanoflake6× Blighted Jadeleaf 300003× Mark of Perseverance50× Protohedron36× Triphasic Nanoflake12× Blighted Jadeleaf 65000
Character Level-up Requirements
| From → To | EXP Required | Gold |
|---|---|---|
| 1 → 20 | 22,860 | 820 |
| 20 → 40 | 248,540 | 12,540 |
| 40 → 60 | 475,710 | 23,900 |
| 60 → 80 | 465,230 | 109,180 |
| 80 → 90 | 579,950 | 238,980 |
| Total | 1,792,290 | 385,420 |

Tap through for today's price on the official store. Affiliate link, we may earn a commission.