ARKNIGHTS: ENDFIELD YINGLUNG PASS AREA DEFENSE
Table of Contents
Yinglung Pass is one of the Wuling regions added in Version 1.4, and the Early Warning Terminal at its Xiranflow Cloudseeder Station outpost runs the same Area Defense tower-defense mode you already know from the rest of the map. This page is the stage-specific companion to that full Area Defense guide: it gives you the exact turret loadout and placement for every level here, so you can clear all four with as little manual play as possible.
The stage now runs four levels. Levels 1 to 3 shipped with Version 1.4, and Version 1.5 raised the Xiranflow Cloudseeder Station level cap to open Level 4. Each level has two modes. Operator Intervention gives you fewer turret slots, so you have to help the turrets by fighting from the second floor. Auto-Defense unlocks after you clear a level in Operator Intervention and hands you extra turret slots, which is enough to make the level run fully AFK. On Levels 1 to 3 that bonus is exactly two slots, so those builds always start from the Operator Intervention layout and add two turrets for Auto-Defense.
Overview & How It Works
Every map at Yinglung Pass is built across two tiers, a ground floor and a second floor, with enemies pushing along a bottom lane and a top lane toward your objective. Turrets do not fire unless a Xiranite Pylon is powering them, so the golden rule is simple: whenever you drop a cluster of turrets, drop a pylon next to it, and whenever you move turrets between floors, move the pylon so it still covers them.
In Operator Intervention the bottom lane almost always holds itself once the turrets are down. The lane that needs your attention is the top one, so you park your operator on the second floor and hold auto-attack to slow the enemies while the mortars finish them. You do not need skills for this, and you can afford to leak a few small enemies (the wave tolerance is roughly five small enemies or two big ones before you fail), so do not panic over the occasional runner. The turret counts per level are:
| Level | Operator Intervention | Auto-Defense |
|---|---|---|
| Level 1 | 4 turrets | 6 turrets |
| Level 2 | 6 turrets | 8 turrets |
| Level 3 | 8 turrets | 10 turrets |
| Level 4 | Not documented yet | 11 turrets |
Turrets You Will Use
You only need a handful of turrets across all four levels. The one distinction to burn into memory is the purple Marsh Gas Mk I versus the gold Acid Soaker Mk I: they look similar in the deploy menu but do opposite jobs.
| Turret | What it does |
|---|---|
| Sledgehammer Mortar | Long-range AoE artillery with homing shots. The main damage turret and your groups-killer on every level. |
| Marsh Gas Mk I (purple) | Drops a gas cloud that slows enemies in an area. Buys time for the mortars, does not shred defense. |
| Acid Soaker Mk I (gold) | Reduces the defense of enemies in range so every other turret hits harder. Used on the Level 3 boss. |
| Electrocharger Model A2 | Electric turret that clears the small enemies streaming through the middle of Level 2. |
| Torrent Gun Tower | Strong single-lane tower. Anchors the top side on Level 2 and Level 4. |
| AF1 Armor Fragger | Flamethrower that spawn-kills weak enemies and still hits buffed, armored targets. The Level 2 bottom-lane anchor. |
| Xiranite Pylon | Power source. Place one next to every turret cluster or nothing fires. |
Level 1 Setup
Start with Operator Intervention, which allows four turrets. Drop your first Sledgehammer Mortar on the ground-floor lane and power it with a Xiranite Pylon right beside it.
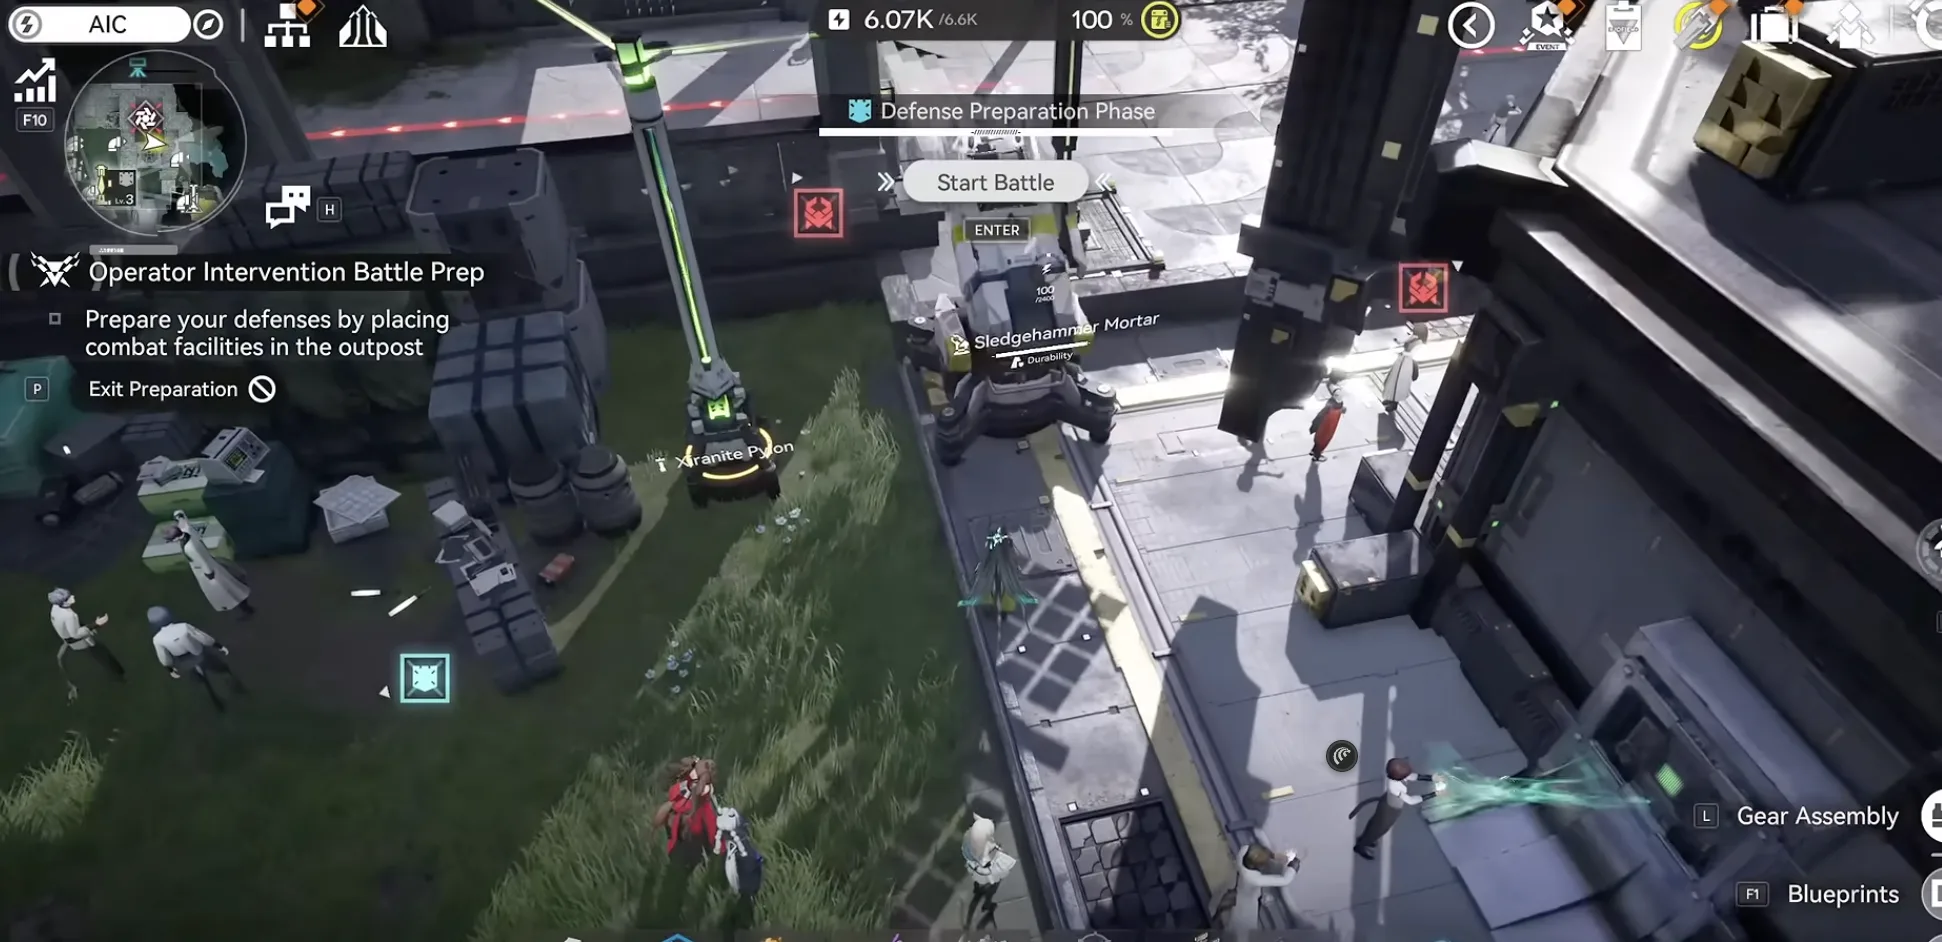
Level 1: first Sledgehammer Mortar on the ground-floor lane, powered by a Xiranite Pylon
Near the center of the map, drop a Marsh Gas Mk I to slow everything coming through. Make sure it is the purple gas turret, not the gold Acid Soaker.
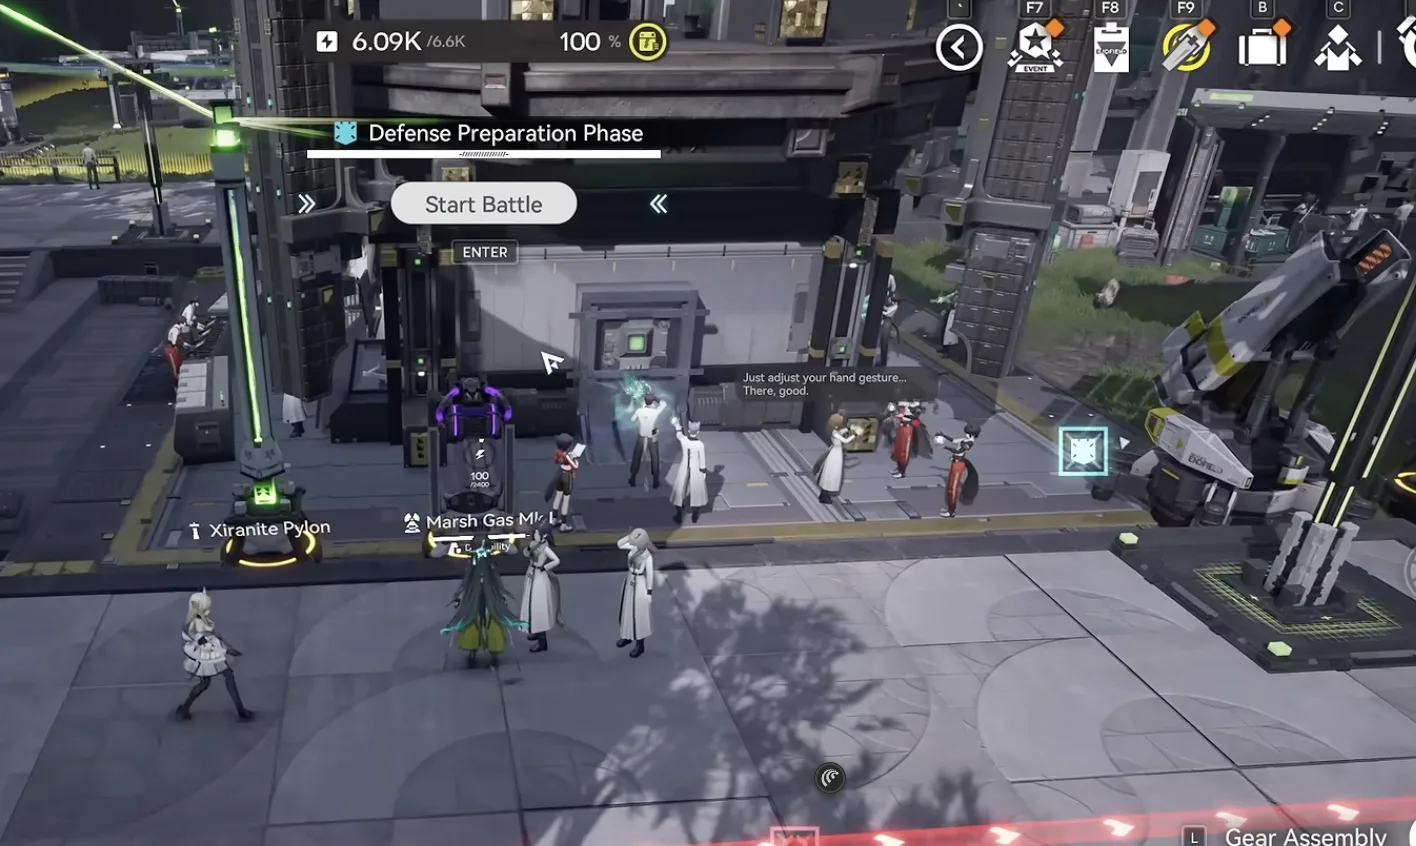
Level 1: Marsh Gas Mk I near the center, the purple slow turret and not the gold Acid Soaker
Add two more Sledgehammer Mortars covering the other side of the road, so you end up with three mortars plus one Marsh Gas for your four slots. Keep a pylon in range of each mortar pair.
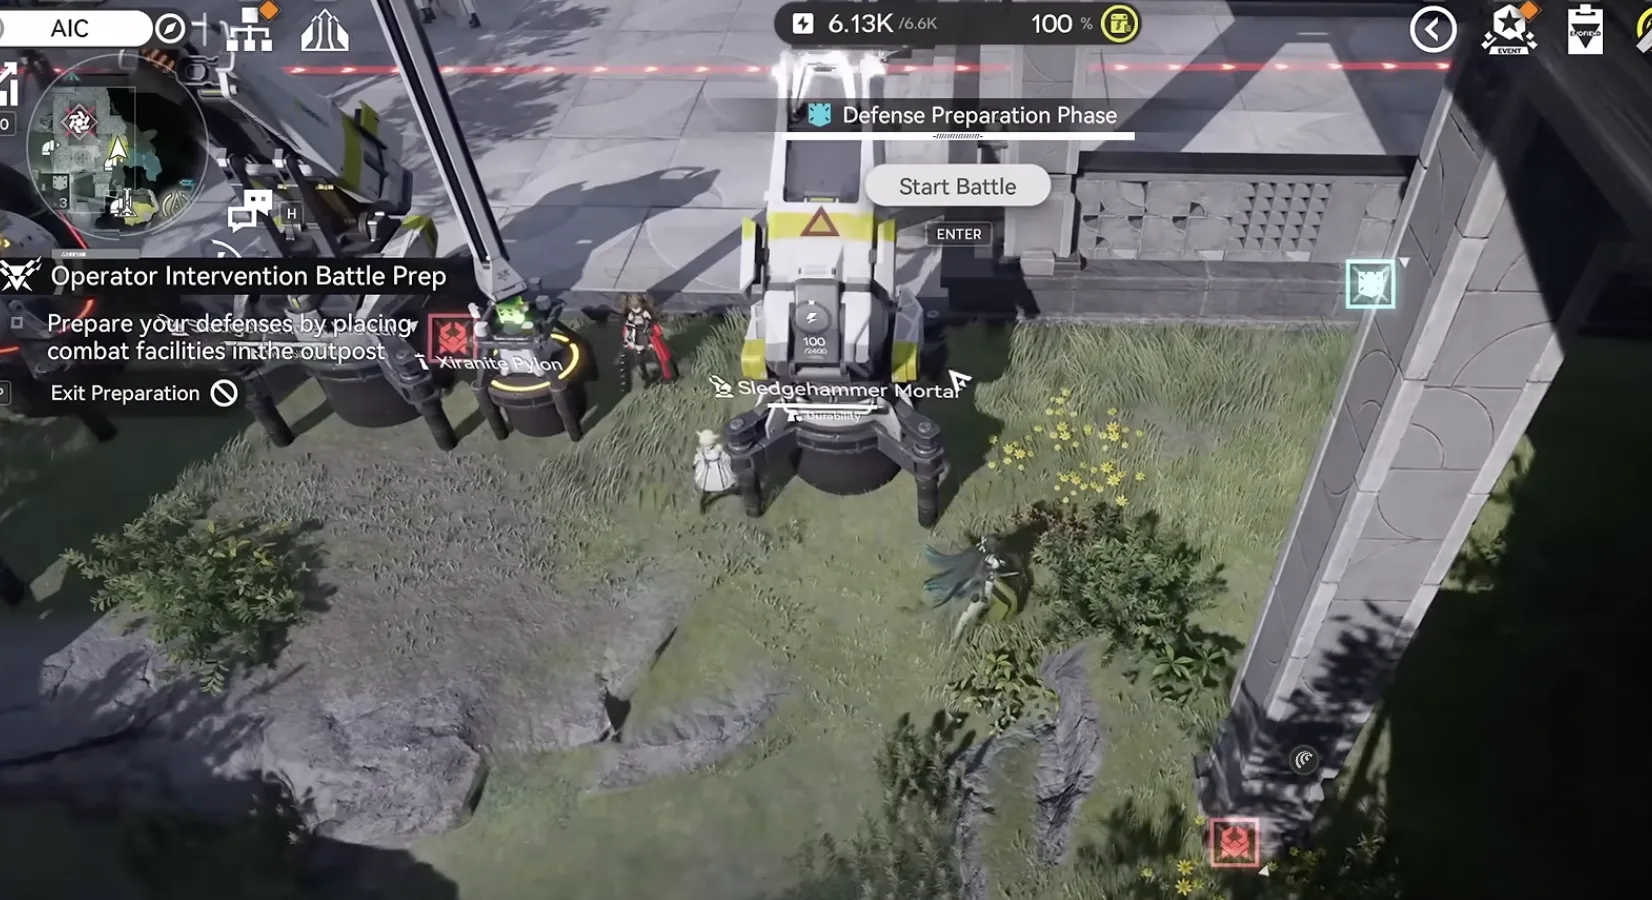
Level 1: the ground-floor Sledgehammer Mortars, each within range of a Xiranite Pylon
Now head up to the second floor. The bottom lane holds on the turrets alone (in a lot of testing it almost never leaks), so ignore it and focus on the top lane. Hold left-click to auto-attack the enemies as they spawn, back up slightly to buy time, and let the mortars land the finishing hits. No skills required.
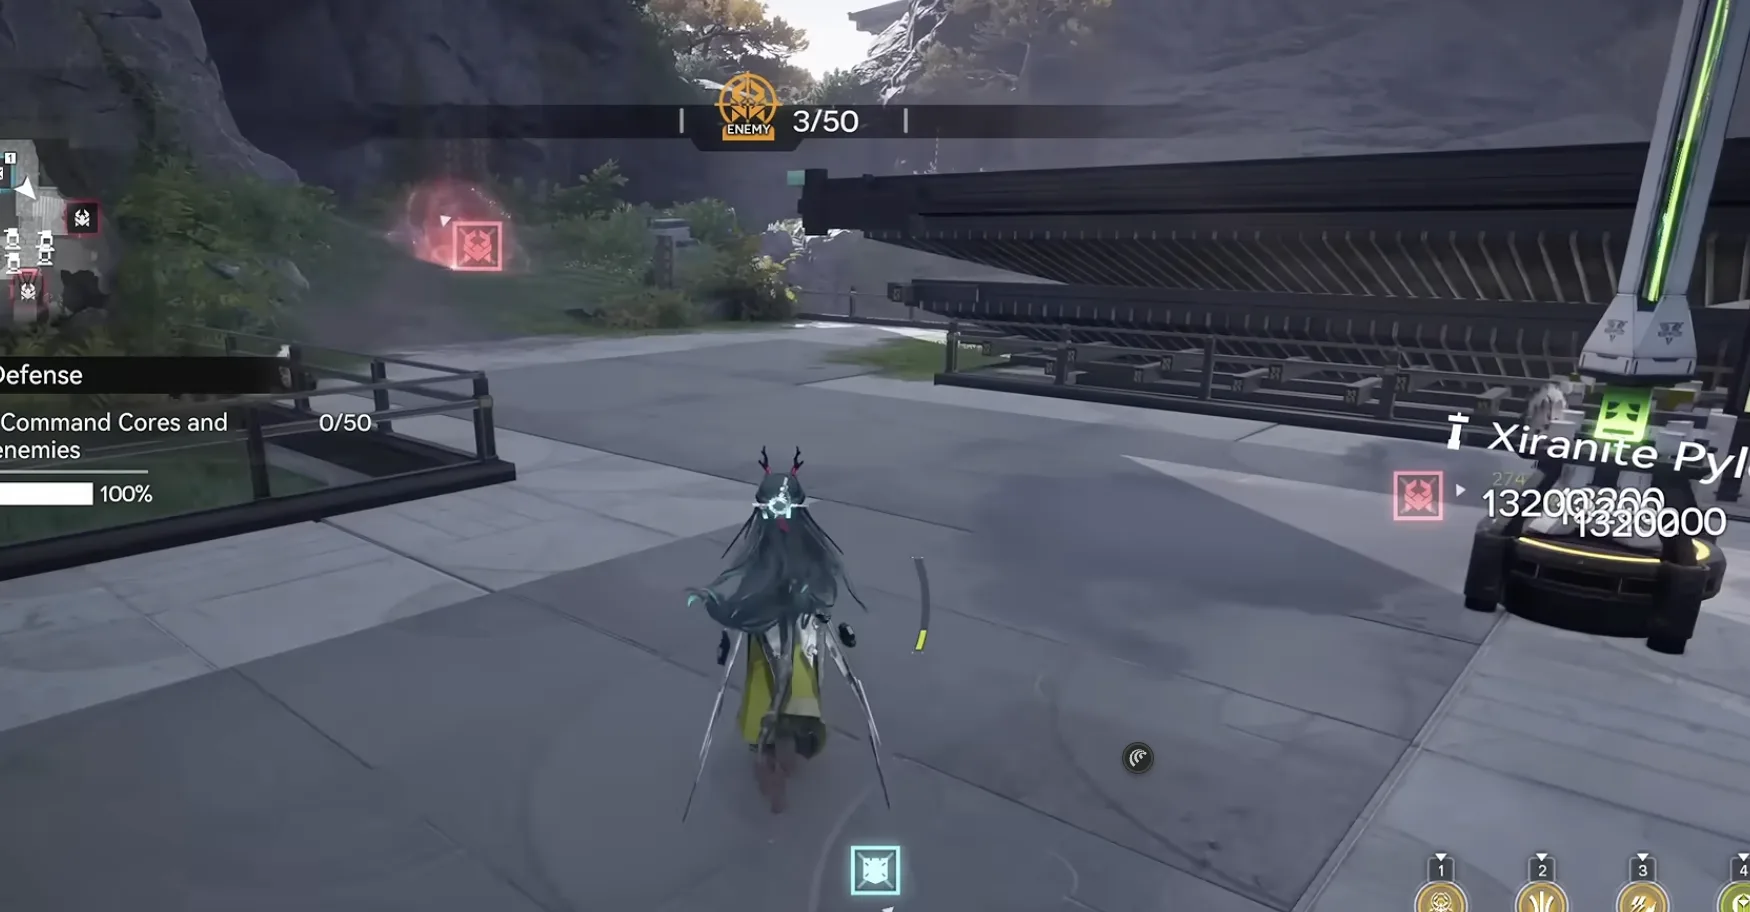
Level 1: hold the top lane manually from the second floor while the mortars finish enemies
Once that clear is done, switch to Auto-Defense for two extra turret slots. Keep the four ground-floor turrets exactly as they are. On the second floor add a Marsh Gas Mk I and another Sledgehammer Mortar, then reposition the Xiranite Pylon so it powers all three top-side turrets. Start the battle and leave it: the top-side gas slows the wave, the mortars (including a bottom-side one that reaches the top lane) clean it up, and you never touch the controls.
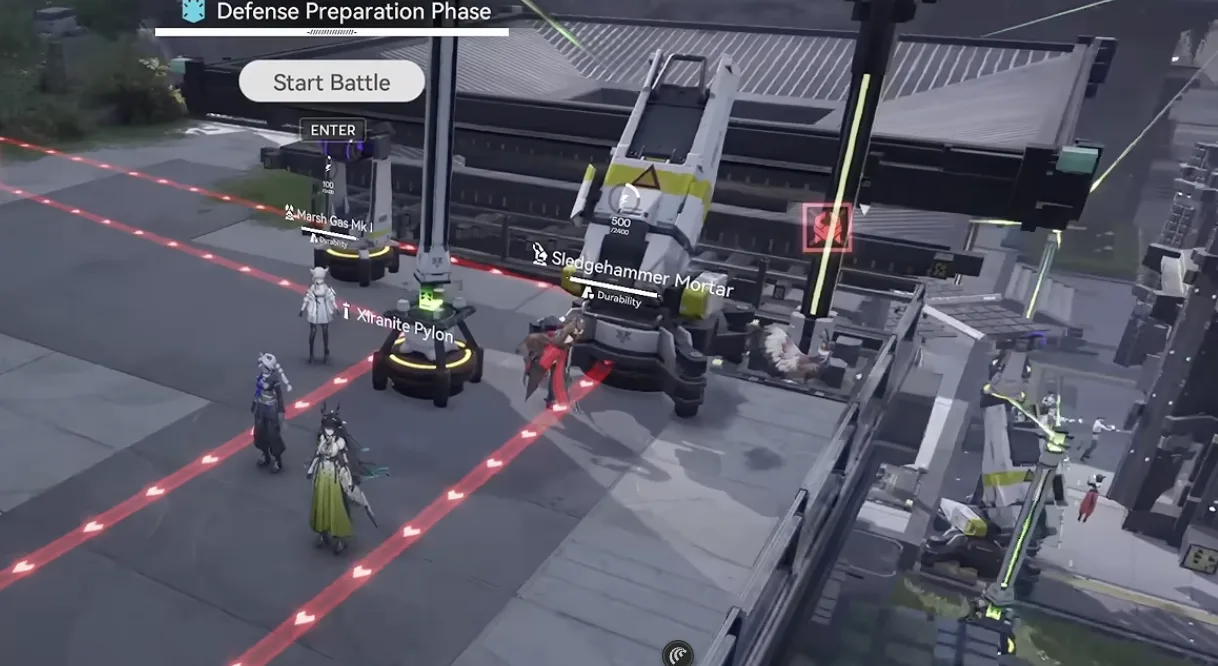
Level 1 Auto-Defense: add a Marsh Gas and a Sledgehammer up top, then move the pylon to cover all three
Level 2 Setup
Level 2 has two lanes to hold and only six turrets in Operator Intervention, so placement matters more here. Start on the bottom side with an AF1 Armor Fragger. Position is critical: count along the enemy spawn row and place it on the sixth tile, on the right of the red line. Only from there can it spawn-kill and still reach the buffed big enemies when they appear. Power it with a pylon.
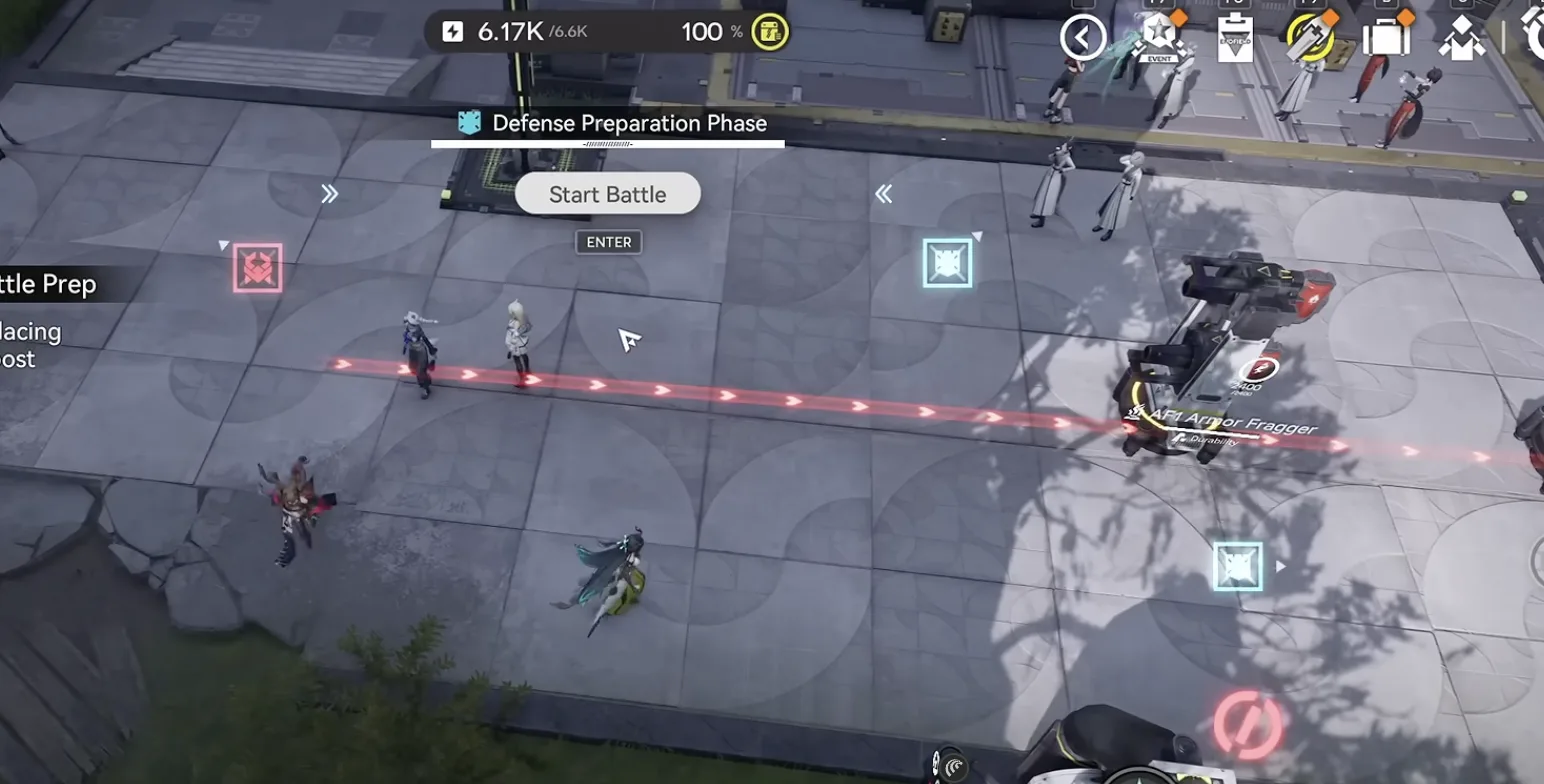
Level 2: AF1 Armor Fragger on the sixth spawn tile (right of the red line) to spawn-kill the bottom lane
Next, build the electric line up the stairs. Place an Electrocharger Model A2 just before the stairs, then a Marsh Gas Mk I on the first deployable tile at the top of the stairs, then a pylon, then two more Electrocharger Model A2 around that zone (roughly one tile right of and below the fence). Exact tiles are forgiving here, so anywhere in that pocket works.
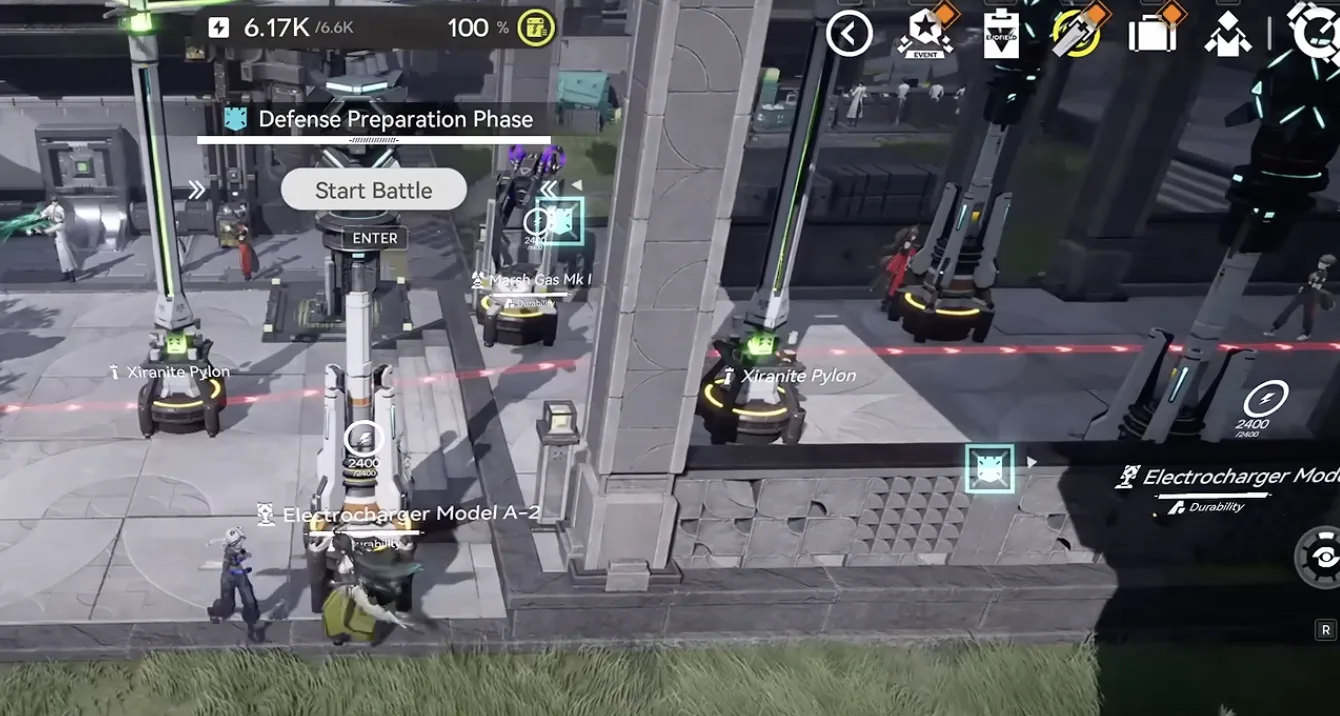
Level 2: three Electrocharger Model A2 plus one Marsh Gas Mk I around the stairs
Finally, anchor the top side with a Torrent Gun Tower placed right on the red line, powered by a pylon. That completes the six-turret Operator Intervention build.
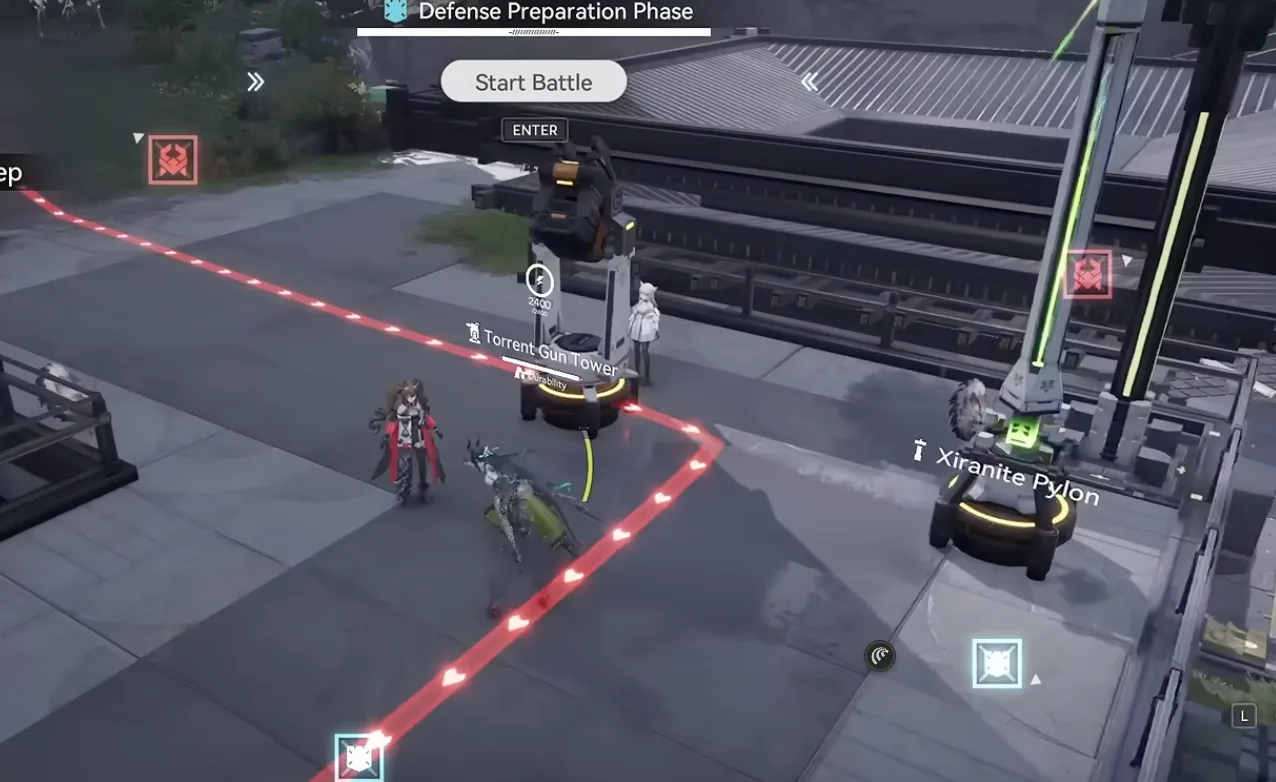
Level 2: Torrent Gun Tower on the red line, top side, then stay on the second floor
Stay on the second floor and hold auto-attack on the top lane. The AF1 Armor Fragger spawn-kills the bottom lane and even tags buffed units as they appear, so bottom-side leaks are rare. Note that some enemies drop bombs when hit, and those bombs damage the adds around them, so hitting them early works in your favour.
For Auto-Defense, add two turrets on the top side: drop a Marsh Gas Mk I in the corner, shift the Torrent Gun Tower over by one tile, and add another Electrocharger Model A2 on the first deployable tile in front. Move the pylon so it powers all three. That is the AFK build.
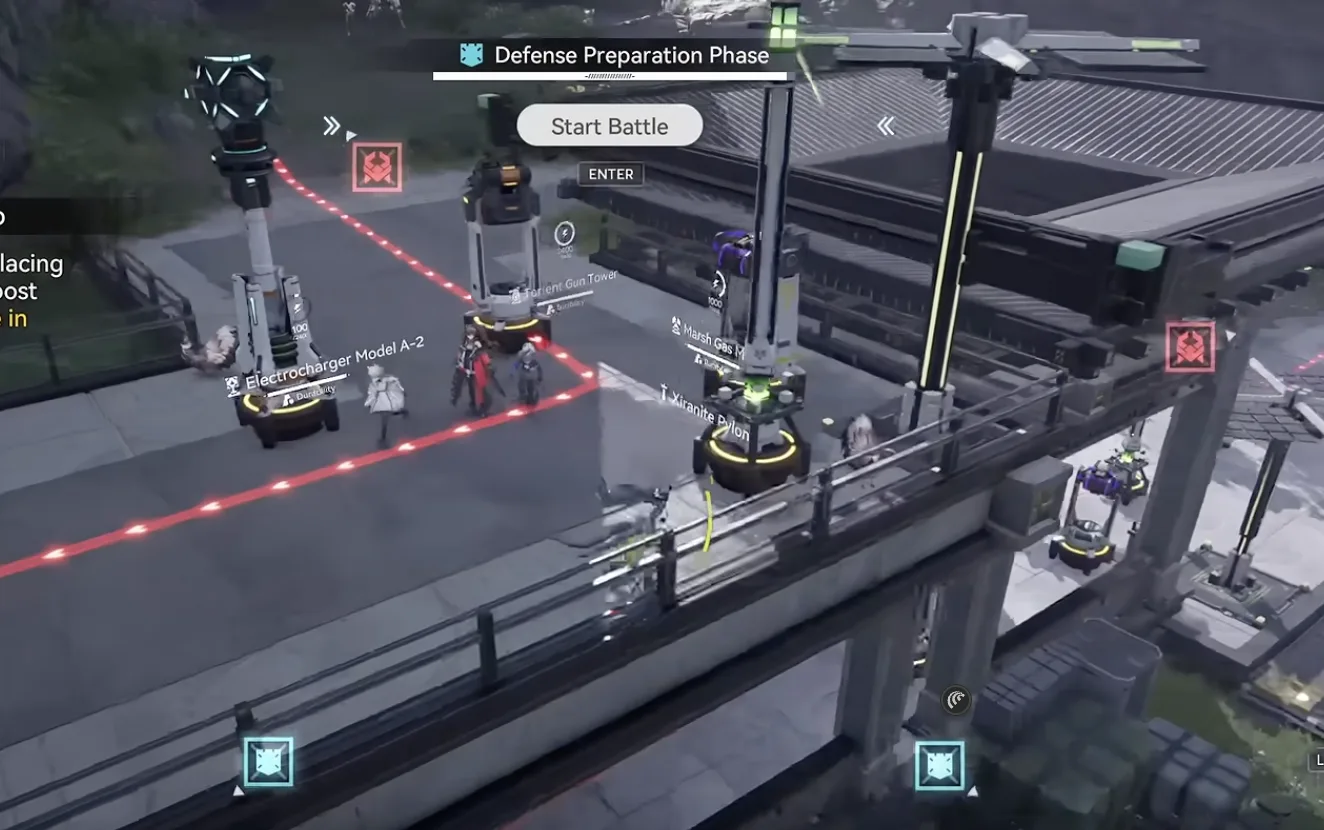
Level 2 Auto-Defense: add a Marsh Gas and an Electrocharger beside the shifted Torrent Gun Tower
Level 3 Setup
Level 3 is the easiest of the Version 1.4 trio despite being the last of them. The whole stage funnels down a single lane, so you can brute-force it. In Operator Intervention you get eight turrets: use seven Sledgehammer Mortars lined up along the lane, spaced about one deploy-range apart, each powered by Xiranite Pylons.
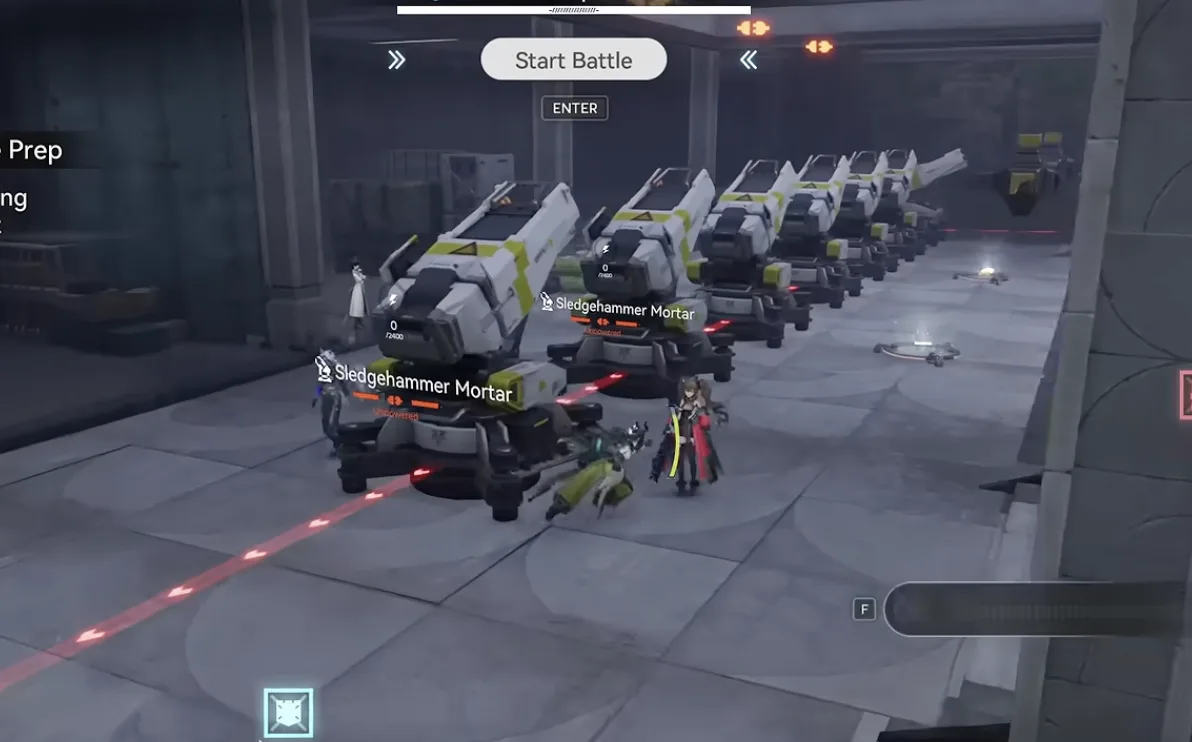
Level 3: seven Sledgehammer Mortars down the single lane, powered by Xiranite Pylons
The eighth turret is an Acid Soaker Mk I, placed where the boss idles for a long stretch so it shreds the boss's defense. With the defense reduction the mortars deal roughly 2,000 to 3,000 more damage per hit instead of the usual 12k to 13k. Position it so a nearby pylon powers it as well.
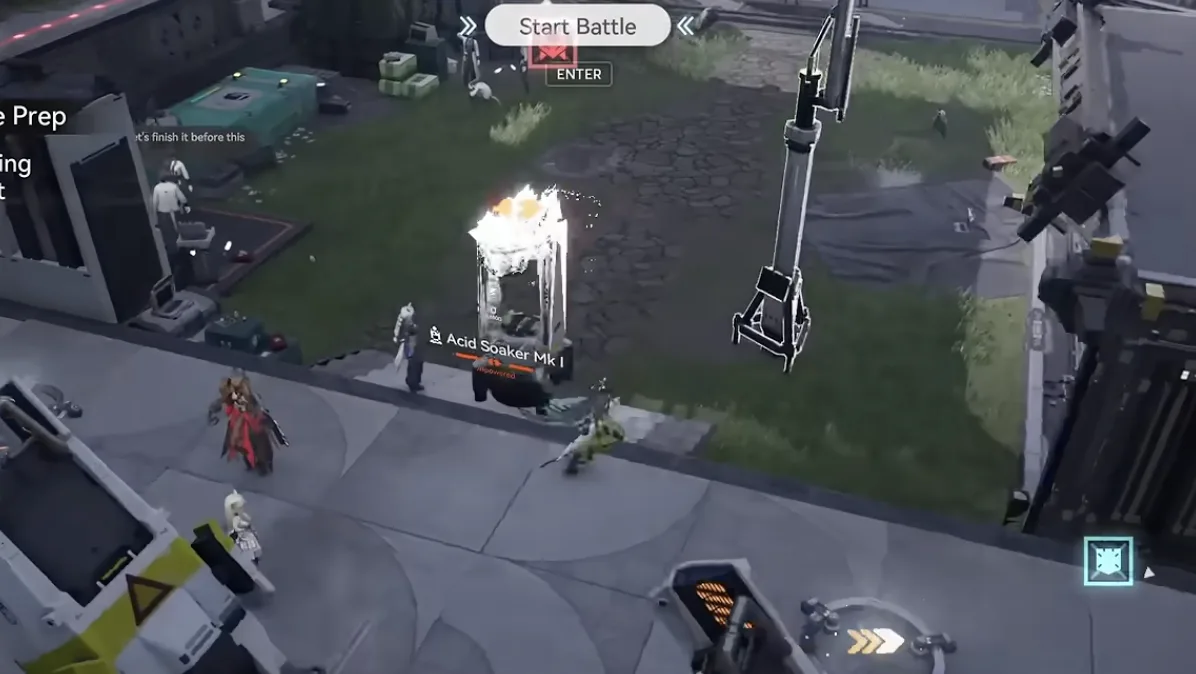
Level 3: Acid Soaker Mk I on the boss idle spot for the defense shred
The boss actually helps you: it groups the swarming adds together with its water tornado, which turns them into free AoE kills for the mortars, and the mortars' homing shots delete the rolling enemies on their own, so you do not need a push-back turret. Between the grouped adds and the shredded boss, the lane rarely gets close to failing.
For Auto-Defense, add two more Sledgehammer Mortars behind the line for ten turrets total. This is genuinely overkill, since eight already clears comfortably, so treat the extra two as insurance rather than a requirement.
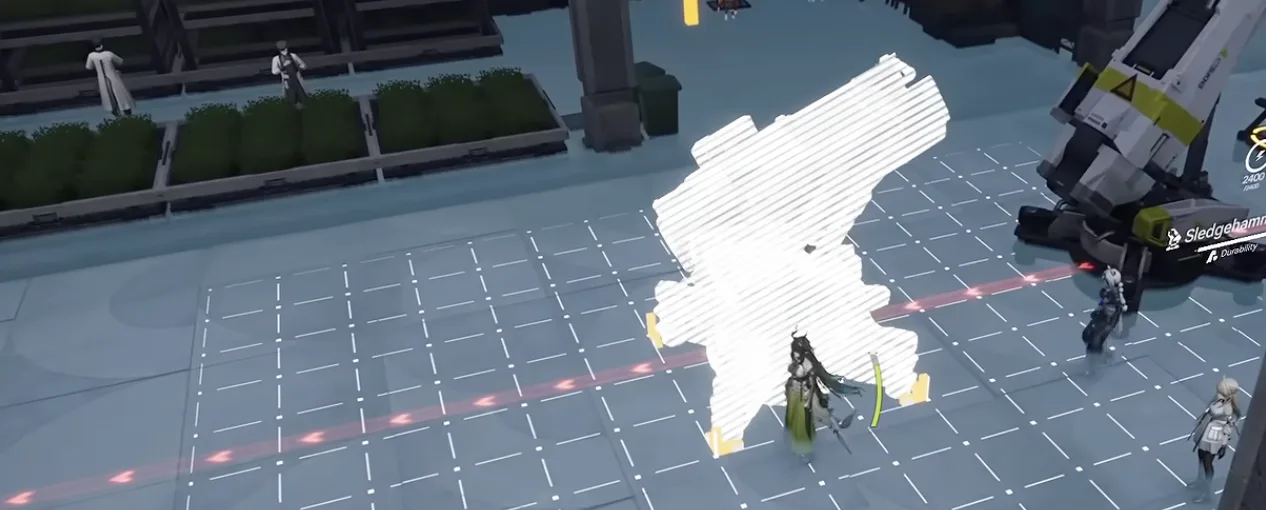
Level 3 Auto-Defense: two extra Sledgehammer Mortars behind the line for insurance
Level 4 Setup
Level 4 is what the Version 1.5 level-cap increase on the Xiranflow Cloudseeder Station outpost unlocked, and it is the biggest layout on the stage. The Auto-Defense build below runs 11 turrets: seven Sledgehammer Mortars, three Marsh Gas Mk I, and one Torrent Gun Tower, split across three firing positions covering the left, right, and top approaches. Each position gets its own Xiranite Pylon, so budget three of them on top of the turret count.
Left side, the main battery. Five Sledgehammer Mortars sit in the middle of the bottom approach with a single Marsh Gas Mk I in front of them. This is where most of the wave dies: the gas cloud holds enemies inside the splash radius while five sets of homing shells cycle onto them. Keep the mortars tight enough that one pylon covers the whole group.
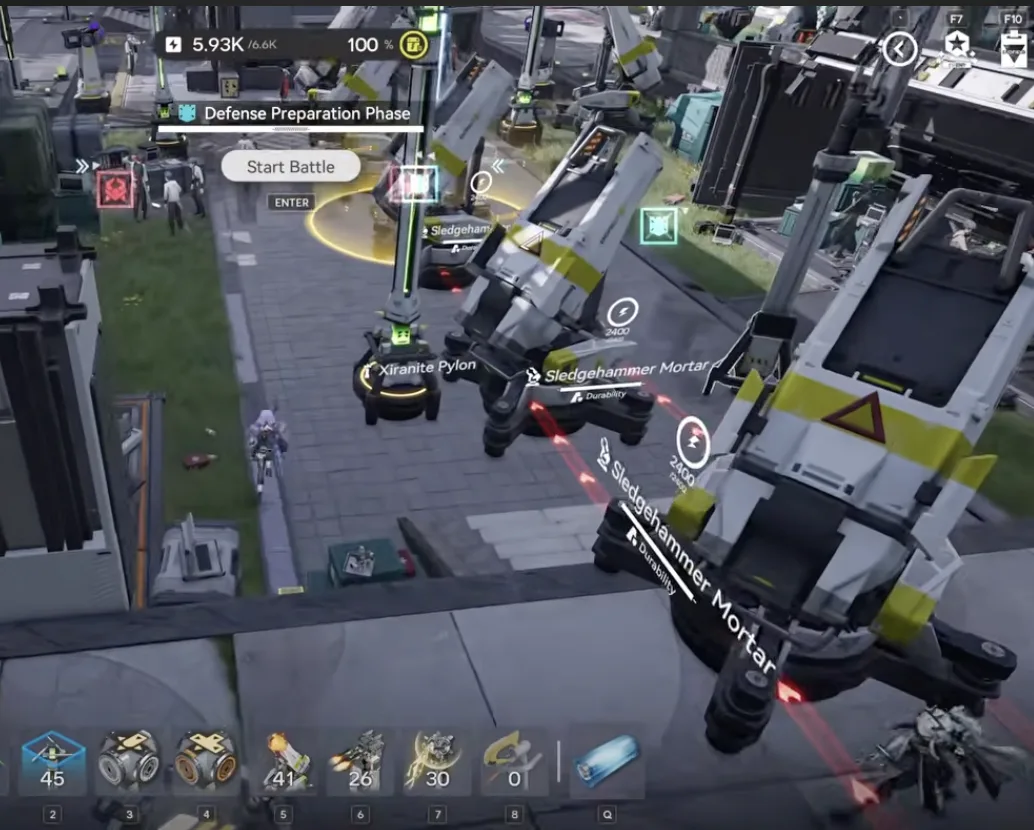
Level 4: five Sledgehammer Mortars with one Marsh Gas Mk I on the left approach
Right side. One Sledgehammer Mortar plus one Marsh Gas Mk I covers the right lane. This pair does not have to kill everything on its own, it only has to slow and thin the runners that peel off before the left battery picks them up, so a single pylon between the two is enough.
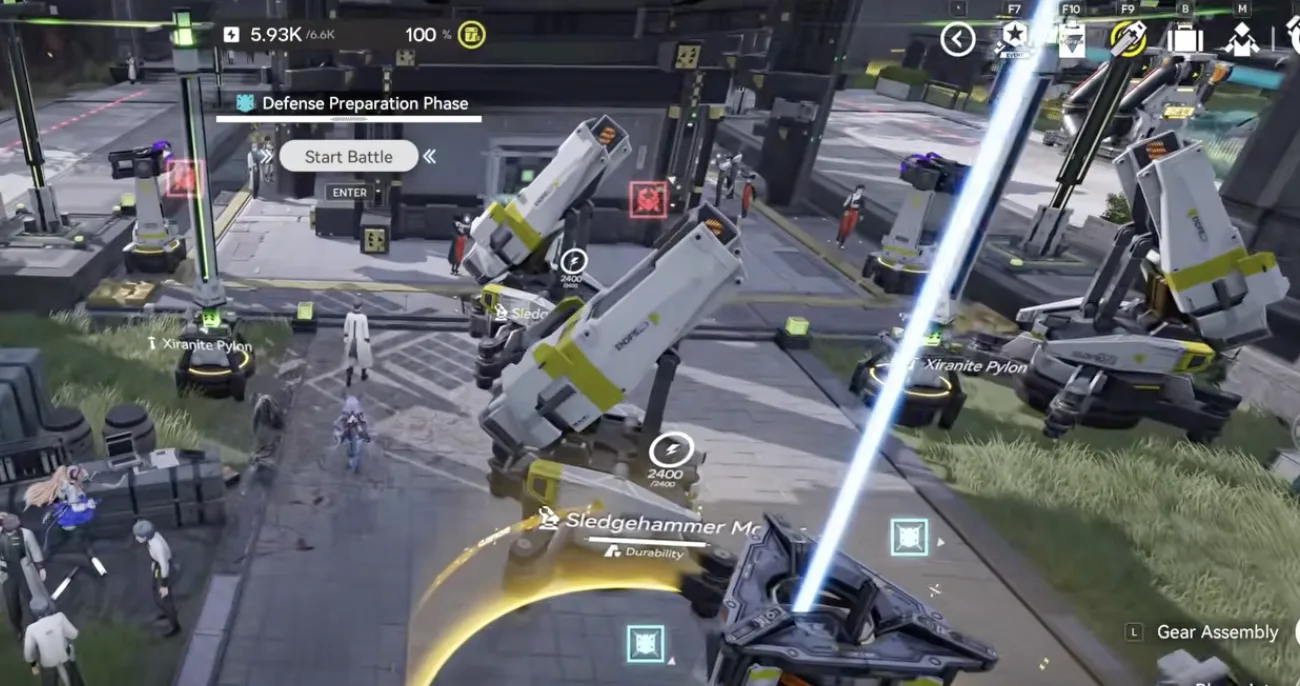
Level 4: one Sledgehammer Mortar and one Marsh Gas Mk I on the right lane
Top side. One Sledgehammer Mortar, one Marsh Gas Mk I, and the Torrent Gun Tower cover the top lane. The Torrent Gun Tower is the anchor here, exactly as it was on Level 2: it holds a single lane by itself, and the Marsh Gas dropped in front of it keeps enemies parked inside its firing arc long enough for the mortar to land shells on them.
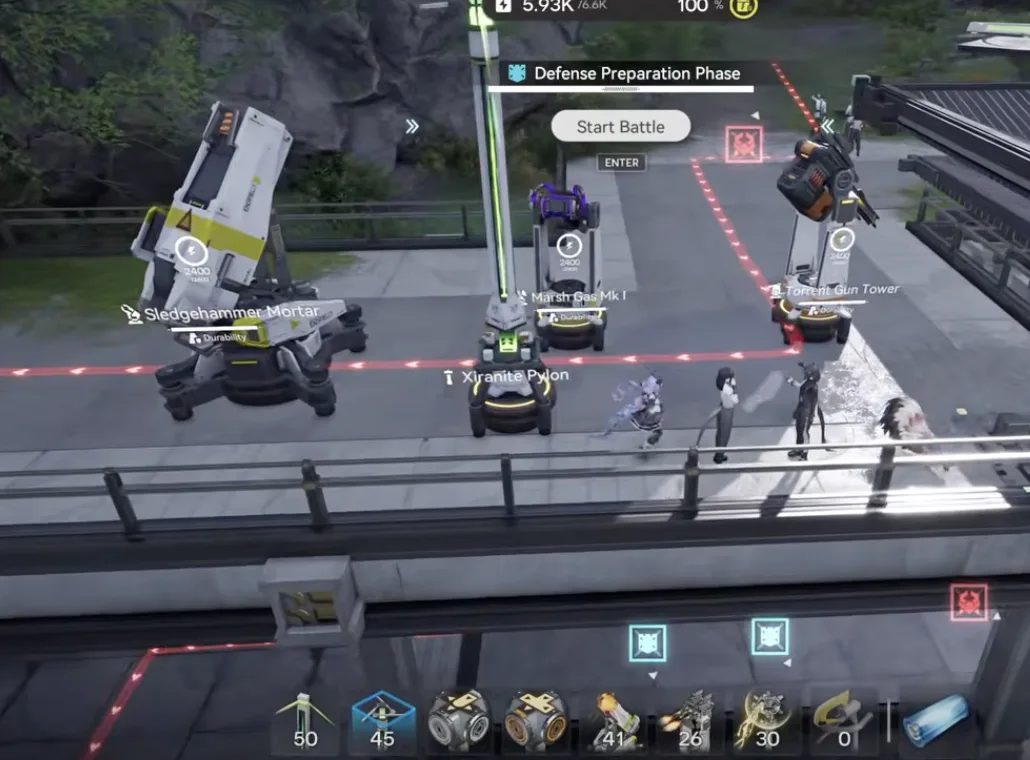
Level 4: Sledgehammer Mortar, Marsh Gas Mk I and Torrent Gun Tower anchoring the top lane
The shape is the same one that carries Levels 1 to 3: one Marsh Gas per firing position to hold enemies still, Sledgehammer Mortars behind it to do the damage, and a Xiranite Pylon inside range of every cluster. We have not documented the Operator Intervention slot count for Level 4 yet, and you do need that clear first to unlock Auto-Defense. Run a trimmed version of this build for it, dropping the right-side pair before you touch the left battery, then place the full 11 turrets above once Auto-Defense opens up.
That is all four Yinglung Pass levels covered. For the wider system (turret tier list, Risk Levels, Xiranite power chains, and the other Wuling outposts), head back to the full Area Defense guide. If you are still building out the region, the Wuling region guide and factory guide cover the power and progression that unlock these stages.