WULING 1.4 MEGA BASE BLUEPRINT
 Level Up & Save at RazerUp to 25% off when you buy any 2 eligible Razer items: keyboards, mice, headsets, and more.Shop Razer Deals
Bundle any 2 items. Offer runs through 31 December 2026. Affiliate link, we may earn a commission.
Table of Contents
This is the full Wuling 1.4 mega base, the ultimate factory that replaces your old 1.3 setup. Patch 1.4 adds a new element, the gas, and this base turns it into the new Pyrrolite gear parts and components. With every base deployed you can even leave yourself an empty sub AIC, and you have full control over how fast the new gear components are crafted. It is a long build, so this guide walks you through it step by step to make the most efficient version.
This is the direct successor to Part 10, the Wuling 1.4 temporary gear components build, and to the Part 9 Wuling 1.3 mega base. You will nuke the old 1.3 base and rebuild in 1.4. If you are new to Wuling, skim Part 1 for the upstream Valley IV pipeline first. For single purpose factories, the Blueprint Curation hub indexes everything by purpose.
Quick Answer
This is a full multi AIC 1.4 base that makes the new Pyrrolite gear components at an adjustable rate of 3 or 6 per minute, alongside batteries, Heavy Xiranite, and exploration items. It uses 15 blueprints spread across the Core AIC, Marker Stone sub AIC, Yinglung Pass outpost, and either an empty sub AIC (Wuling Alt 1 and Alt 2) or the Jingyu Valley sub AIC. Before you start, reach Regional Development Level 21, connect all the new Mining Rigs, grab every Wuling AIC plan upgrade, and finish the Fissure Filling and Land Grouting side missions to unlock both Xiragen spots. Most of the output runs on Dense Originium Powder from the Meta Storage Transfer, so it barely touches your Valley IV depot. All codes are region locked for Asia and NA/EU.
Requirements & Access
First reach Regional Development Level 21 to get max mineral purity. This is easy to hit by unlocking the new depot node, leveling up existing facilities, and leveling up the new Stock Redistribution Terminal outpost. Connect Mining Rigs on all the new mineral spots except gas (the gas connections are covered below), then get all the upgrade nodes in the Wuling AIC plan. Finally, complete the side missions Fissure Filling and Land Grouting to unlock the two locations with Xiragen. Unlocking every Xiragen spot is important, so do the side missions first.
These are the AIC plan upgrades you need in each area:
- Core AIC: Area Expansion 2, plus at least the fourth upgrade on the bottom side to get the 20 Depot Bus Section limit.
- Jingyu Valley sub AIC: Area Expansion 2 and unlock the Wuling Depot Bus.
- Marker Stone sub AIC: Area Expansion 2 and two upgrades on the bottom side.
- Yinglung Pass sub AIC: Area Expansion 1 and unlock the Wuling Depot Bus.
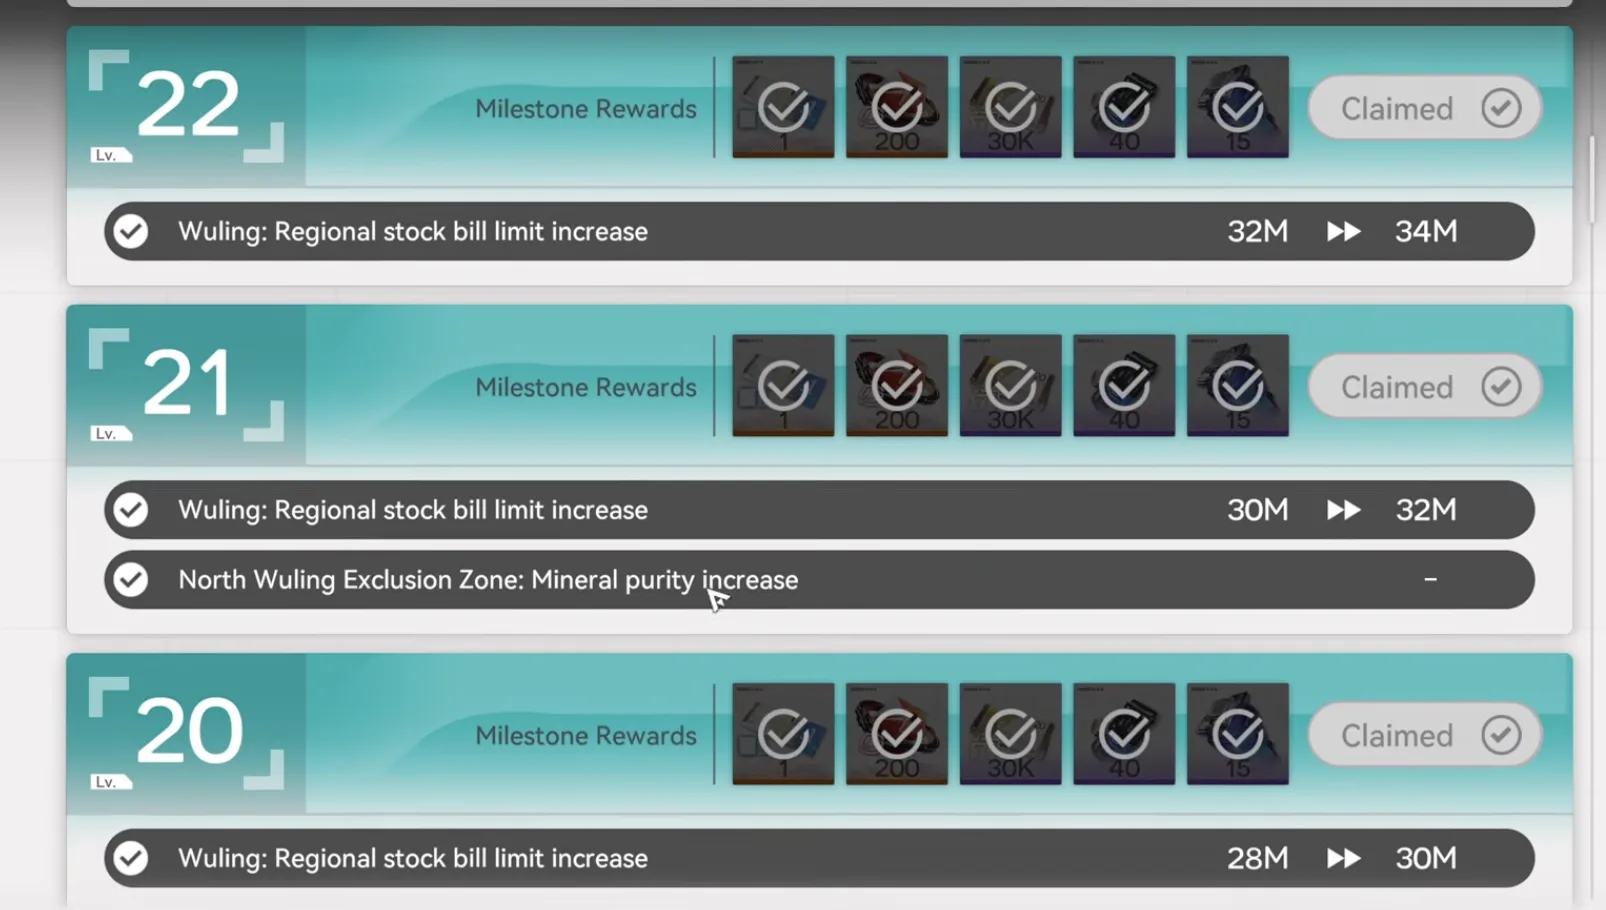
Reach Regional Development Level 21 for max mineral purity before you build
Blueprint Codes
With this patch you need to nuke the old base, so delete everything from all AIC areas first. Then import the codes: open Blueprints, go to Shared Blueprints, click Import Blueprints, and paste the code that matches your server region. The copy buttons below avoid the most common typo, the letter O versus the digit 0, and watch for stray leading or trailing spaces. Codes are region locked, so Asia and NA/EU are not interchangeable.
To kickstart the base you need enough materials in the depot: some SC batteries, about 150 Sandleaf and 300 Yazhen, roughly 1,000 Cuprium parts to craft the facilities, and some Xiranite for the basic facilities. If you do not have them, use the two temporary blueprints at the bottom of the table: put Sandleaf and Yazhen in the temporary Xiranite blueprint's machines, and the same for the temporary Cuprium blueprint.
| Blueprint | Asia Server Code | NA/EU Server Code |
|---|---|---|
| Wuling 1 | EFO013o72e7e49a450579 | EFO01iOe7oIEEU2I67aU4 |
| Wuling 2 | EFO01ouiOAiAEa6A5IieO | EFO01U4Aiu355eOu971a8 |
| Wuling 3 | EFO018IeEiei201IeUI73 | EFO01o083ei99u6A5IieO |
| Wuling 4 | EFO017i89o8o6E5I7O0Ai | EFO01o083ei99u6OOIieO |
| Purif. Node | EFO017i89o8o6E5I8O0Ai | EFO019A612EiiaeU15UI2 |
| Wuling Alt 1 | EFO018IeEiei201o2UI73 | EFO01eE7U8o22A469oAi8 |
| Wuling Alt 2 | EFO01I3A5UAUO19625o08 | EFO01u1IoAUaa80i6AoOU |
| JV Sub AIC | EFO01u8U47U7560i6AoOU | EFO01893u7e66I1oaUI73 |
| MS Sub AIC | EFO01ouiOAiAEa6AAIieO | EFO01U4Aiu355eOu271a8 |
| YP Bottom | EFO01eAo0IoI9O4i6oAi8 | EFO0172UA3844i5iuO0Ai |
| YP Top | EFO018IeEiei201IiUI73 | EFO016i1a42ee0779O83e |
| Extra 1 | EFO01E50Ua0aA3oI43uIa | EFO01u1IoAUaa80iUAoOU |
| Extra 2 | EFO01a6584543eA71oe5e | EFO01u1IoAUaa8080AoOU |
| Temp Cuprium Parts | EFO013o72e7e49a60579 | EFO014o5O1688E3i7E81A |
| Temp Xiranite | EFO01a6589eao1AU5ou5e | EFO01A5ie90Ou3Eee91eO |
Marker Stone Sub AIC
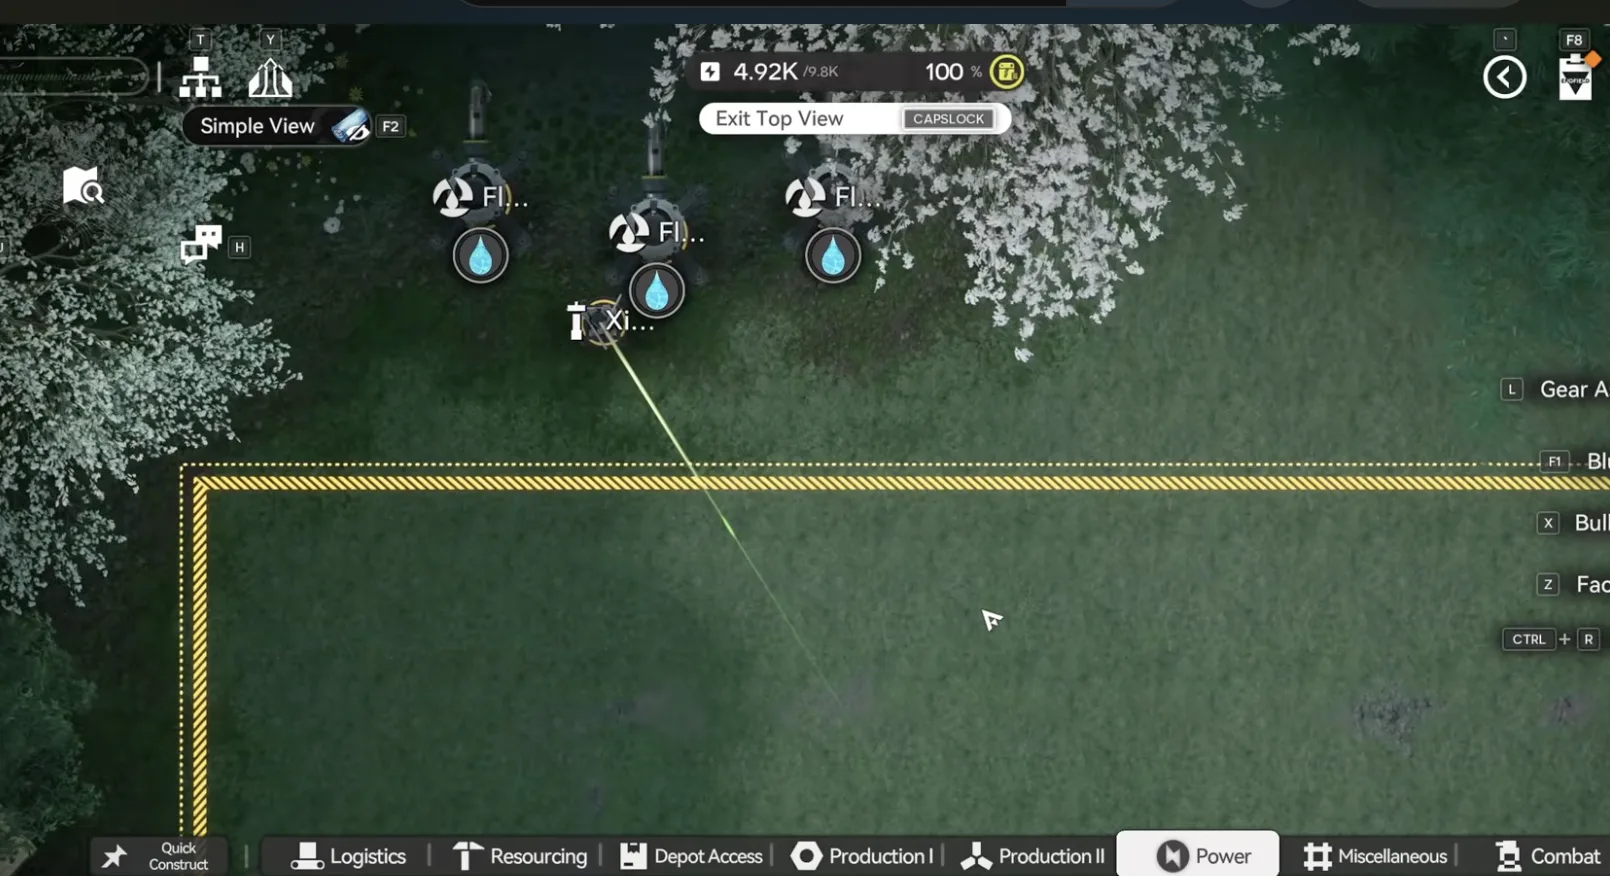
Make sure you have deleted everything from all AIC areas, then go to the Marker Stone sub AIC. Face the map with the acid lake on your right. Move the Core to the top left and put down three temporary Thermal Banks here, placing some batteries in them as a temporary energy source.
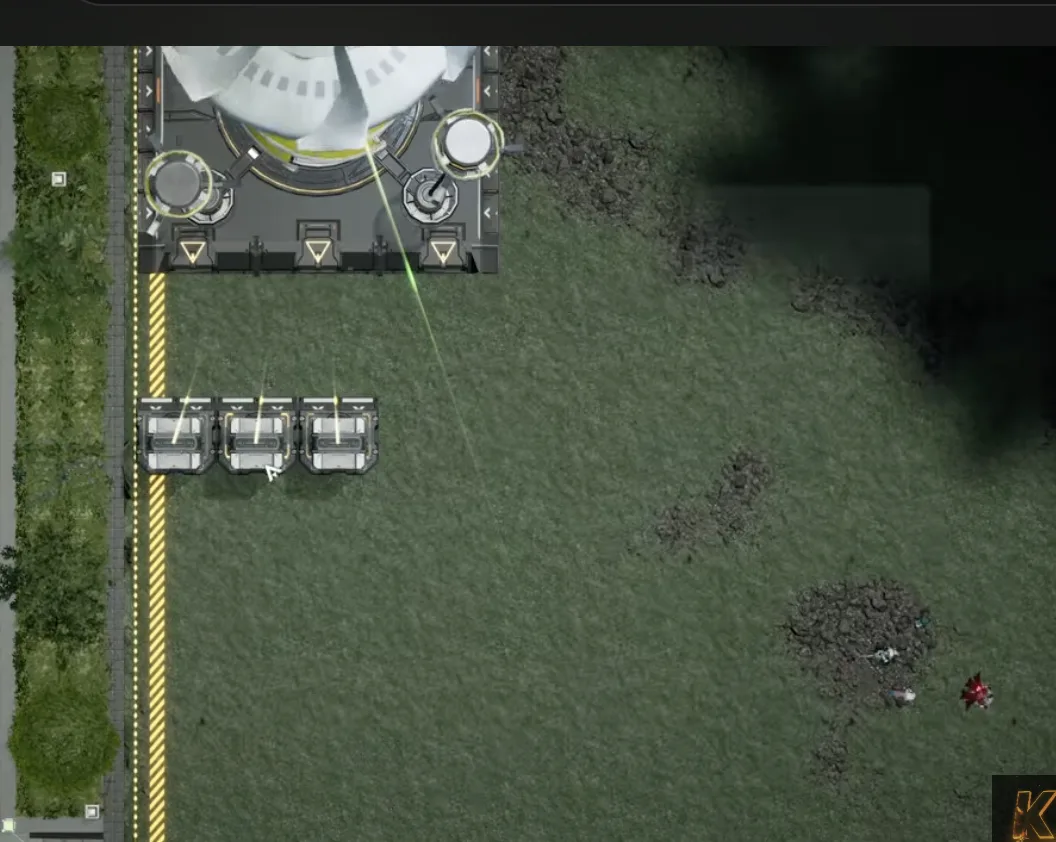
Core top left, three temporary Thermal Banks with batteries
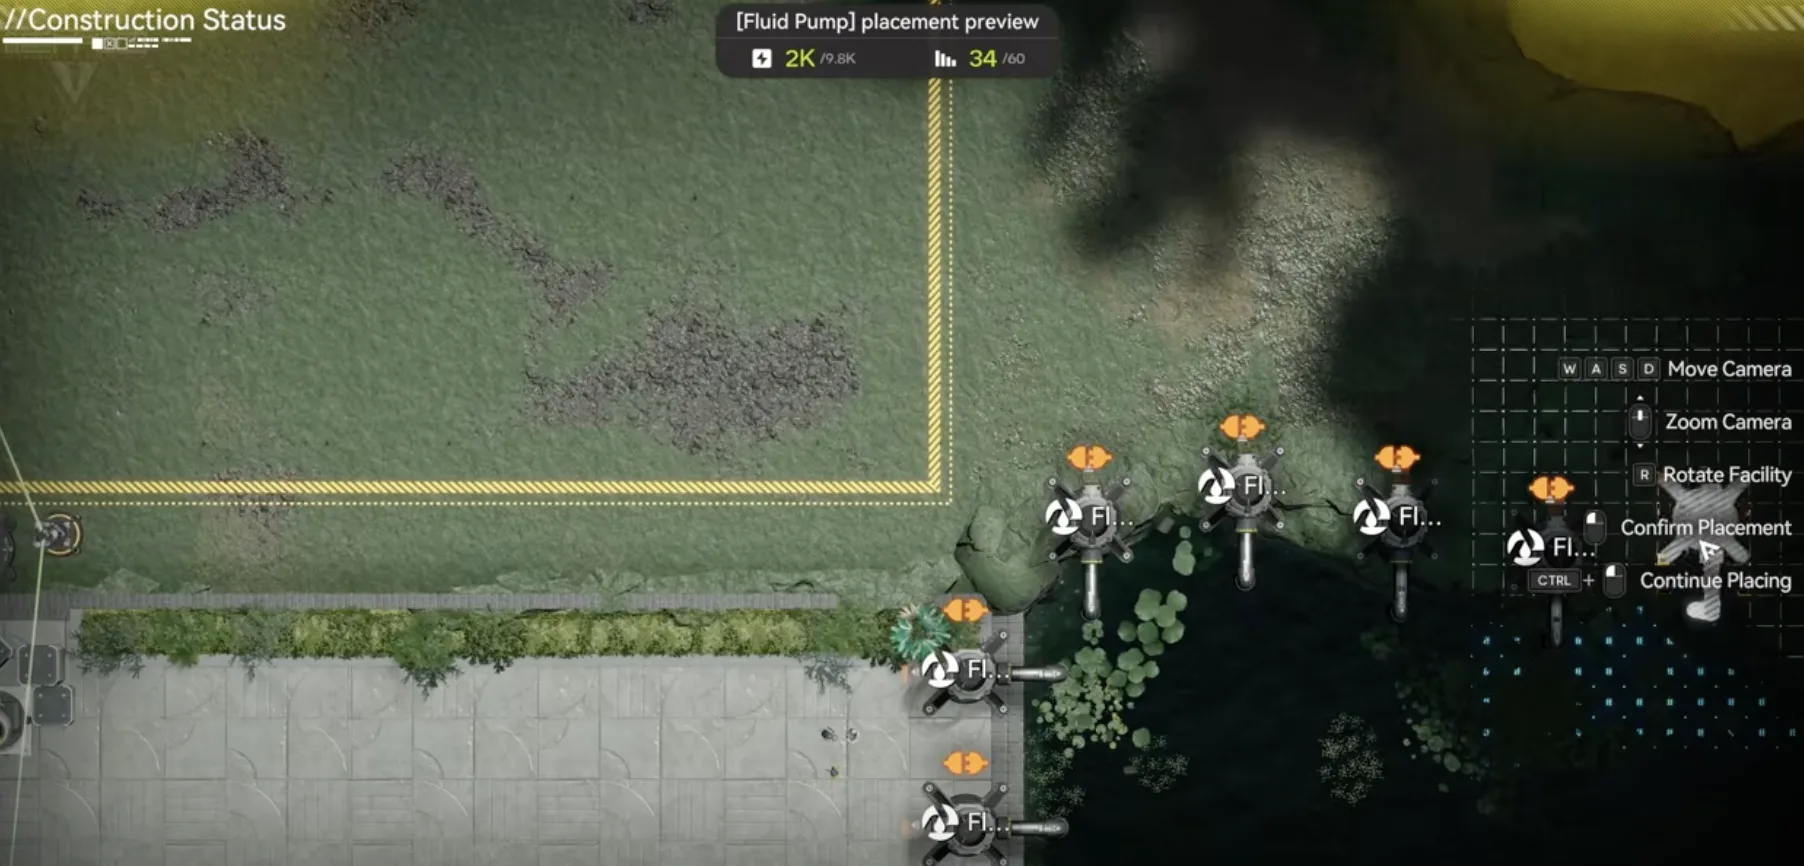
Connect seven Fluid Pumps in the lake
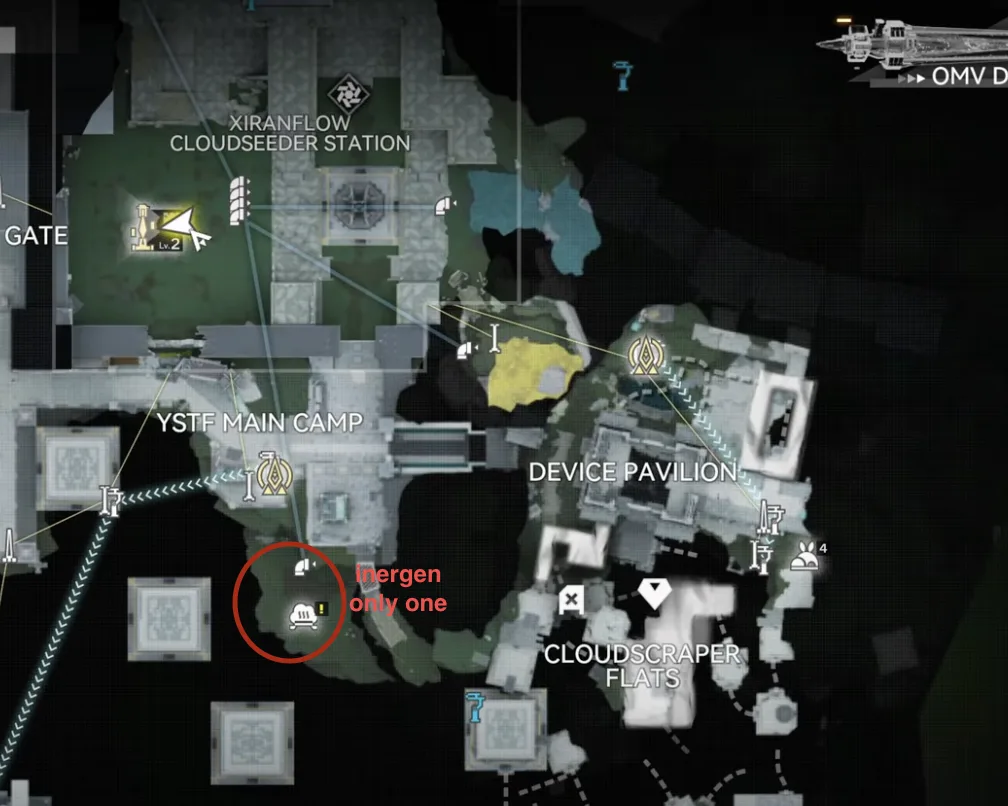
Next, connect two conduits to get Inergen. You only need two Gas Extractors, each one into one conduit, then move the two outputs here above the base.
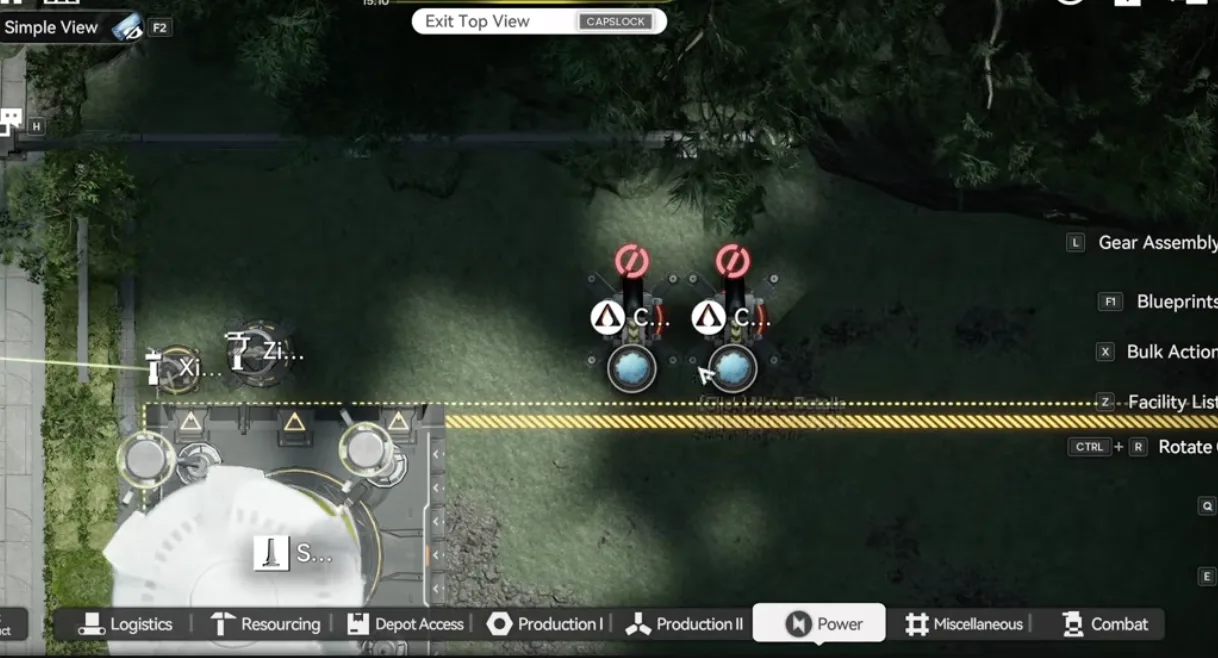
Two Gas Extractors, each into one conduit for Inergen
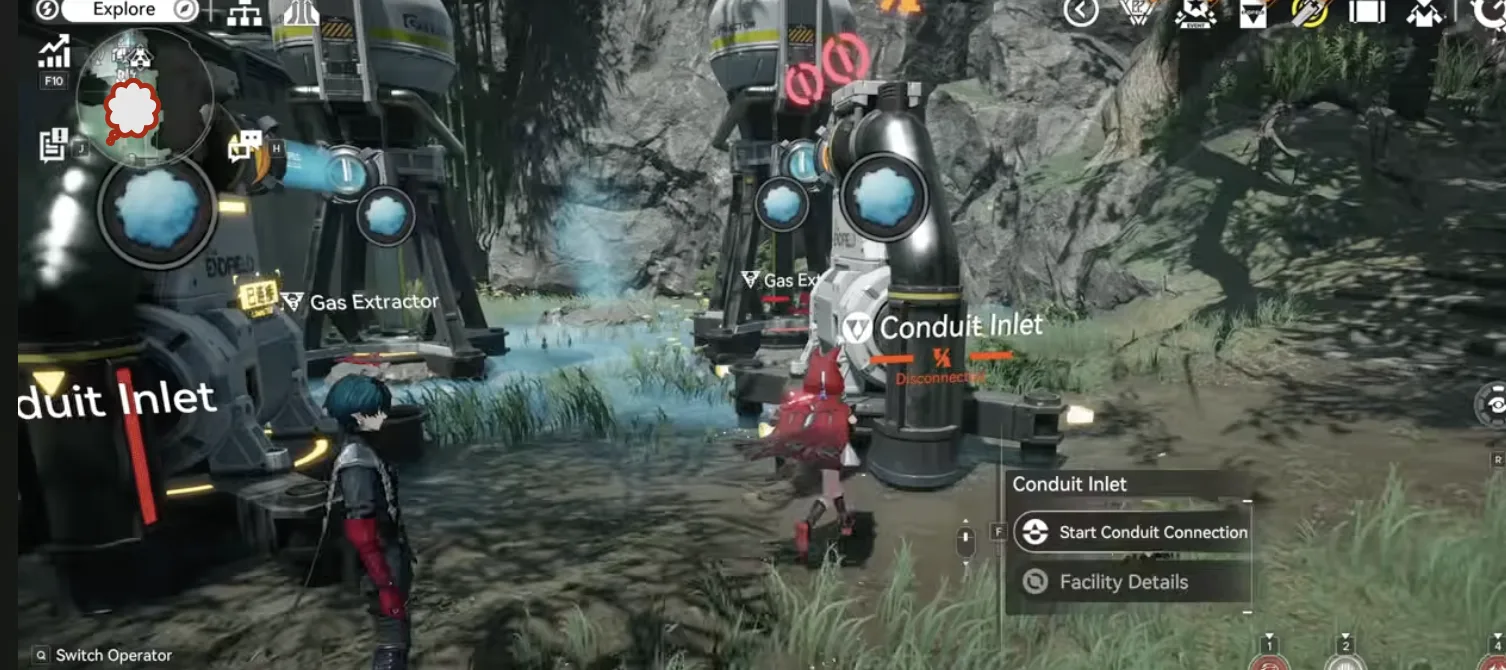
Move the two Inergen outputs above the base
Now deploy the MS Sub AIC blueprint on the most bottom side and connect six water pipes to the area marked with the water icons. Then take one Inergen conduit outlet, move it to the bottom side, and connect it to this input. That is all for now. Wait a little and this area will start producing Xiranite.
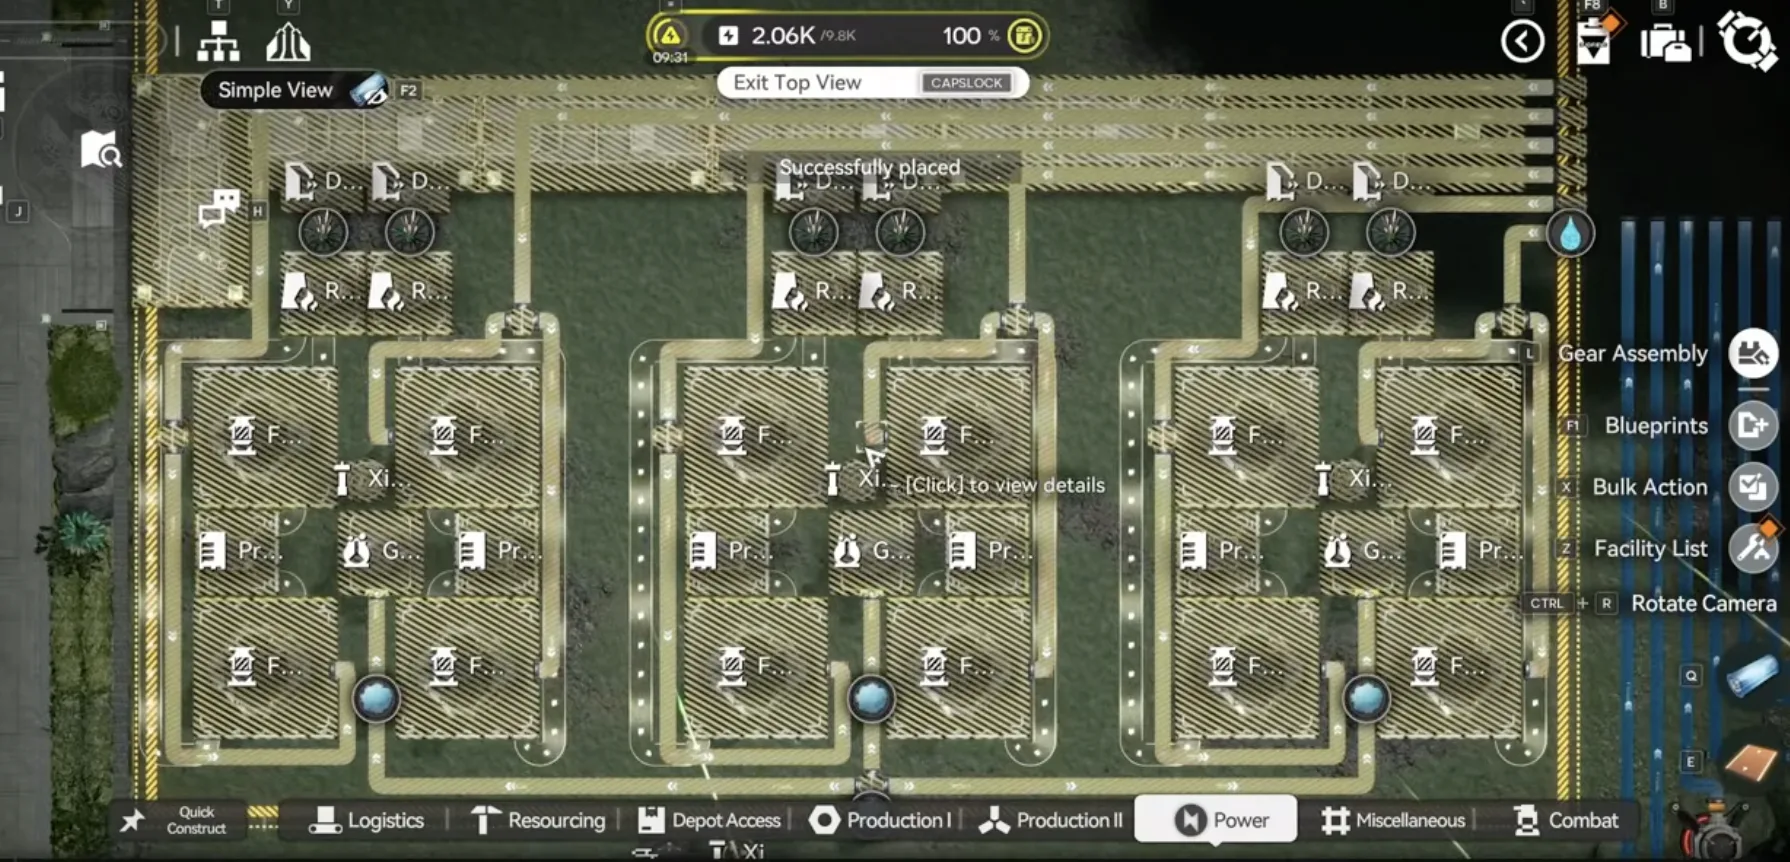
Deploy the MS Sub AIC blueprint on the most bottom side
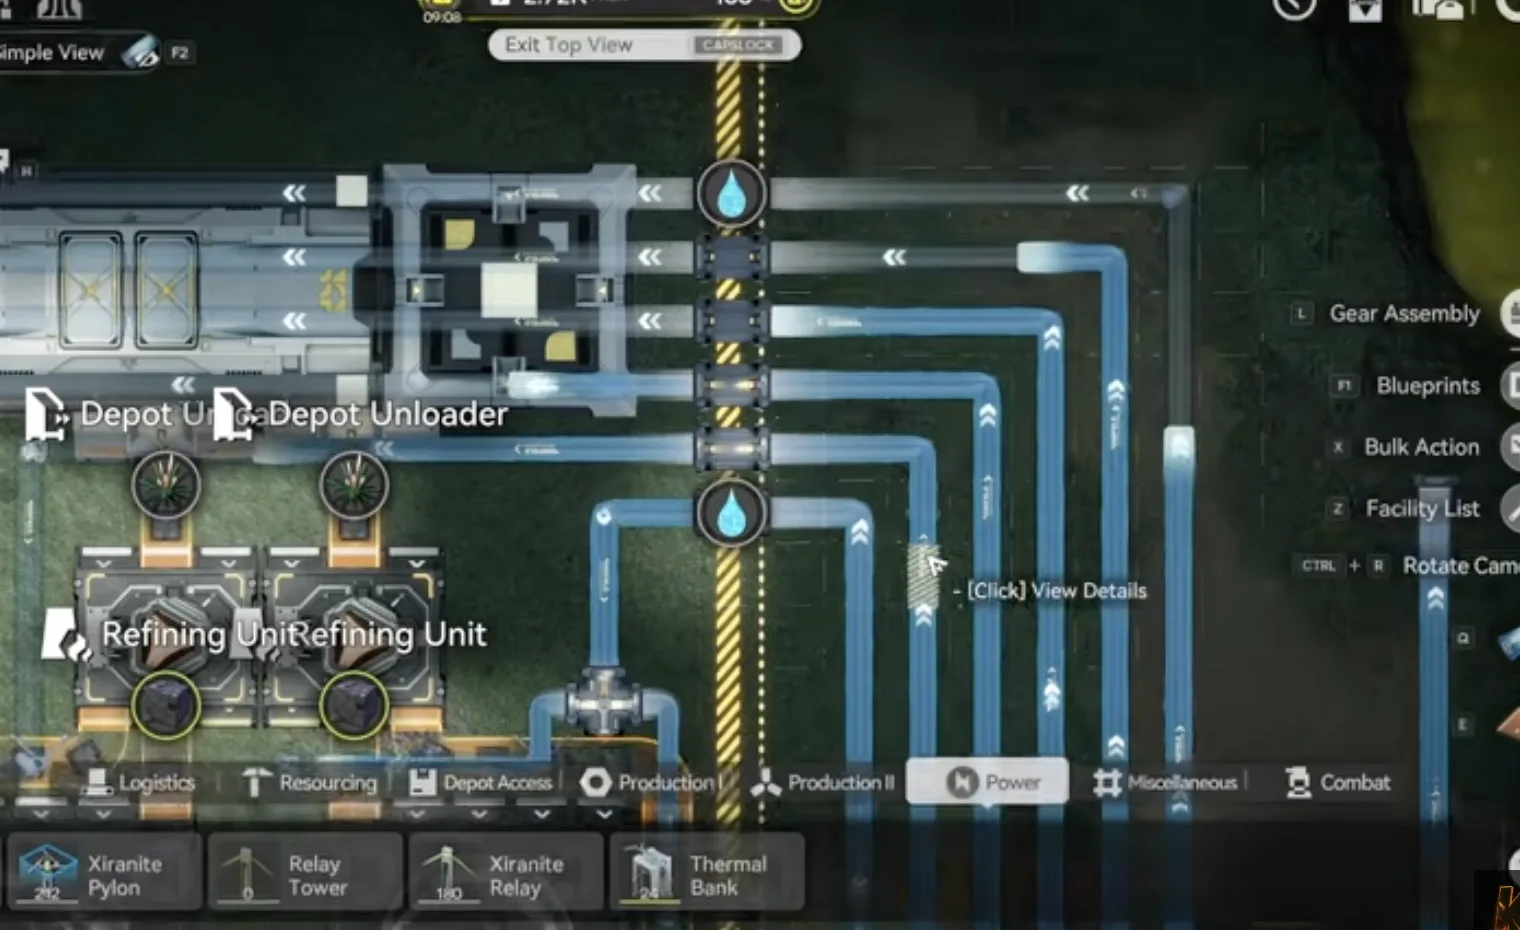
Connect six water pipes to the marked area
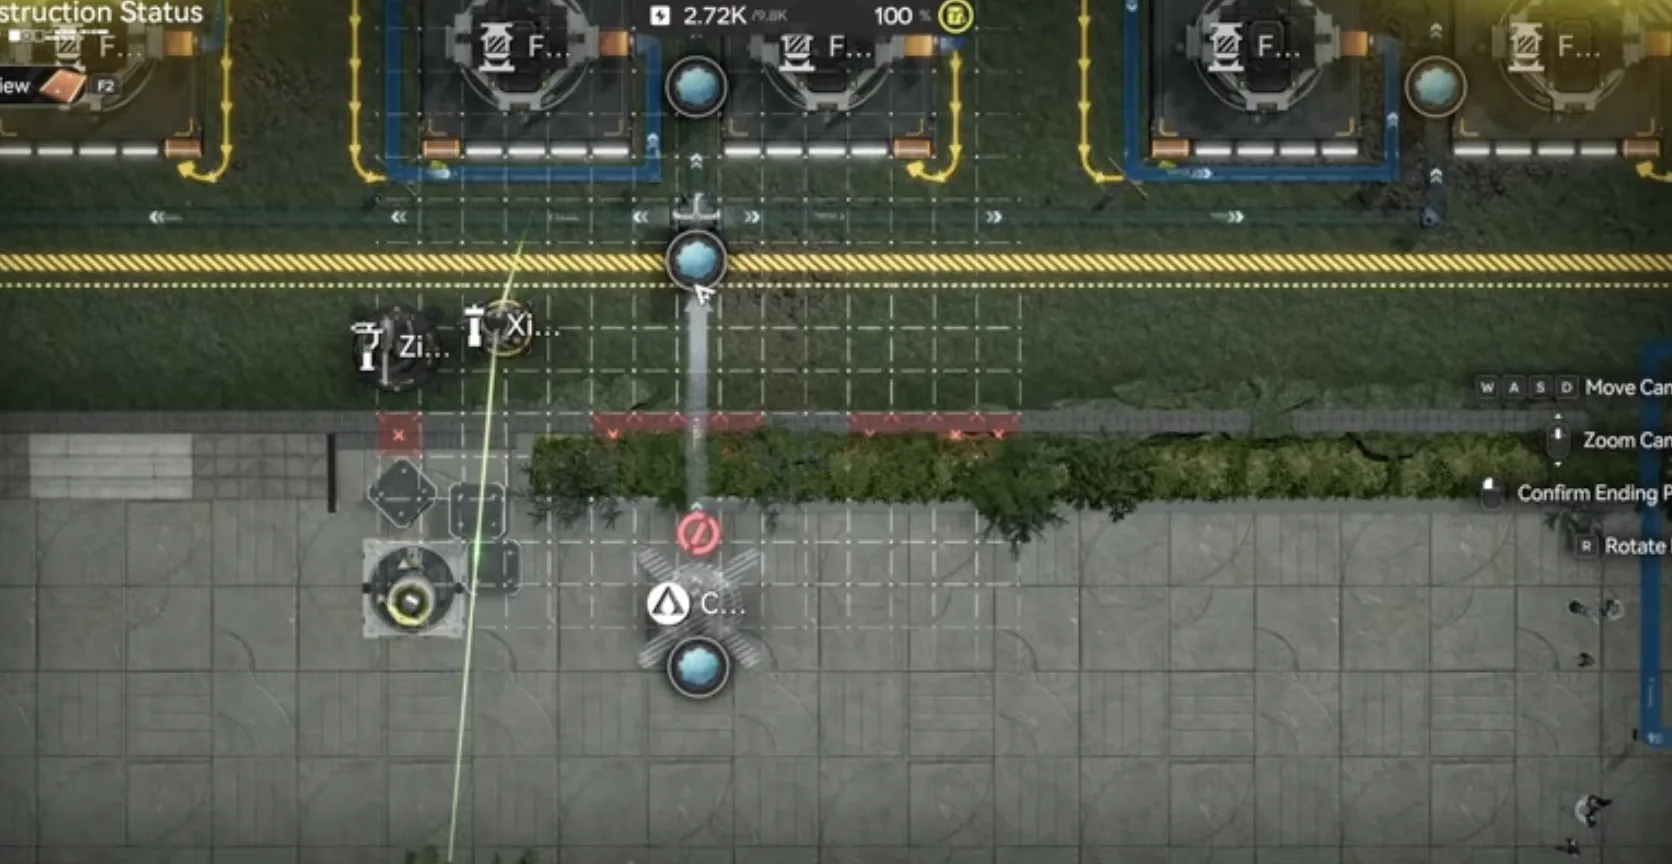
Route one Inergen outlet to the bottom side input to start Xiranite production
Core AIC
Go to the Core AIC area. You will need a 60 per minute Inergen output conduit on the top side, where you can find four Inergen mines. Use the pipe converger to combine three Gas Extractors, drag them into a conduit inlet, connect that to a conduit outlet, and set it aside since we use it later. Then face the map with the river on your right and move the Core to the bottom left.
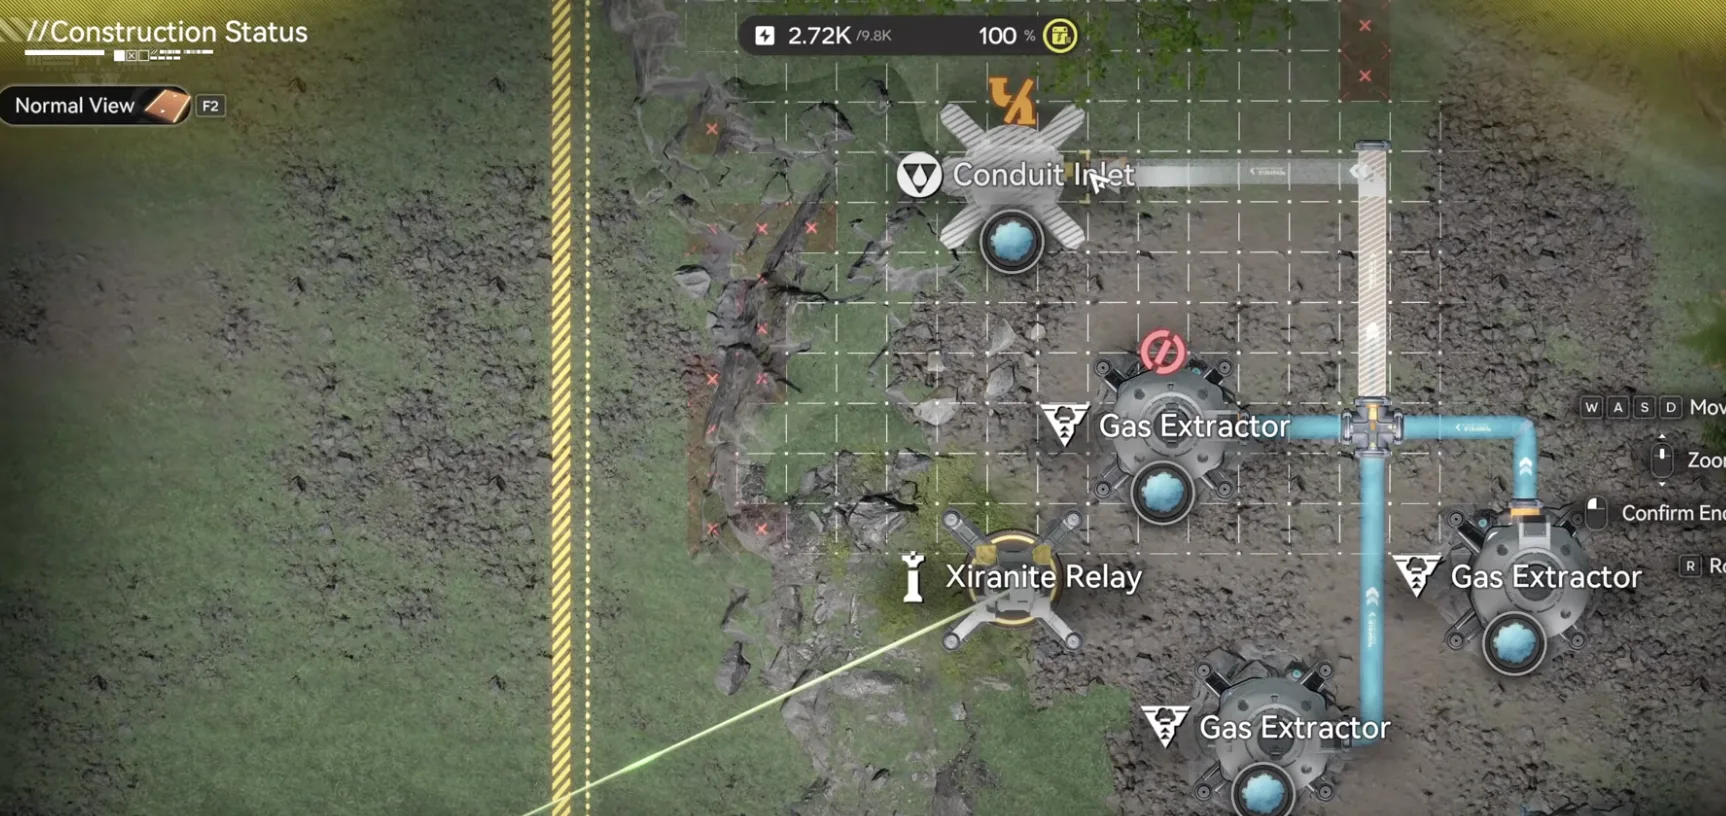
Four Inergen mines on the top side of the Core AIC, combine three Gas Extractors into one 60 Inergen per minute outlet and save it for later
You need nine Fluid Pumps on the right side. Start from the very top left and, at a distance of 2 blocks, deploy one Fluid Pump. All nine fit here. Power them up, then deploy the Wuling blueprints:
- Wuling 1: match the top right corner, one row below the yellow line so the pipes are easier to see.
- Wuling 2: on its left side, matching the Depot Bus.
- Wuling 3: on the bottom side, matching the belt.
- Wuling 4: on the left side of Wuling 3.
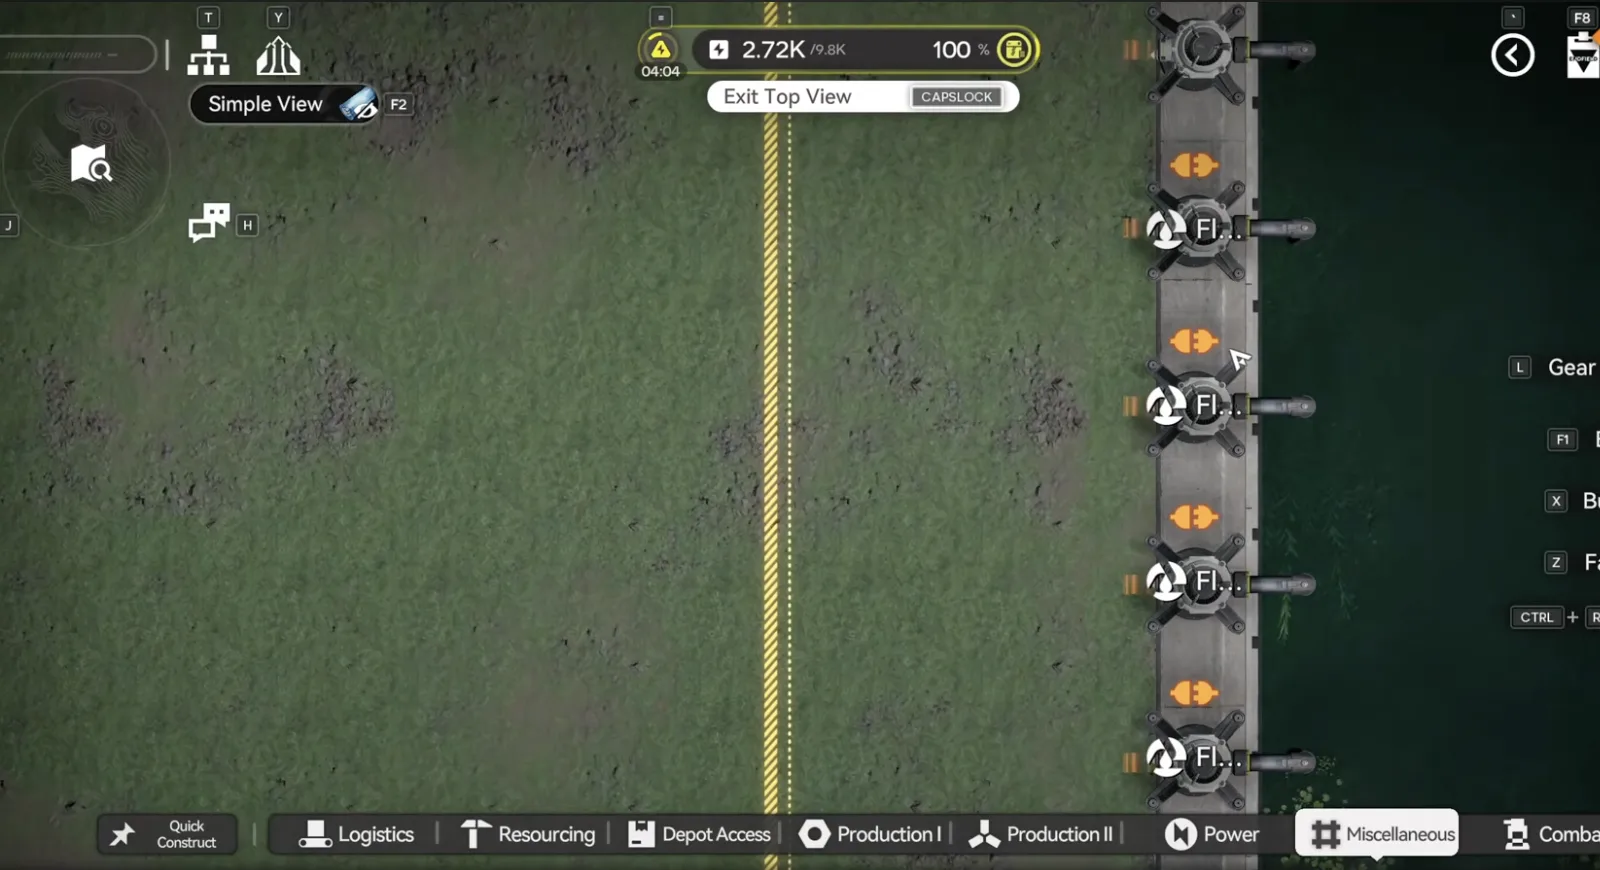
Nine Fluid Pumps on the right side, starting top left at 2 block spacing
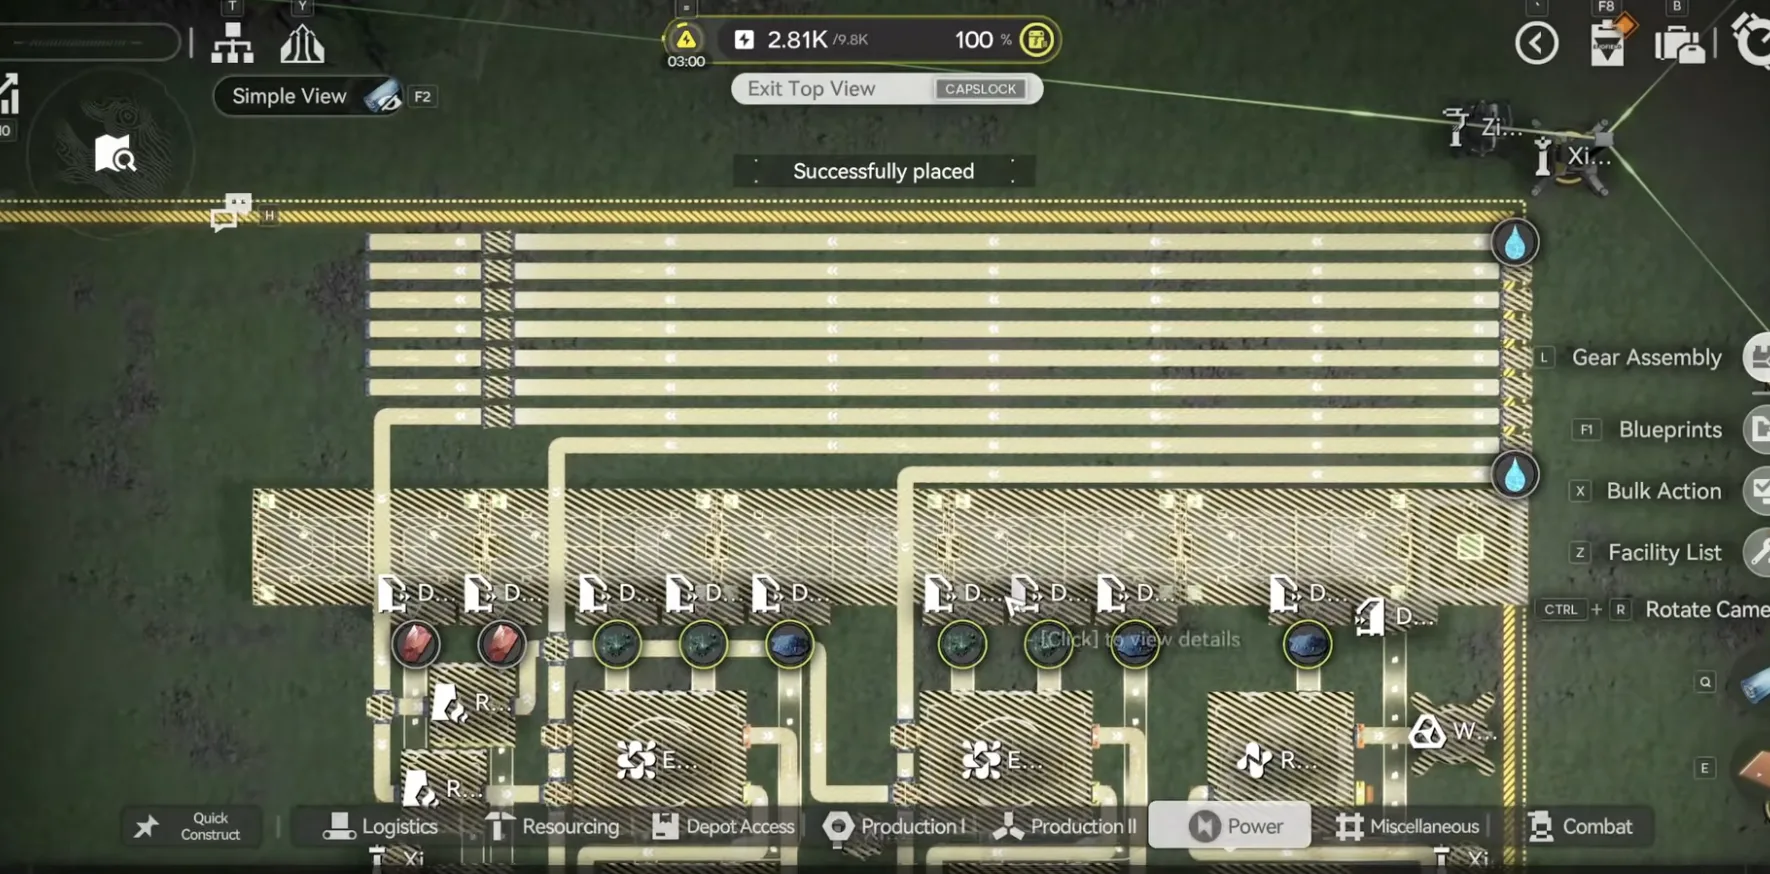
Wuling 1 at the top right corner
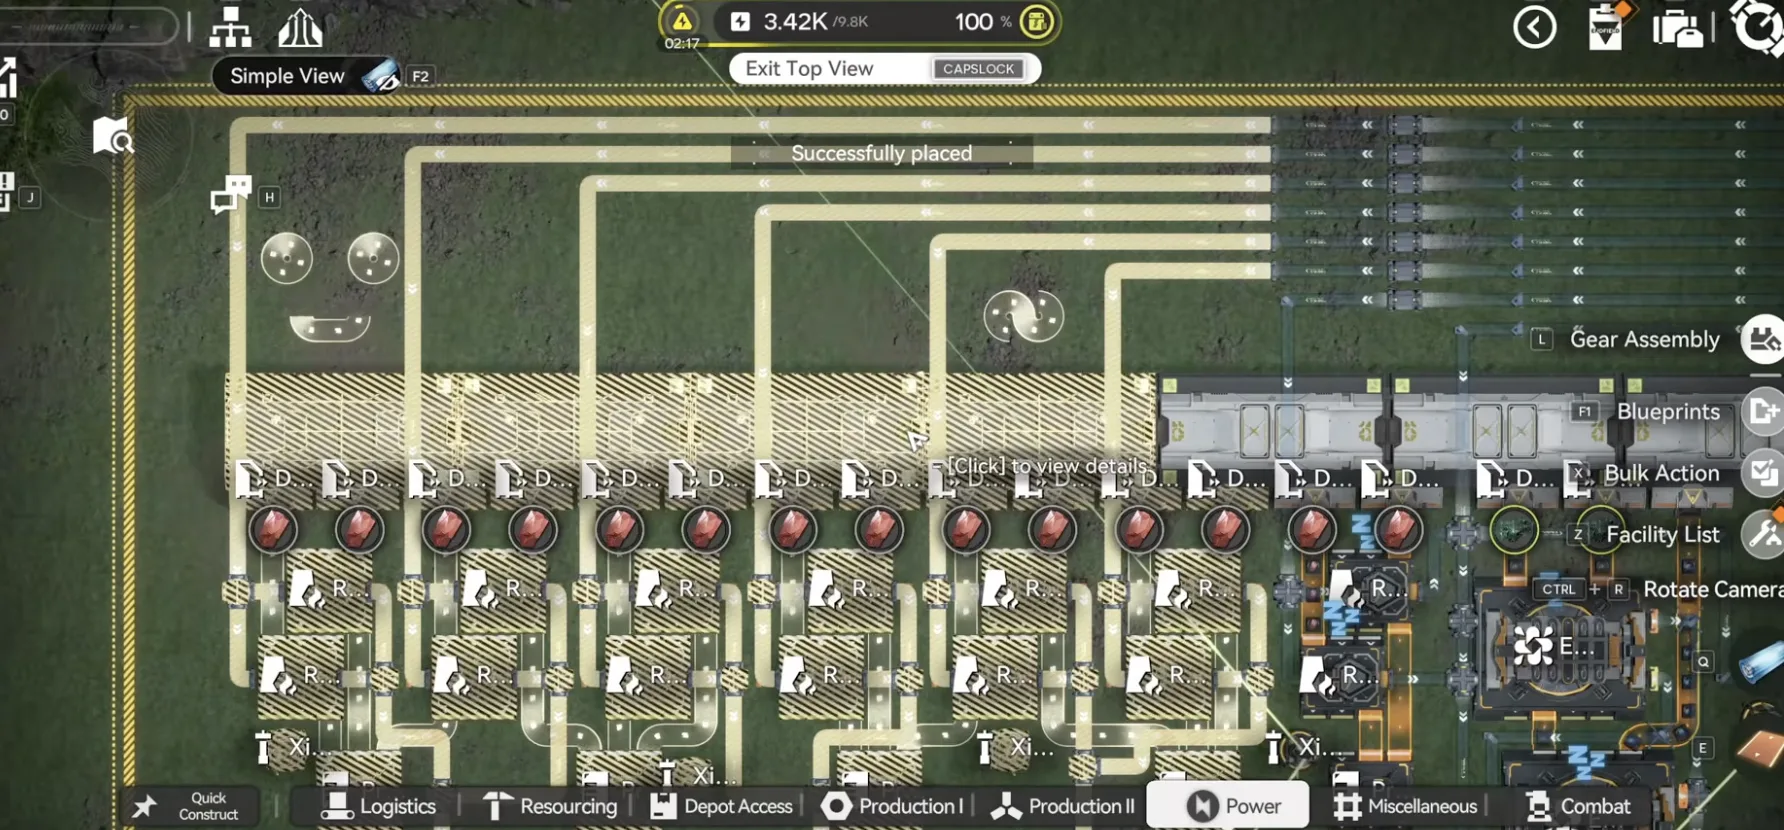
Wuling 2 on its left, matching the Depot Bus
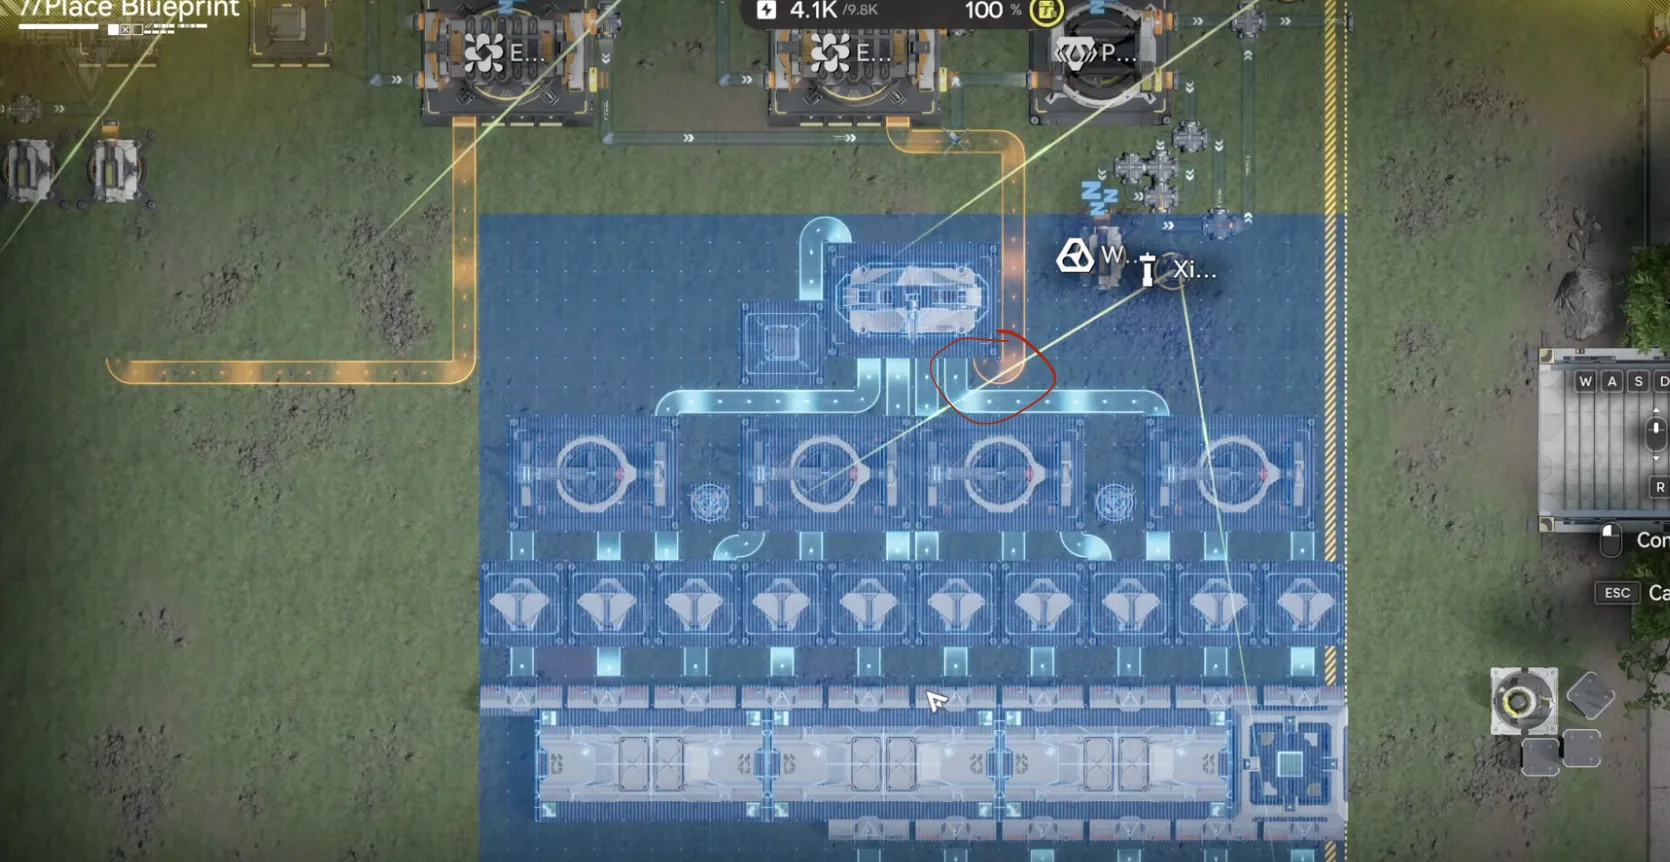
Wuling 3 on the bottom side, matching the belt
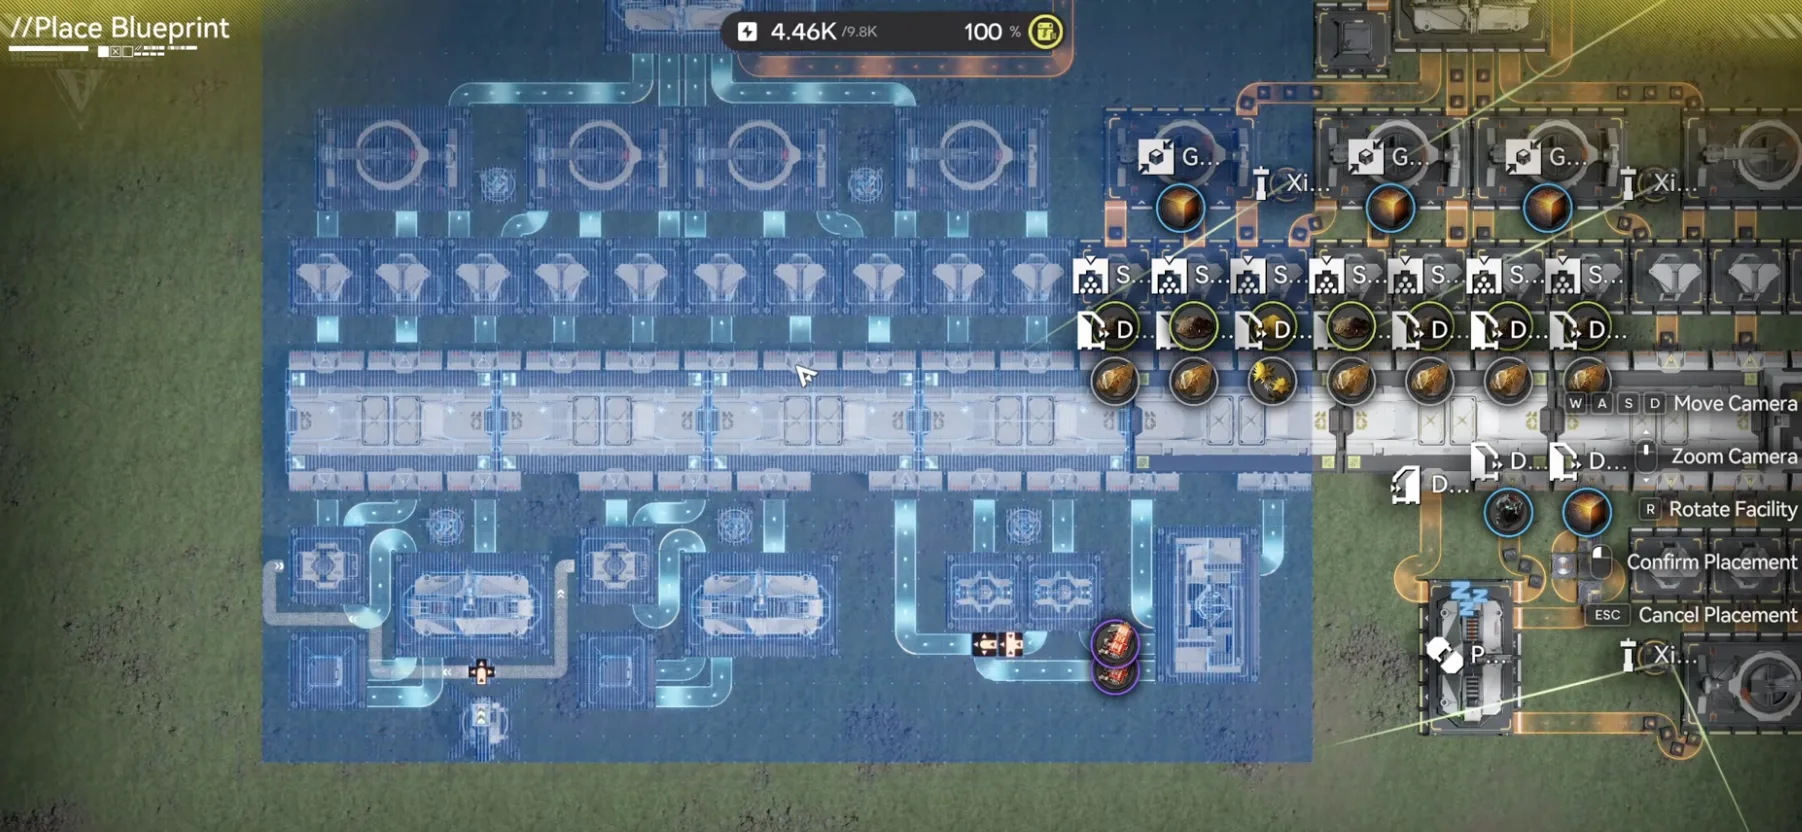
Wuling 4 on the left side of Wuling 3
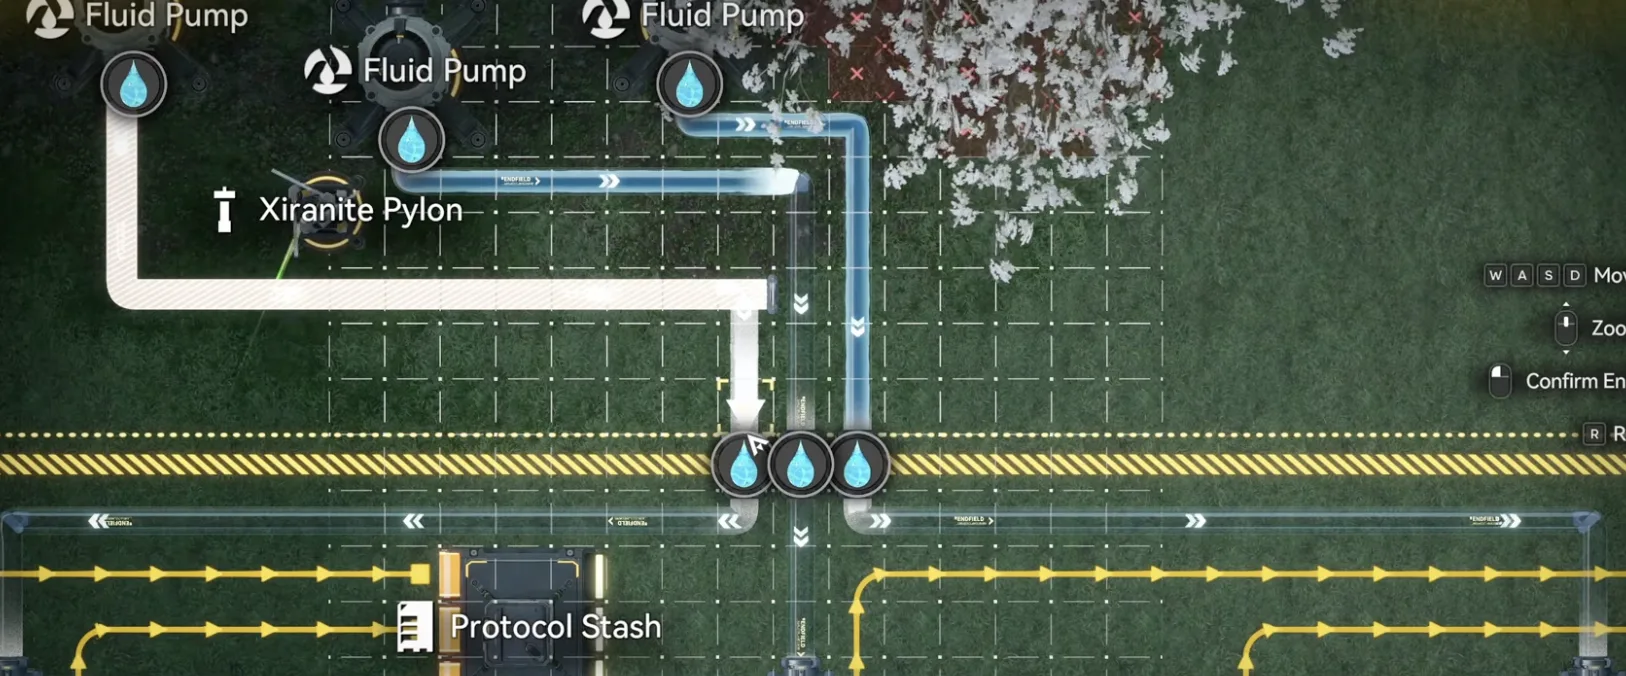
Now connect all nine Fluid Pumps into the nine pipes on the top right side marked with water. Make sure each Fluid Pump goes into one pipe. A small trick: run the fifth pump into the middle and the rest become easy to line up. Then deploy a Fluid Supply Unit below the last Fluid Pump and connect the water pipe coming out from the base to it. Double check it is a pipe coming out from the base and that it goes into a Fluid Supply Unit. Finally, move the Inergen output you prepared earlier here to replace this conduit outlet. The Core AIC is now fully functional.
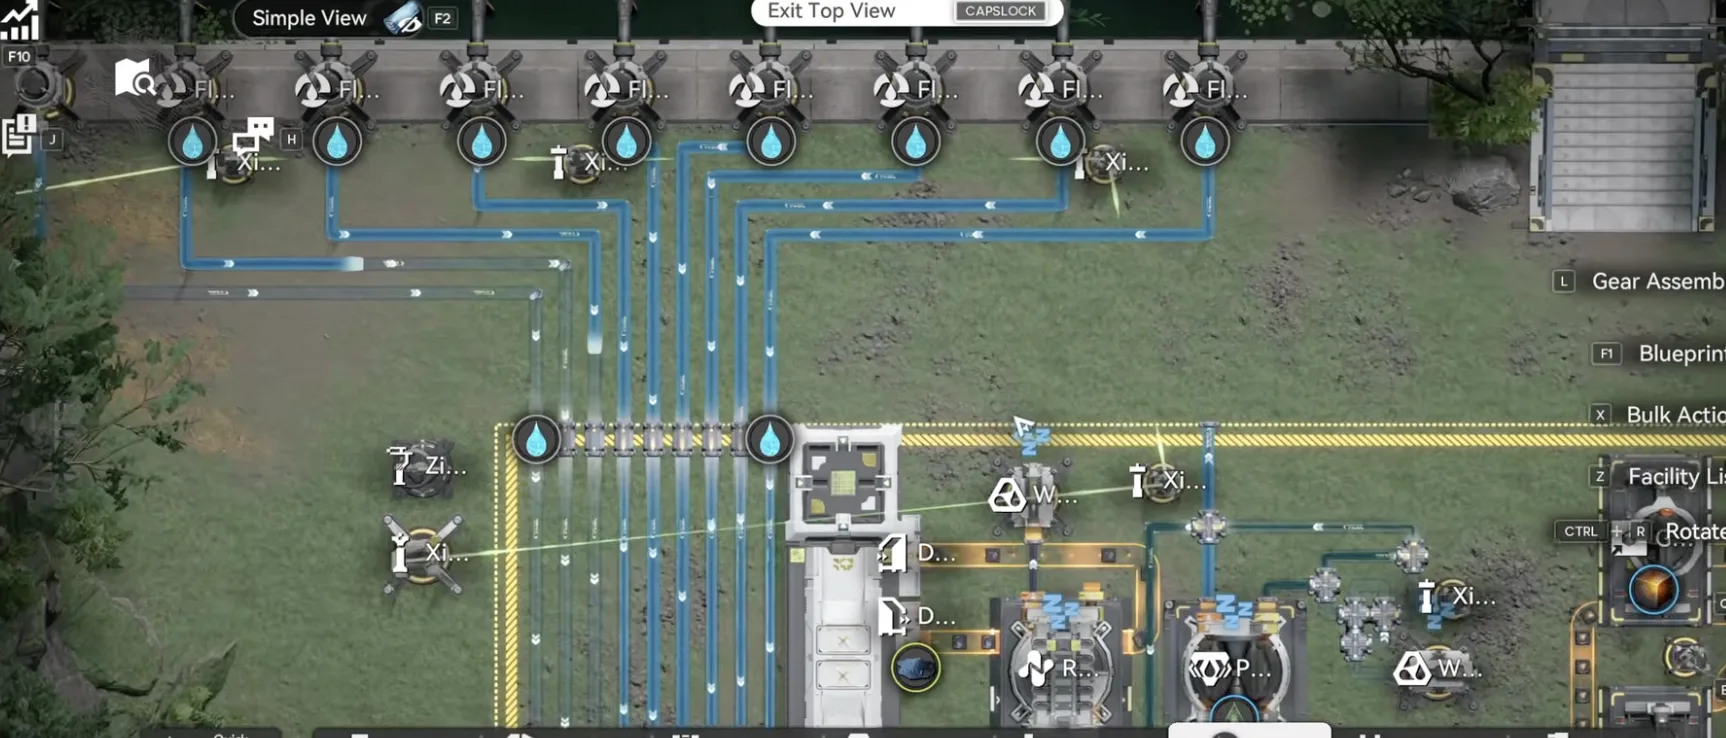
Each Fluid Pump into one pipe, fifth pump into the middle
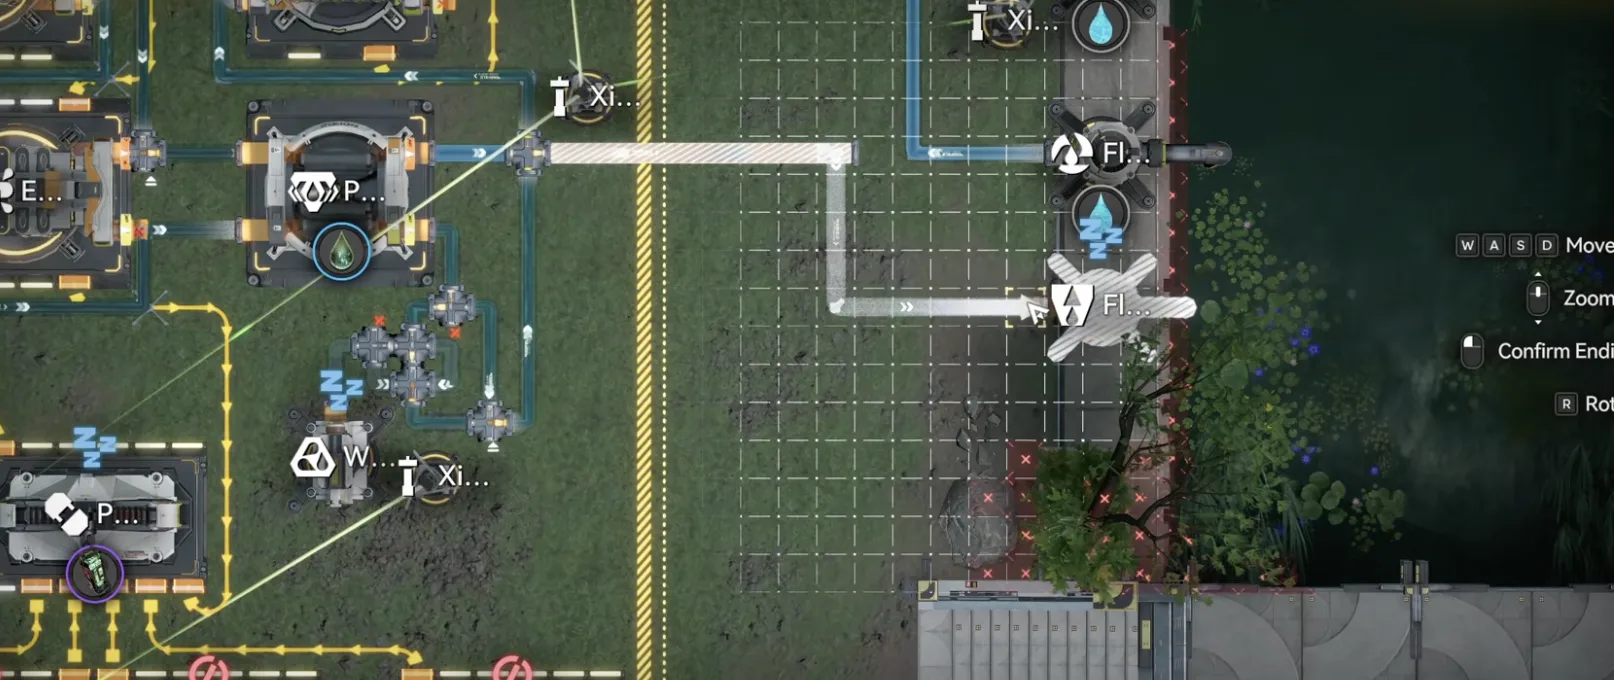
Fluid Supply Unit below the last pump, fed by the base pipe
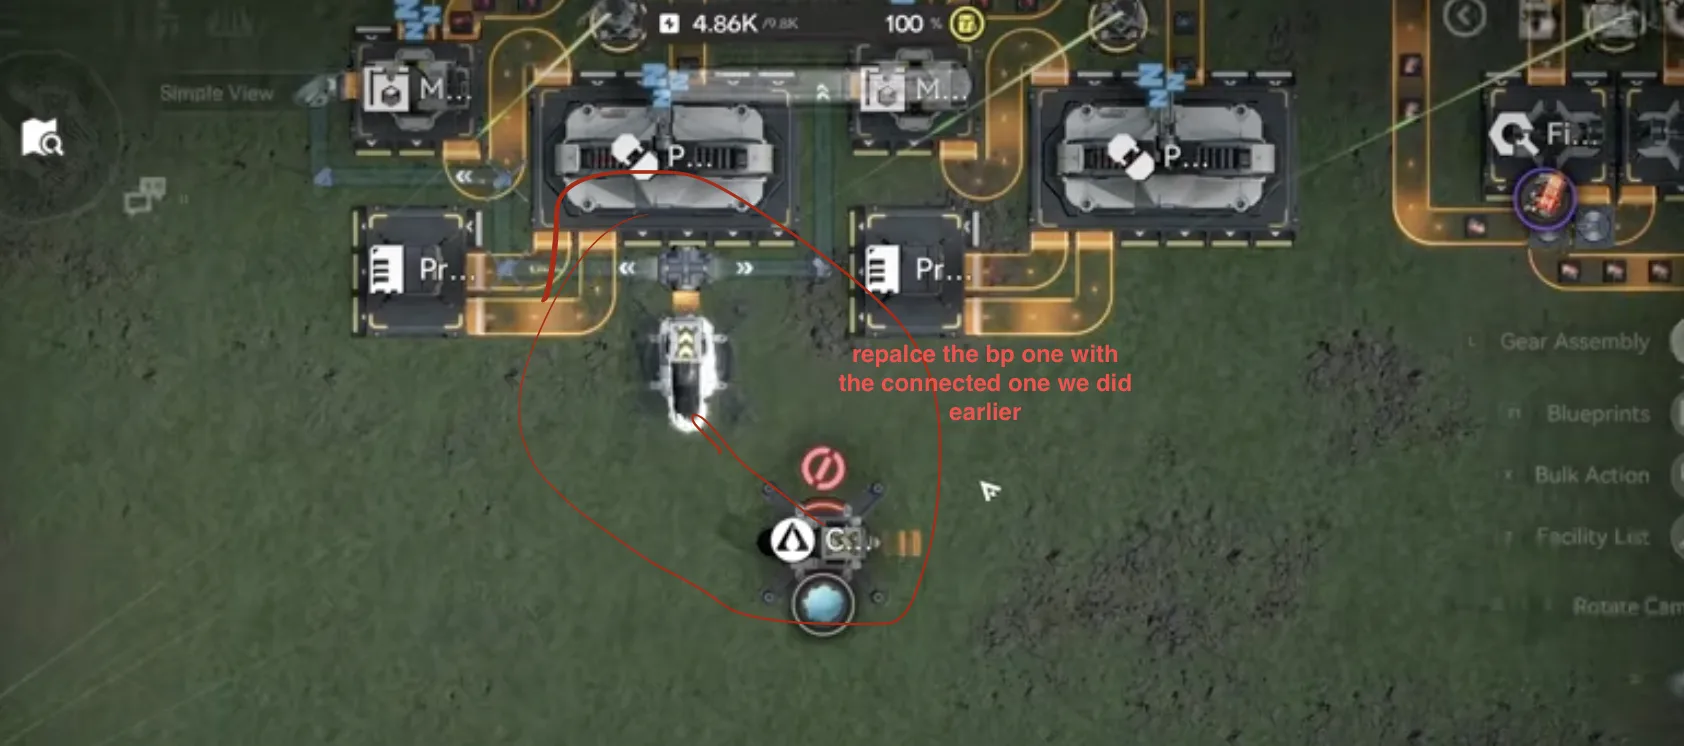
Combine three Gas Extractors into one outlet (60 Inergen per minute), save for later
Empty Sub AIC Option (A vs B)
At this point you have two options. Use only one of them, never both. Option A leaves you an empty sub AIC by deploying Wuling Alt 1 and Alt 2 inside the Core AIC. Option B uses the Jingyu Valley sub AIC blueprint instead.
Option A: Wuling Alt 1 and Alt 2 (empty sub AIC)
If you want an empty sub AIC at the end, continue here. Move the Core to this position and deploy Wuling Alt 1 matching the Depot Bus. Then place Wuling Alt 2 on the bottom right corner, one tile above the yellow line so the pipes are easier to see. Put one stack of Sandleaf in each of these three seed machines and one stack of Yazhen in each of the six seed machines on the right side. Finally, deploy three Fluid Pumps on the right side, power them up, and connect them to the three pipes marked with water.
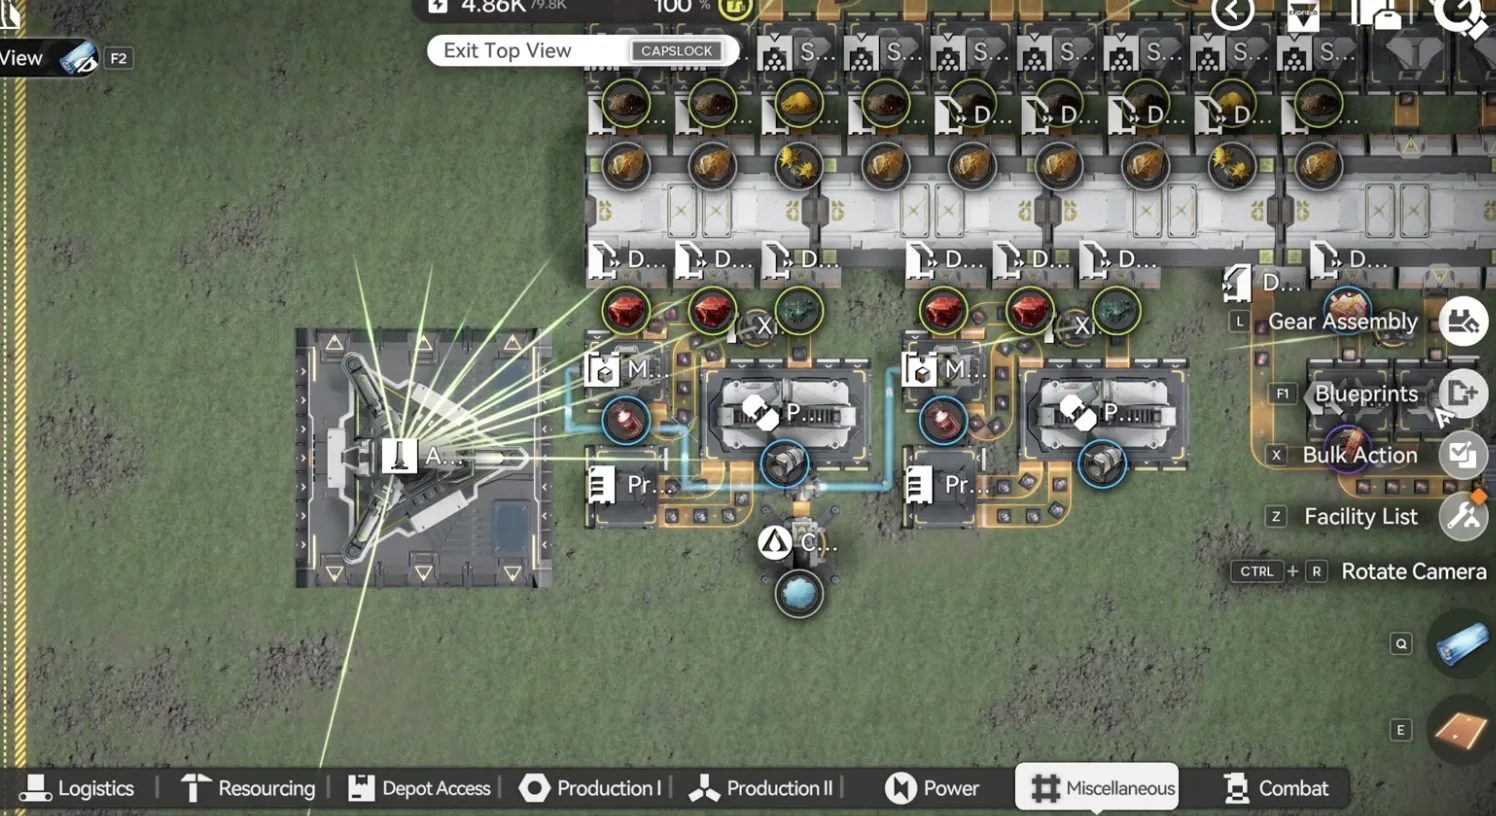
Move the Core to this position
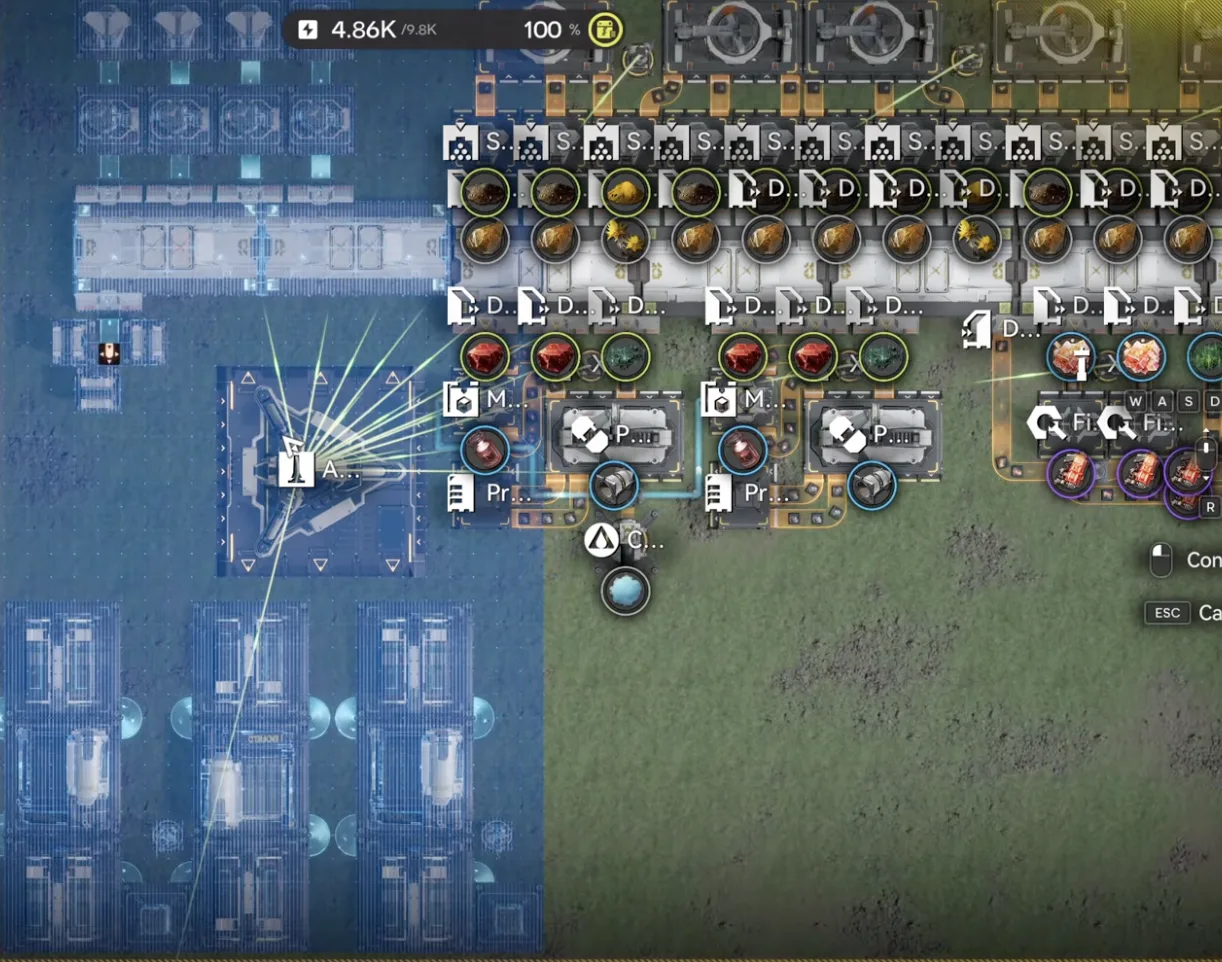
Wuling Alt 1 matching the Depot Bus
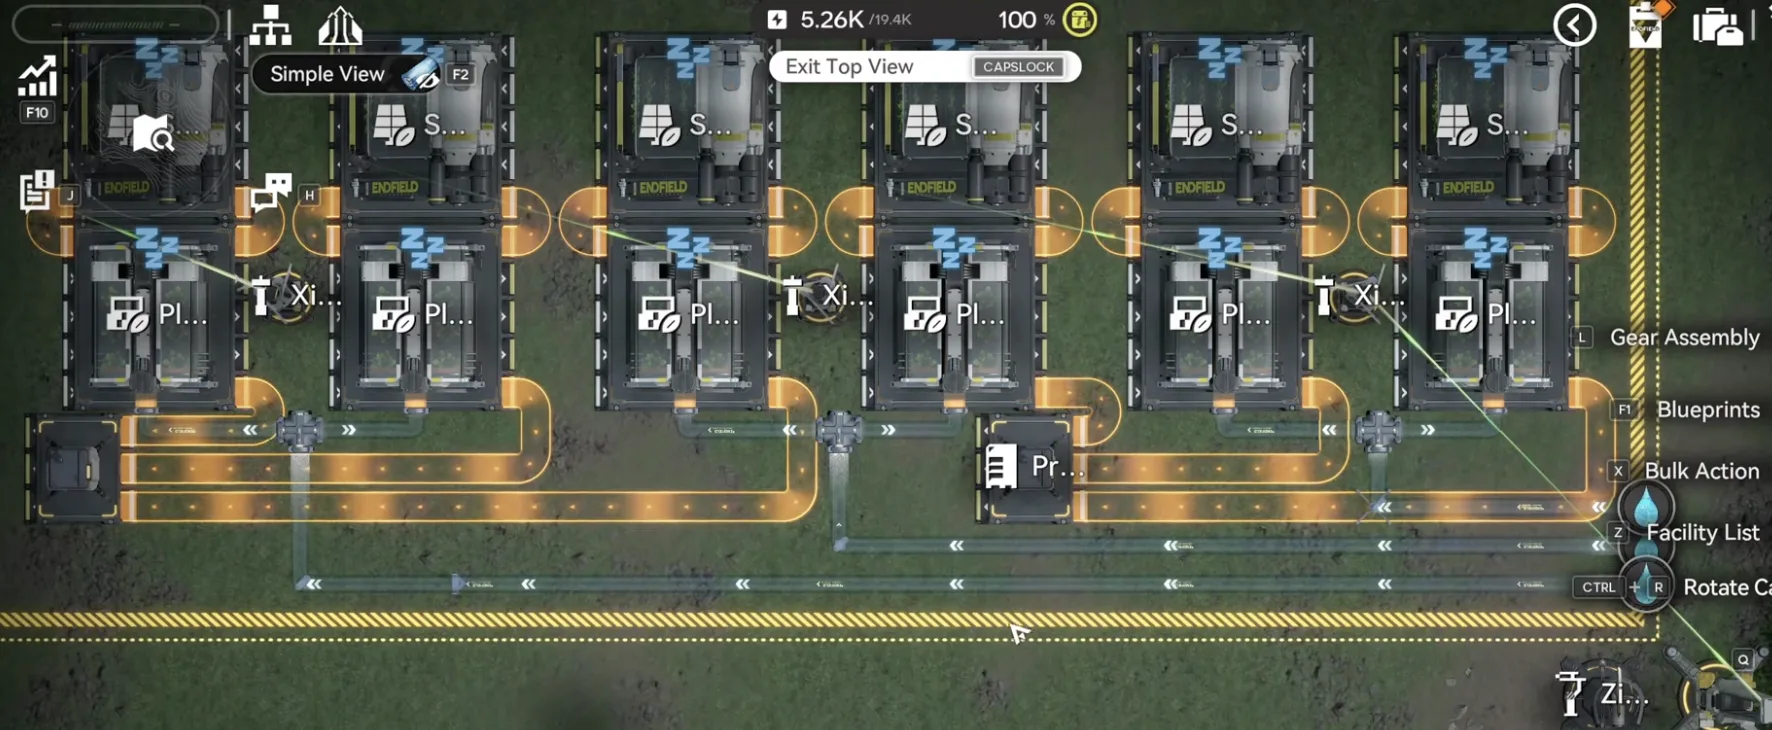
Wuling Alt 2 on the bottom right corner
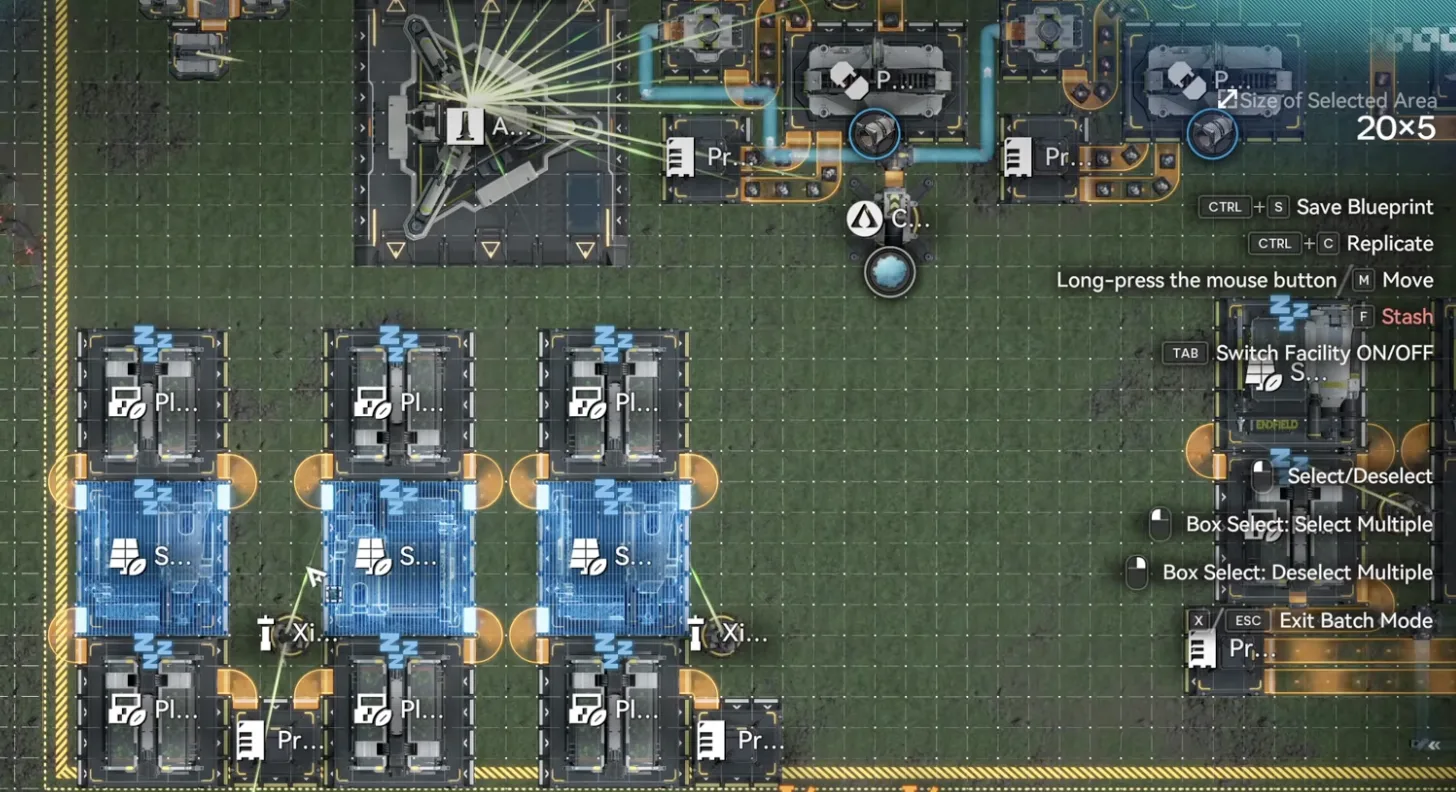
Sandleaf in each of the three seed machines
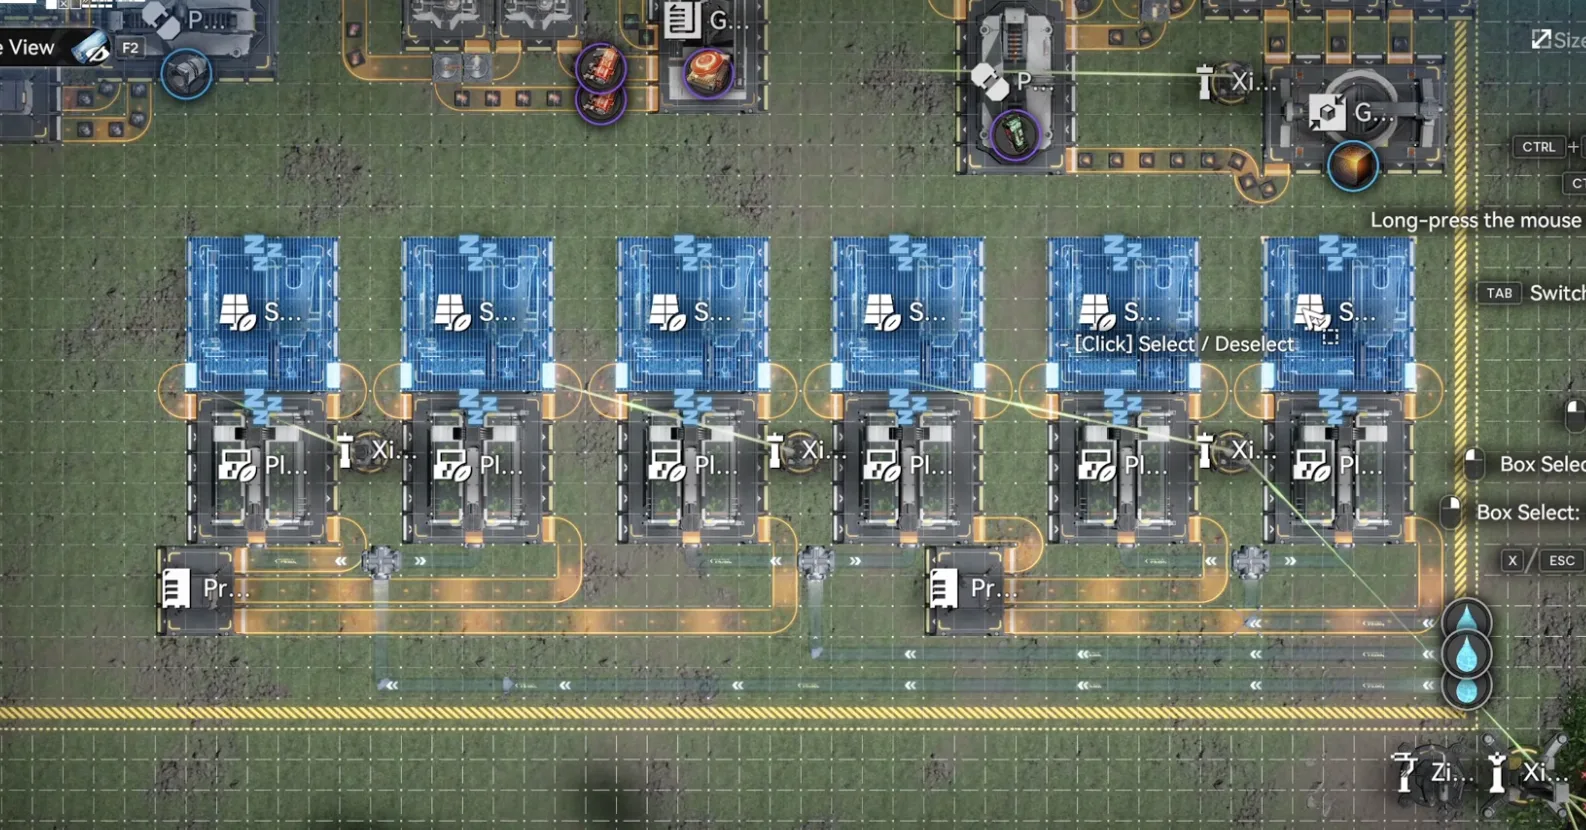
Yazhen in each of the six seed machines on the right
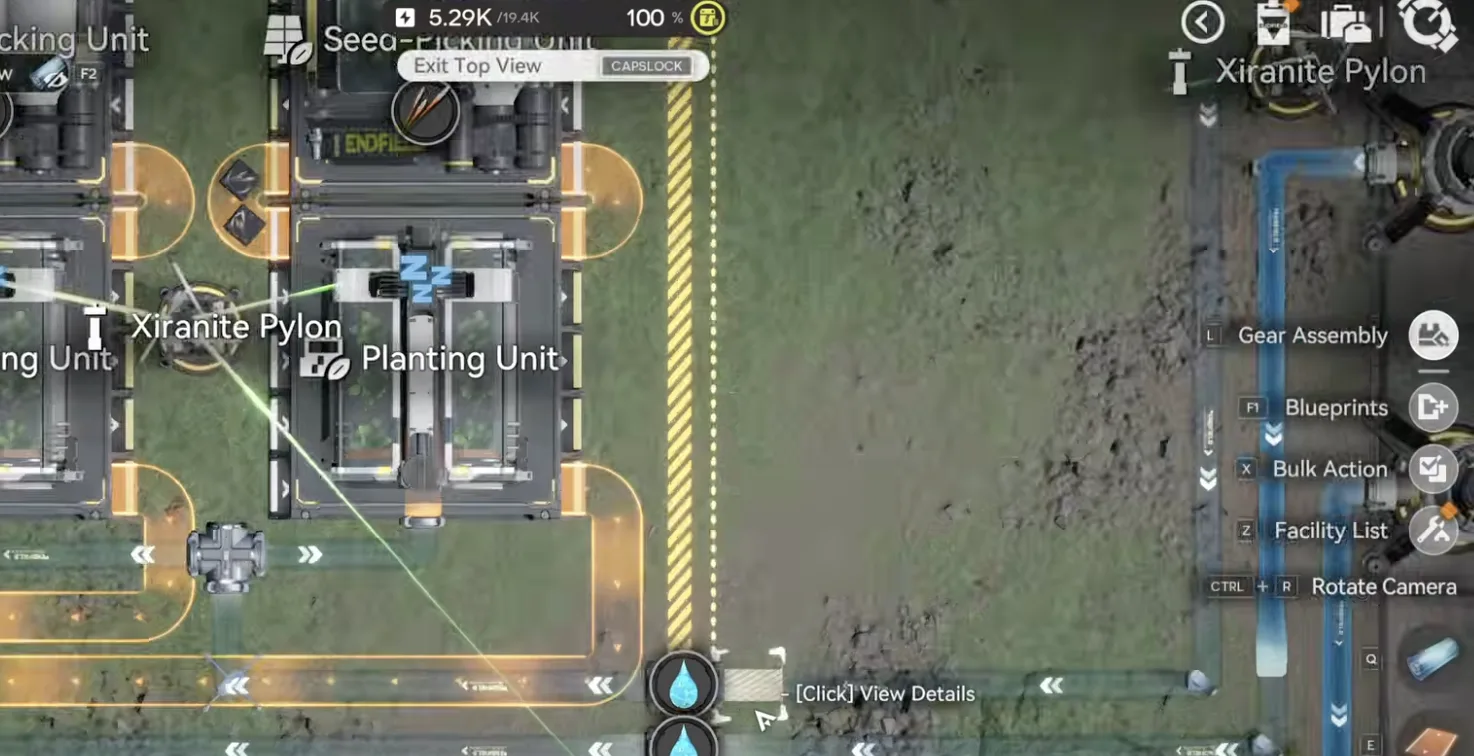
Three Fluid Pumps into the three marked pipes
Option B: Jingyu Valley Sub AIC
If you do not want the Wuling Alt 1 and Alt 2 part in the Core AIC, go to the Jingyu Valley sub AIC instead and face the map with the lake above. Move the Core to the bottom right, place three Fluid Pumps, and deploy the JV Sub AIC blueprint matching the left side. It is fully AFK, so you do not place the crops manually, you just connect the three water Fluid Pumps into the three marked pipes. Then move the Core to take the Ferrous Dust like this and wait a bit for it to start working. Remember, use only one option between Jingyu Valley and Wuling Alt 1 and 2, not both.
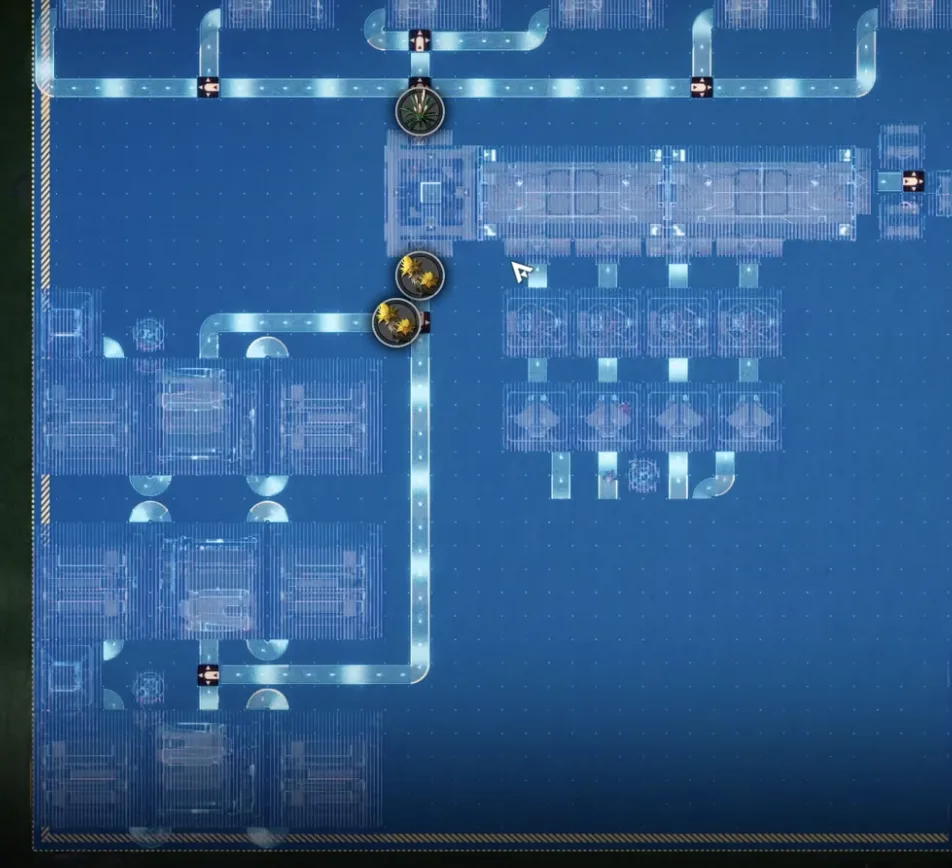
Deploy the JV Sub AIC blueprint matching the left side
Three water Fluid Pumps at Jingyu Valley
Connect the three Fluid Pumps into the three marked pipes
Move the Core to take the Ferrous Dust
Cuprium Zone & Purification Node
Back in the Core AIC area is the Cuprium processing zone. By default the blueprint uses 12 water treatment units to process the sewage. If you do not want to spend that 600 power, you can use the Purification Node blueprint instead. Delete this area without touching the Protocol Stash, then deploy the Purification Node blueprint matching the three pipes coming from the top side, and connect those conduit inlets to the ones linked to the purification nodes in the test area.
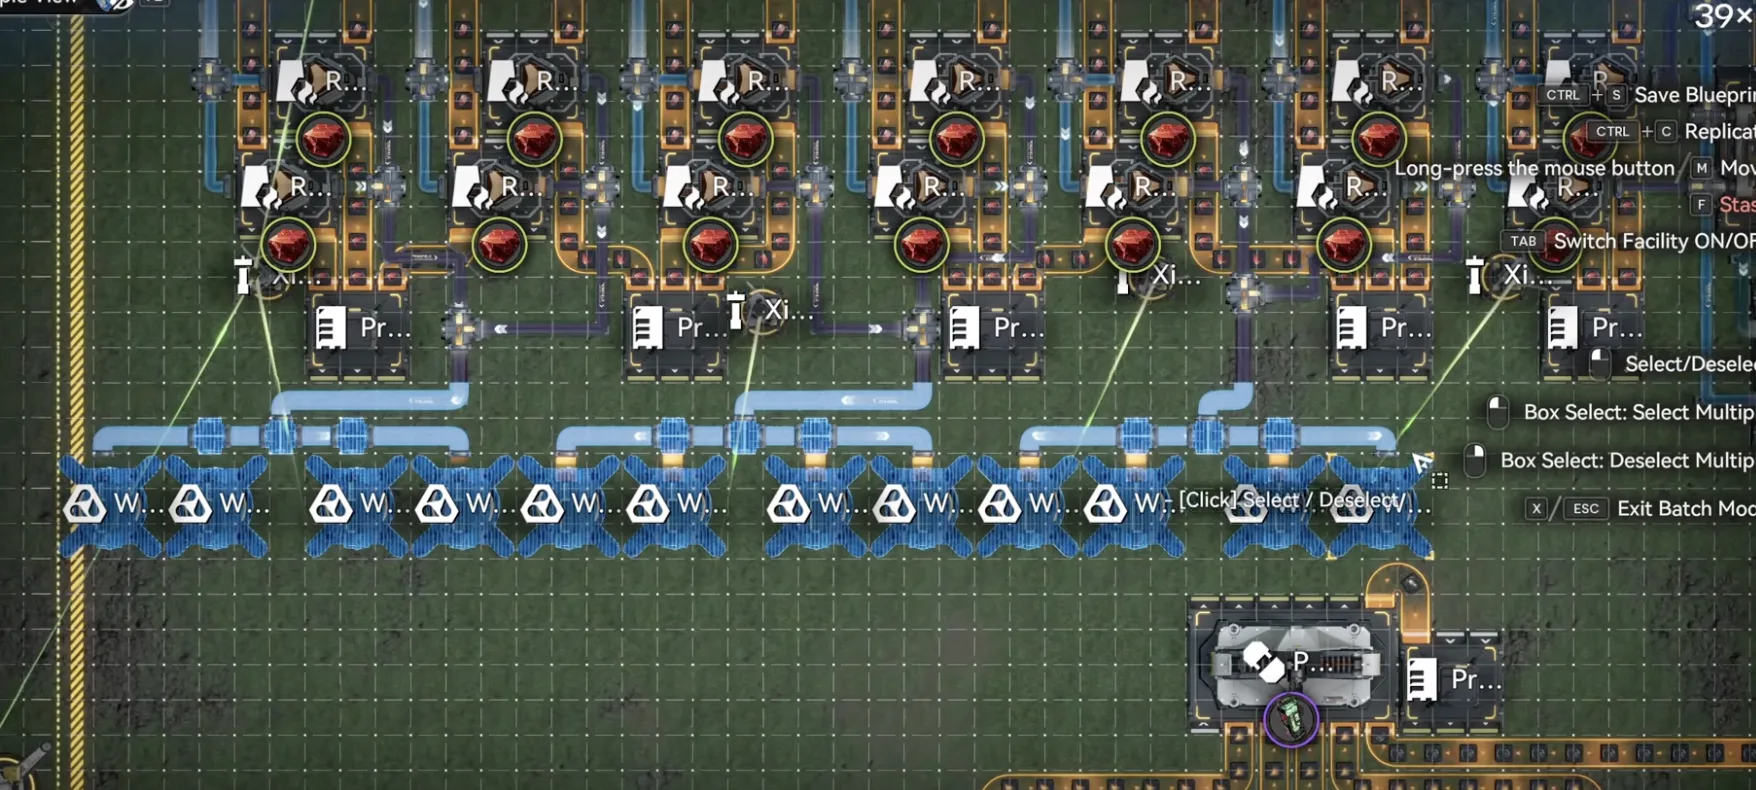
Optional: remove the 12 water treatment units to save 600 power
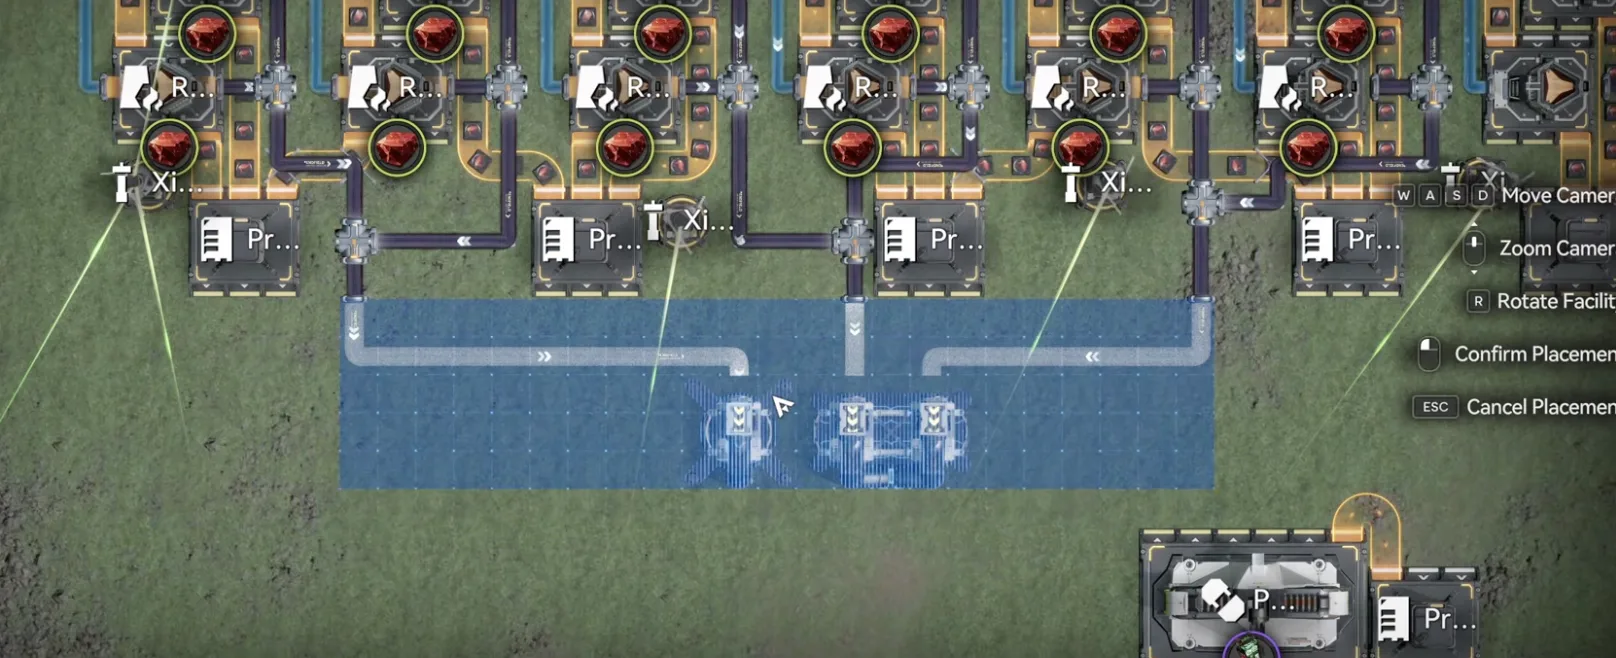
Deploy the Purification Node matching the three top side pipes
Keep repeating the outlet to inlet connection until you reach the destination in the test area shown below. You do not need to drag the Xircon effluent back, it is basically useless since we do not have the spare Originium Ore to turn it into more batteries, so just leave it there. Use this plugin only if you want to process sewage with the Purification Node instead of the 600 power water treatment units. It is not a big issue, so if you are lazy just leave the blueprint default in place.
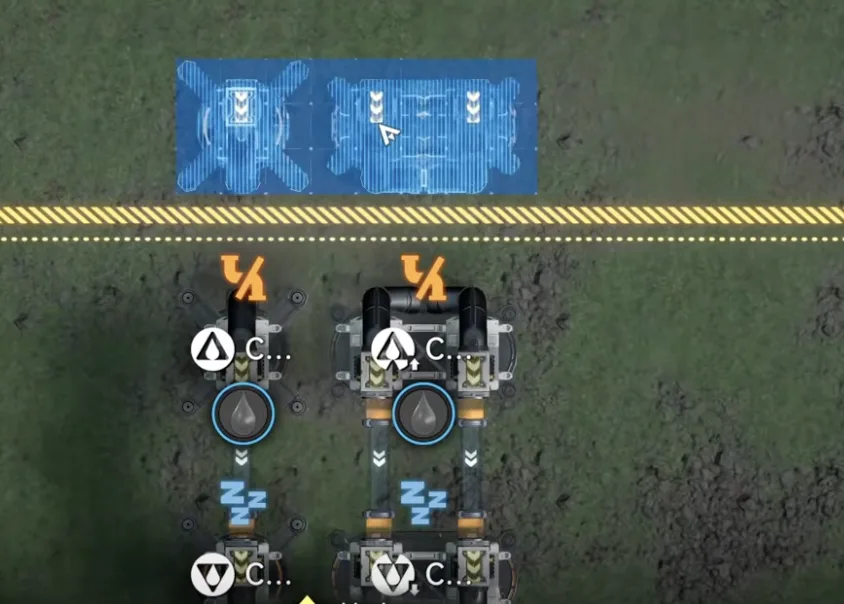
Repeat the inlet to outlet connection toward the test area
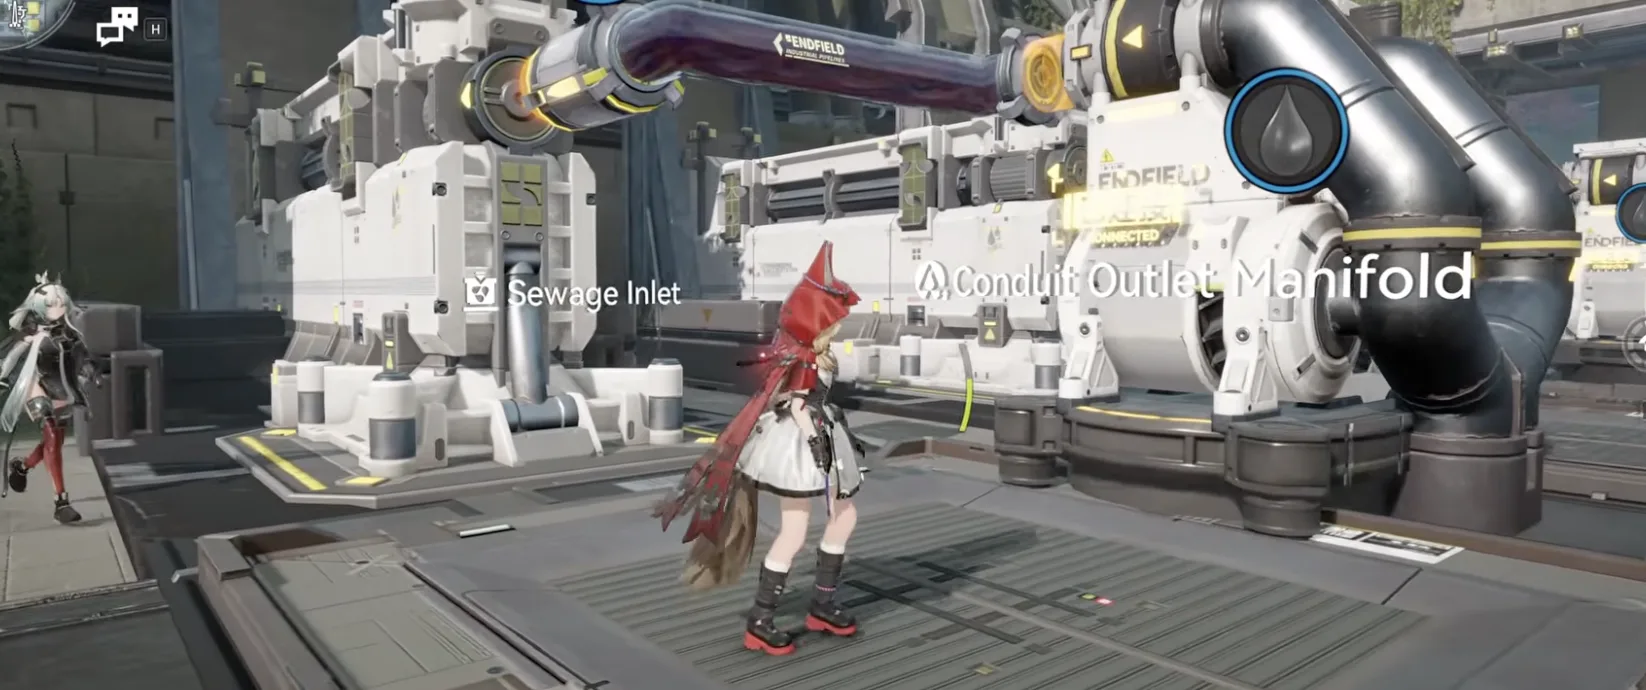
Final Purification Node connection at the test area
Yinglung Pass Outpost
This outpost has the longest preparation phase. You need to prepare these conduit outlets first: one 20 per minute Inergen outlet (one Gas Extractor into an inlet), one water Fluid Pump outlet from the right side, one acid Fluid Pump outlet from just below the normal lake, and the hardest one, a 100 per minute Xiragen outlet.
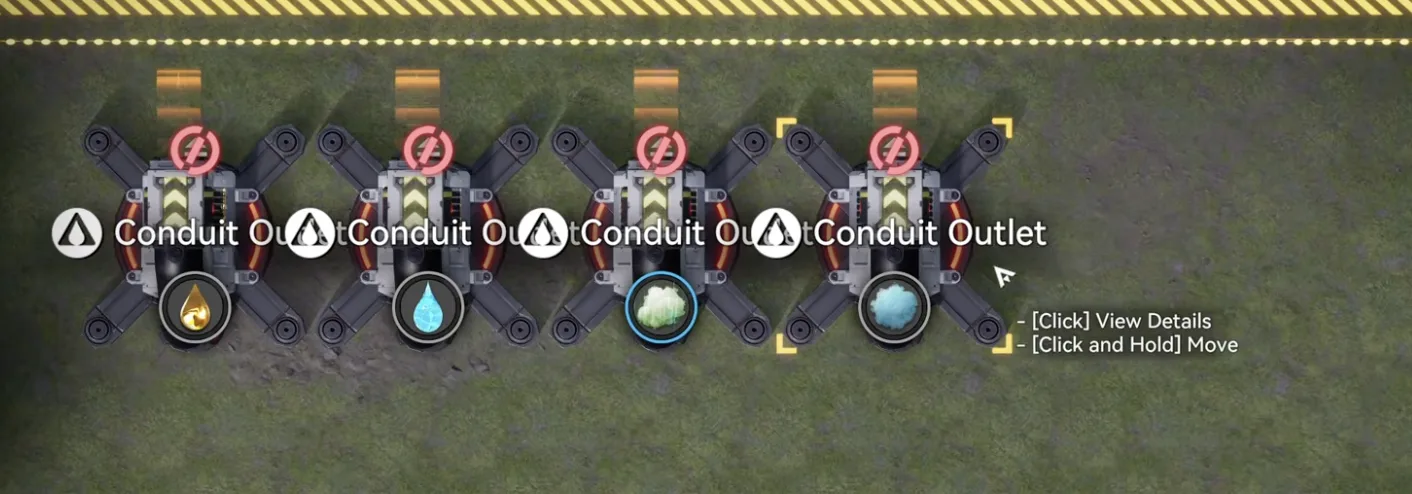
Prepare the conduit outlet connectors first
20 per minute Inergen, one Gas Extractor into an inlet
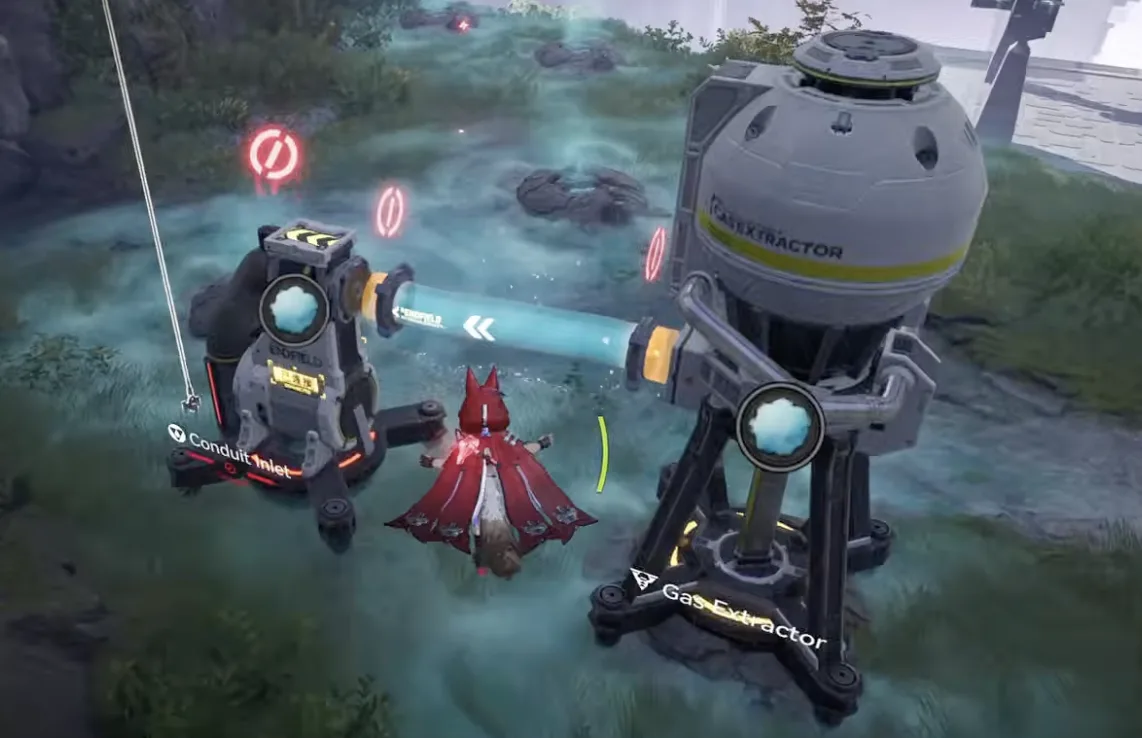
20 per minute Inergen single connection
Water Fluid Pump outlet on the right side
Acid Fluid Pump, just below the normal lake
The 100 per minute Xiragen line
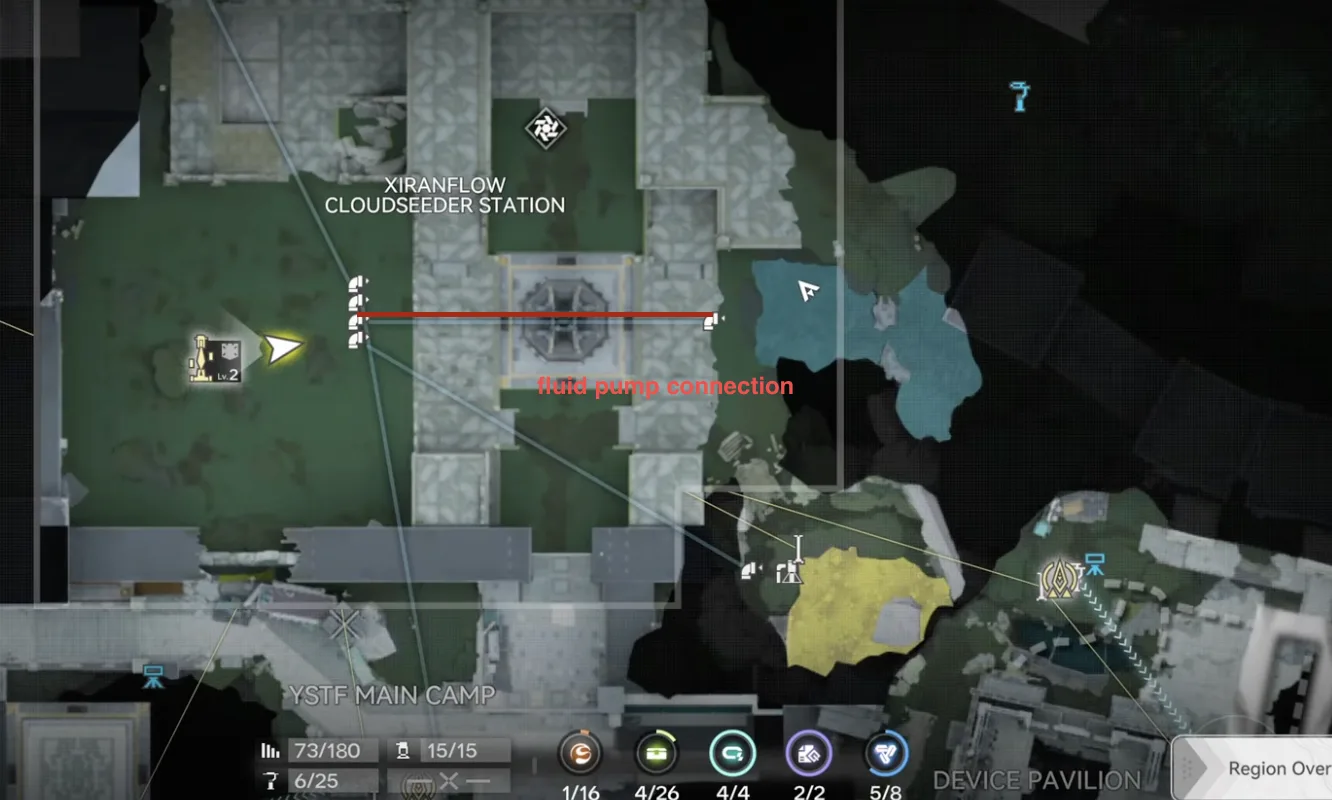
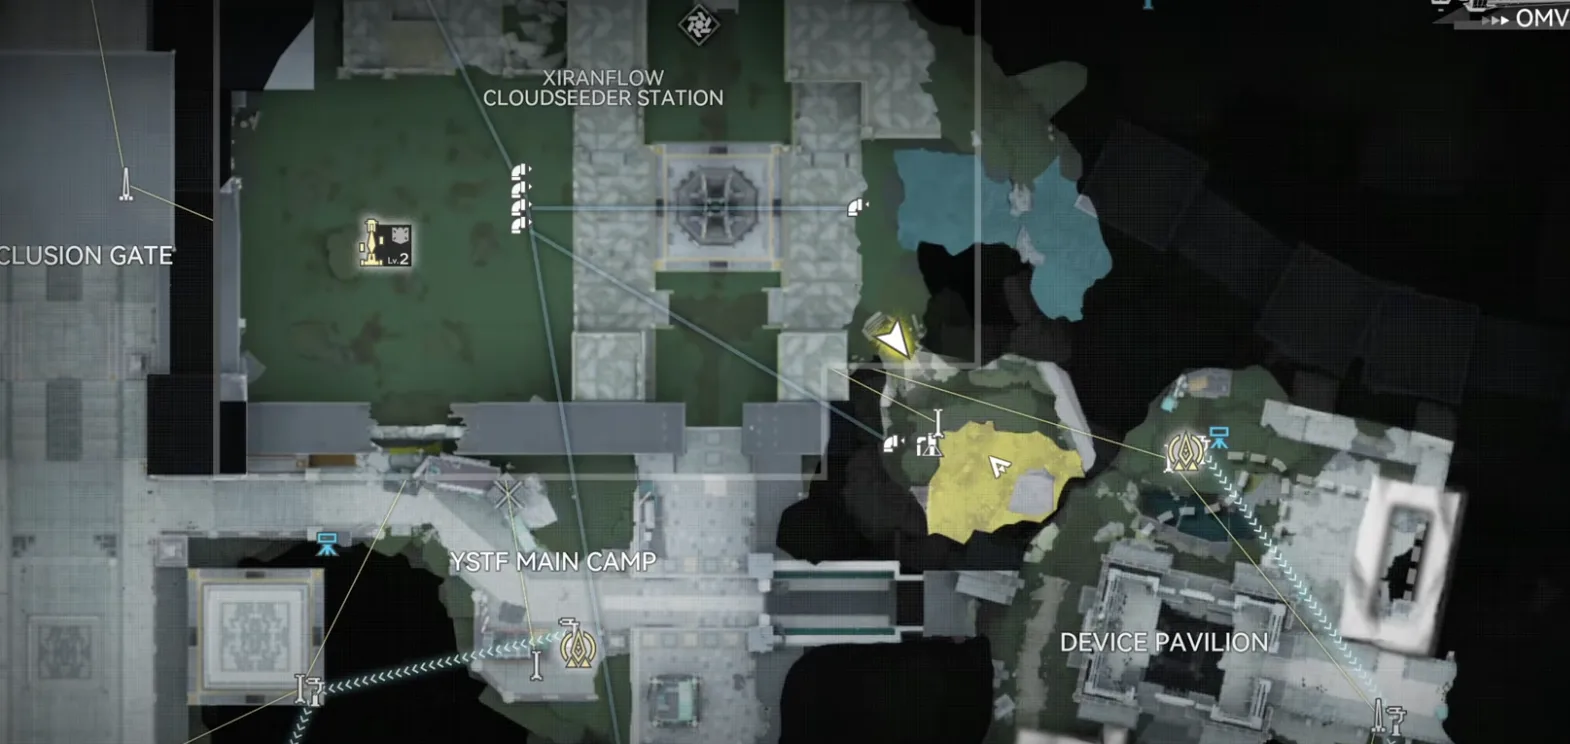
The North Wulling Exclusion Zone has three Xiragen spots, and the last two are locked behind the Fissure quest. Merge all the Gas Extractors into one single pipe and it becomes a 100 per minute Xiragen output. Start from the furthest spot: one extractor into a conduit inlet, use the teleport waypoint at the Xiranite Research Labs as the connection (outlet into another inlet), and repeat until you reach the location on the left side. Combine the two new Gas Extractors and the outlet into one pipe with the converter (press Z, facility list, converter), then into another inlet.
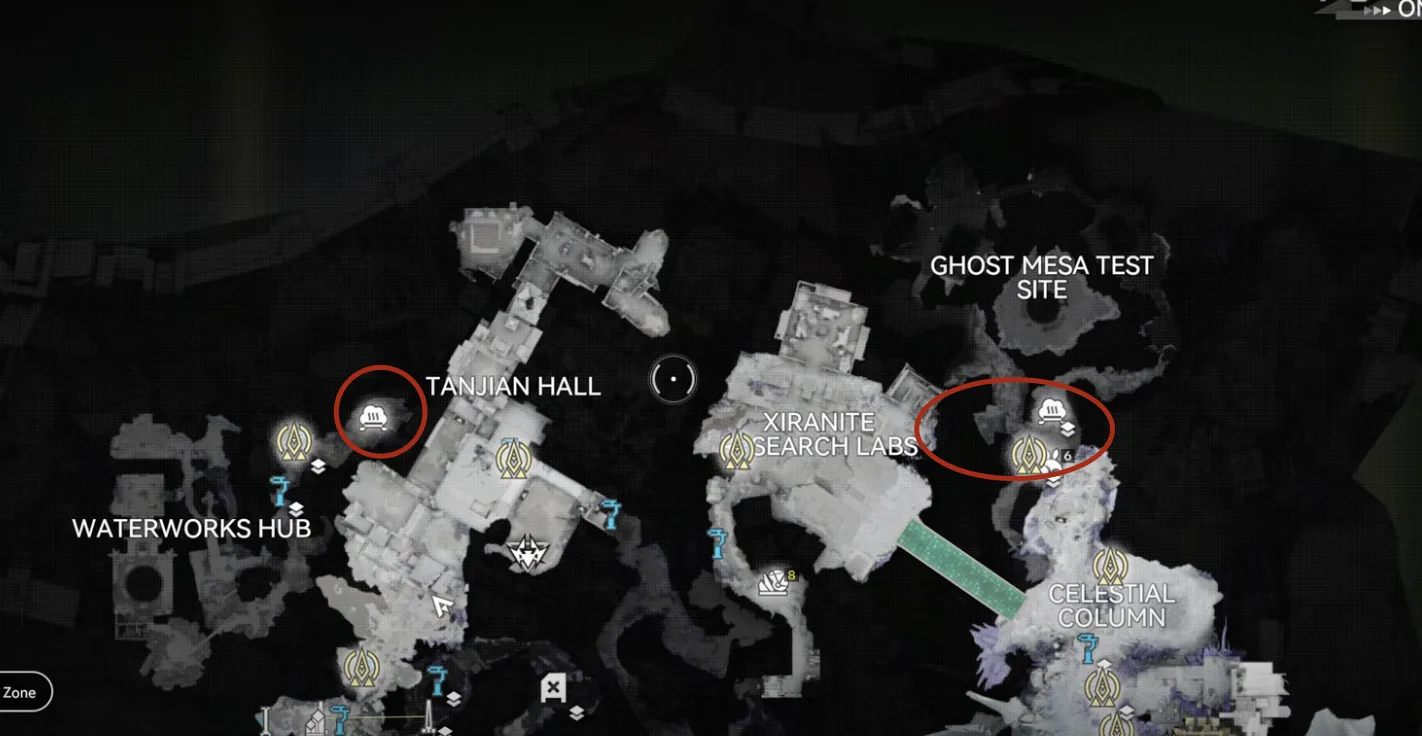
Three Xiragen spots, the two locked ones open after the Fissure quest
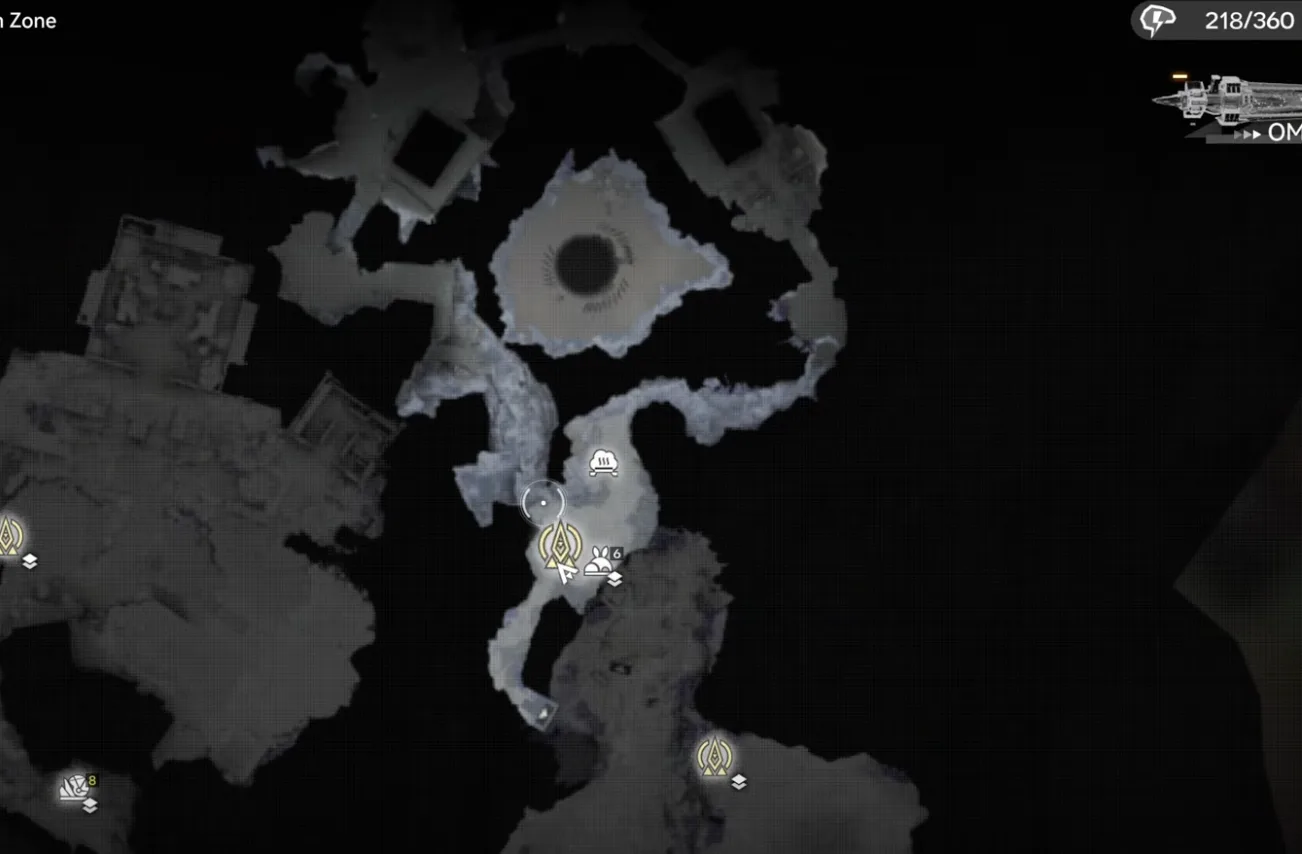
Start from the furthest Gas Extractor
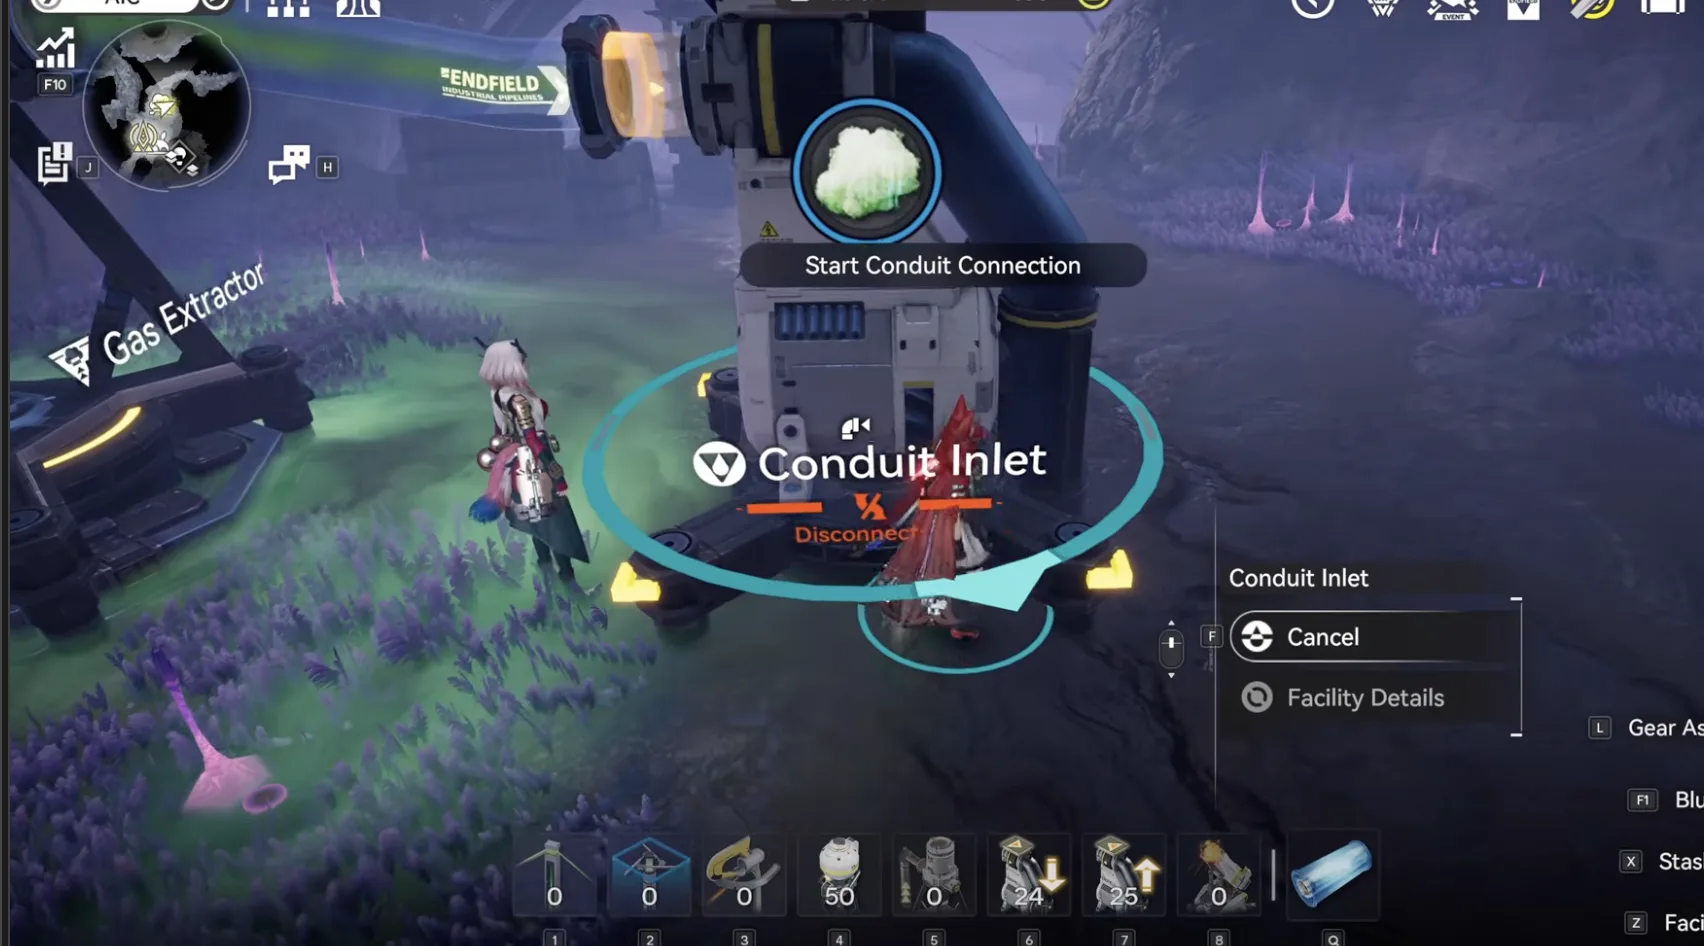
Furthest extractor into a conduit inlet
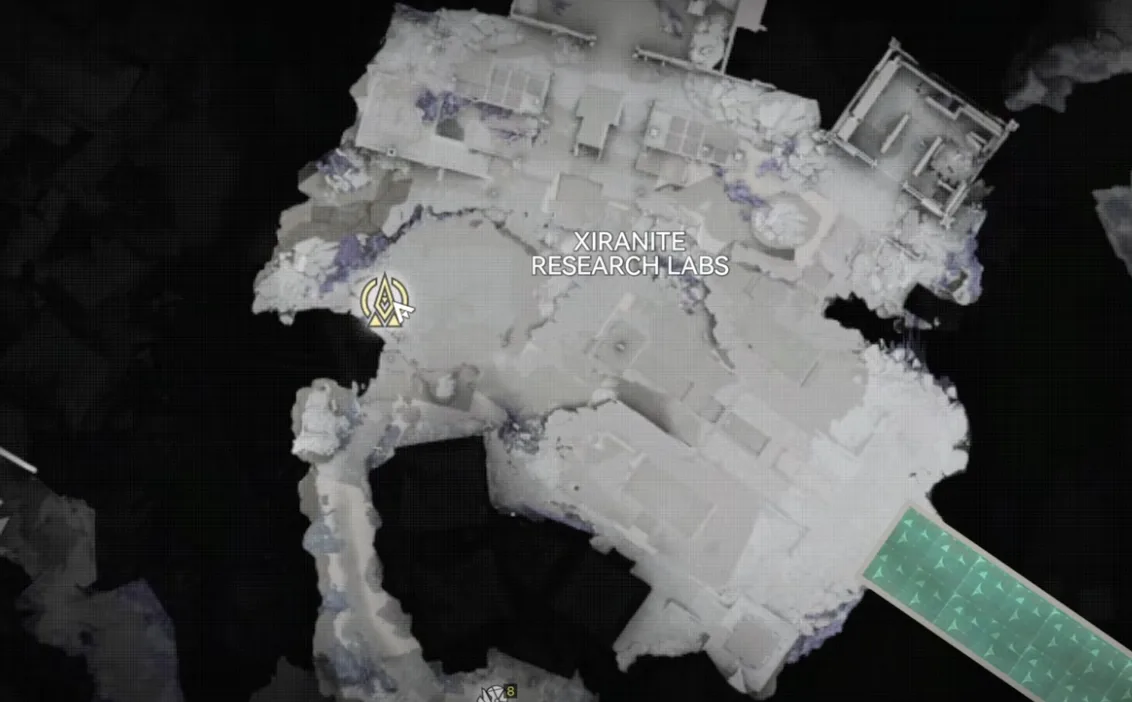
Teleport waypoint at Xiranite Research Labs
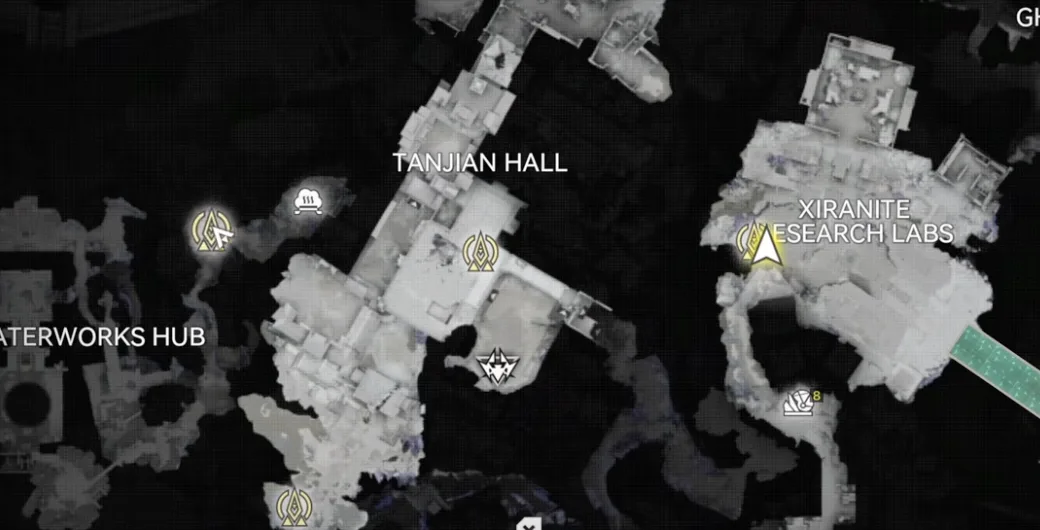
Second extractor location near Tanjian Hall
Combine the two new Gas Extractors and the outlet into one pipe with the converter, then into another inlet. Now teleport to the waypoint above the Designated Urban Area, outlet into inlet again, and go to the last location, the Sentry Base. Merge the two new Gas Extractors and the outlet into the last single pipe, then into another inlet. Finally, start the connection and teleport back to the sub AIC to connect the final outlet. You now have a 100 per minute Xiragen output at the base.
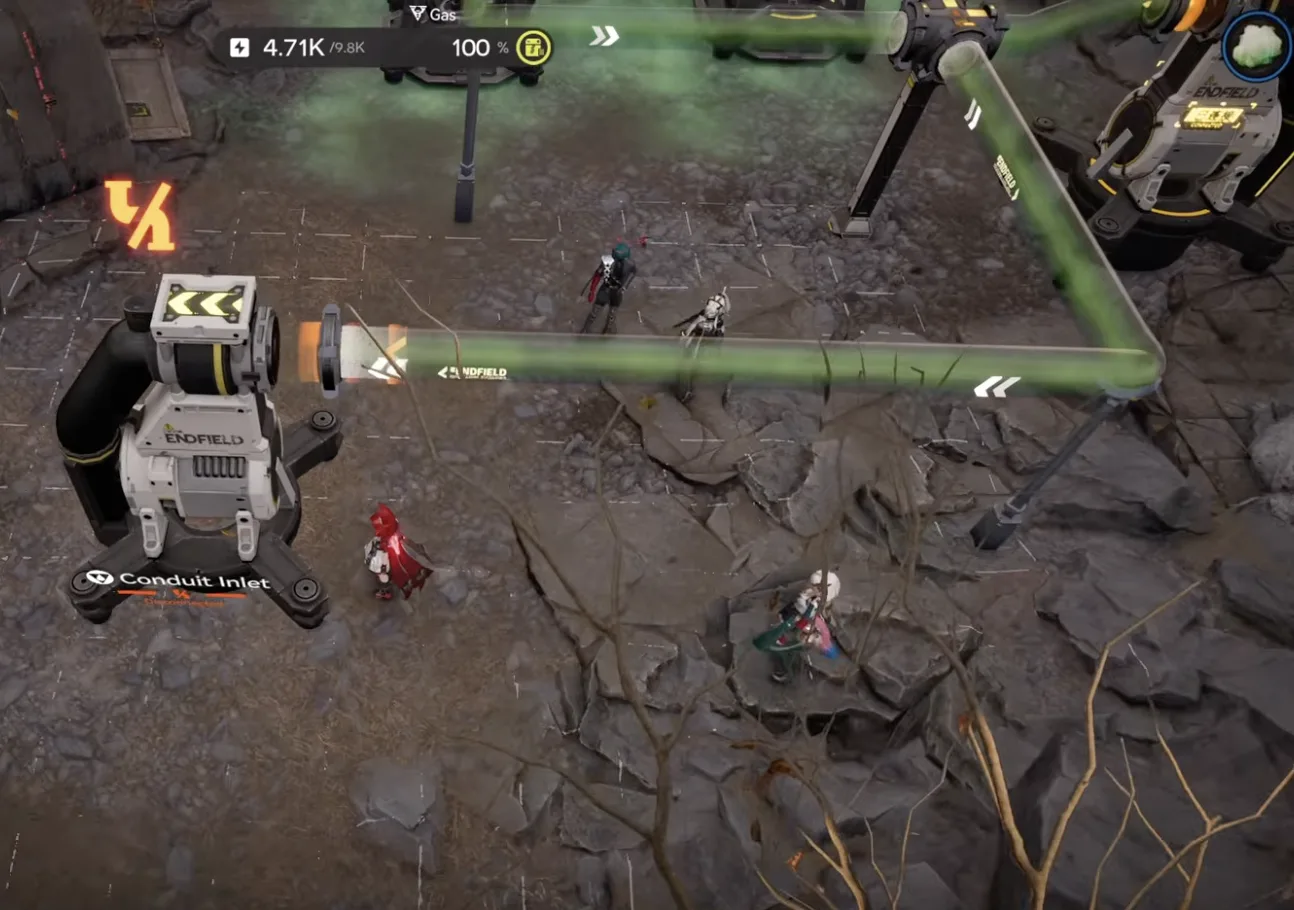
Converter merges two extractors and the outlet into one pipe
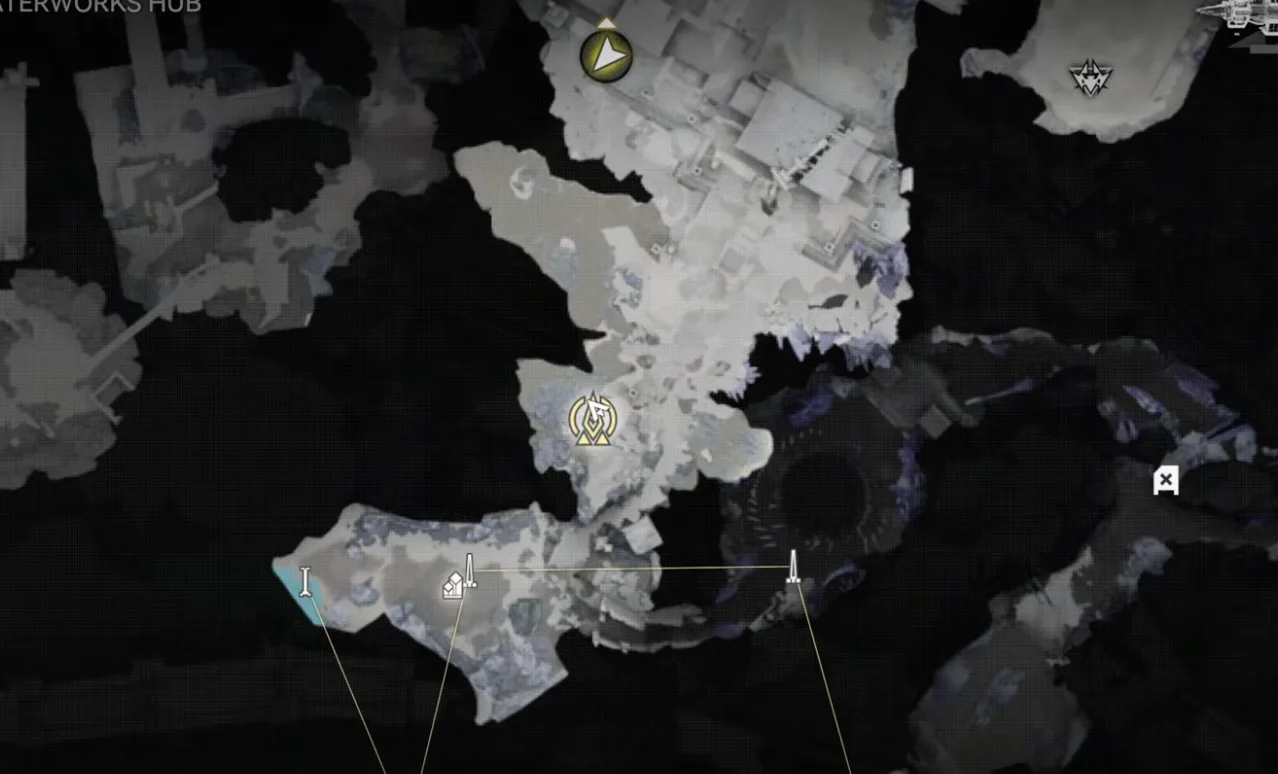
Teleport above the Designated Urban Area to extend
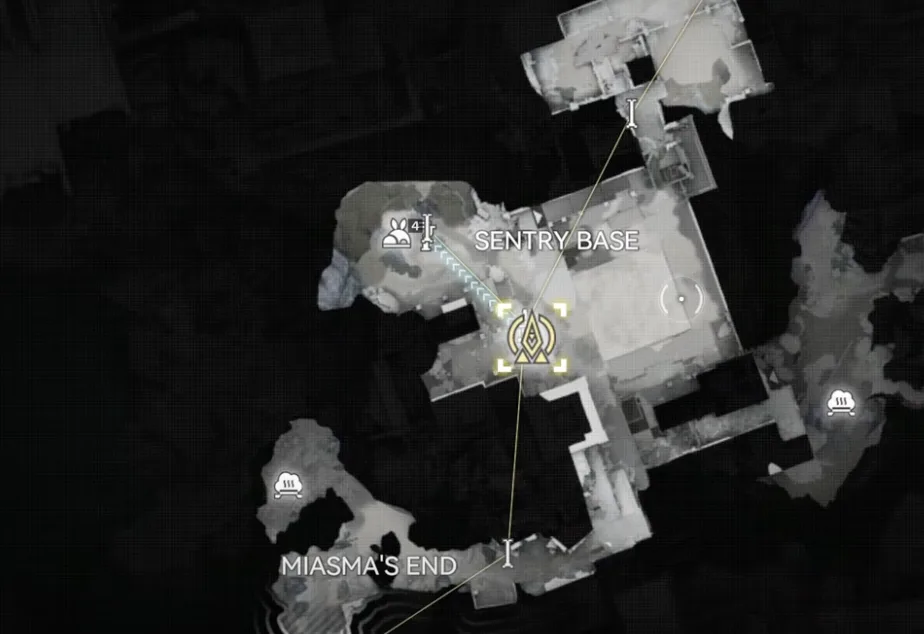
Last merge at the Sentry Base
Deploy and connect Yinglung Pass
Once all the conduit outlets are prepared, put them to one side together. Move the Core to the most bottom left side and deploy YP Bottom on the most bottom side. Then place YP Top above it, matching the Depot Bus.
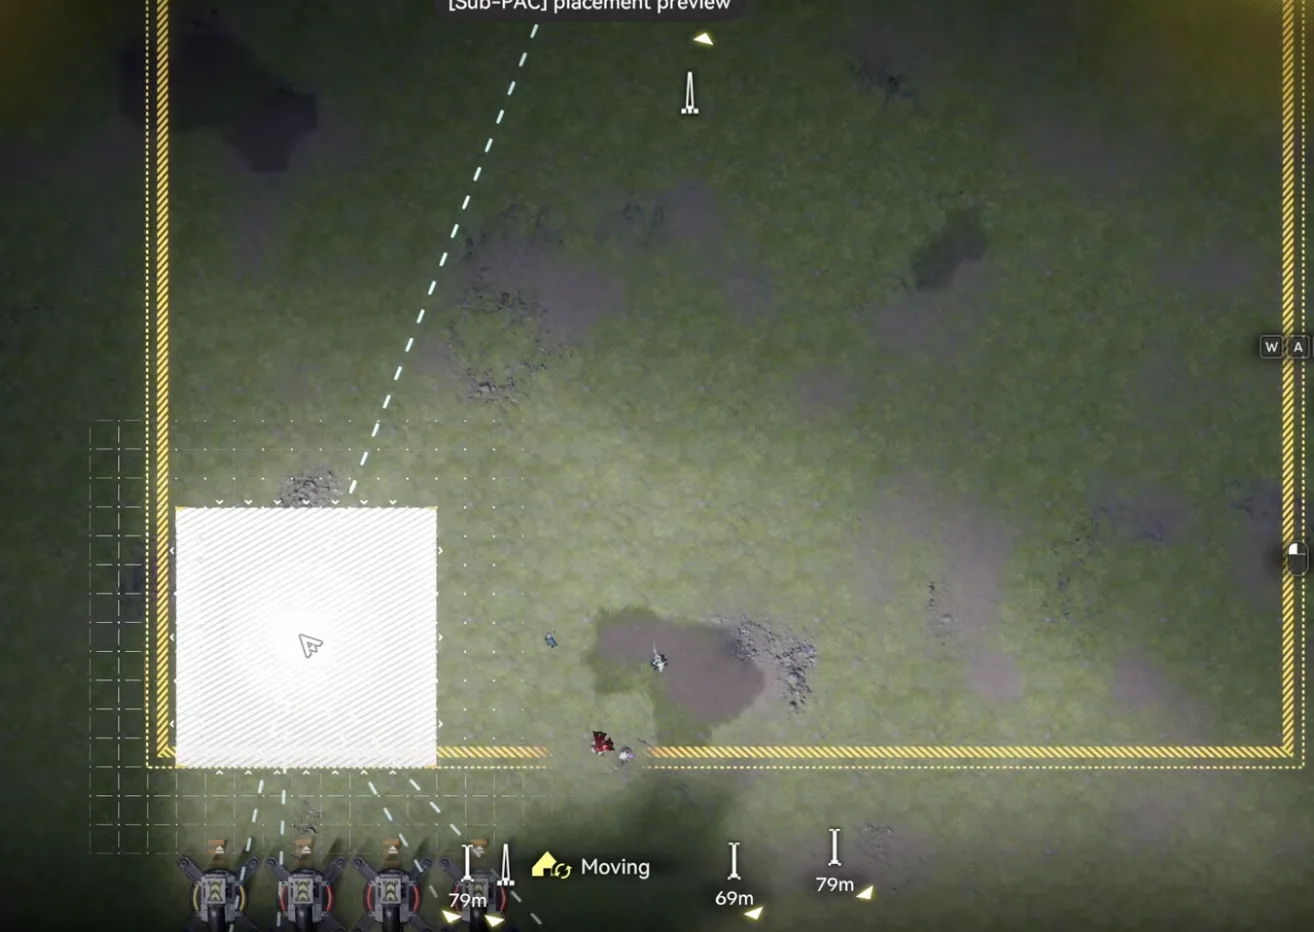
Move the Core to the most bottom left
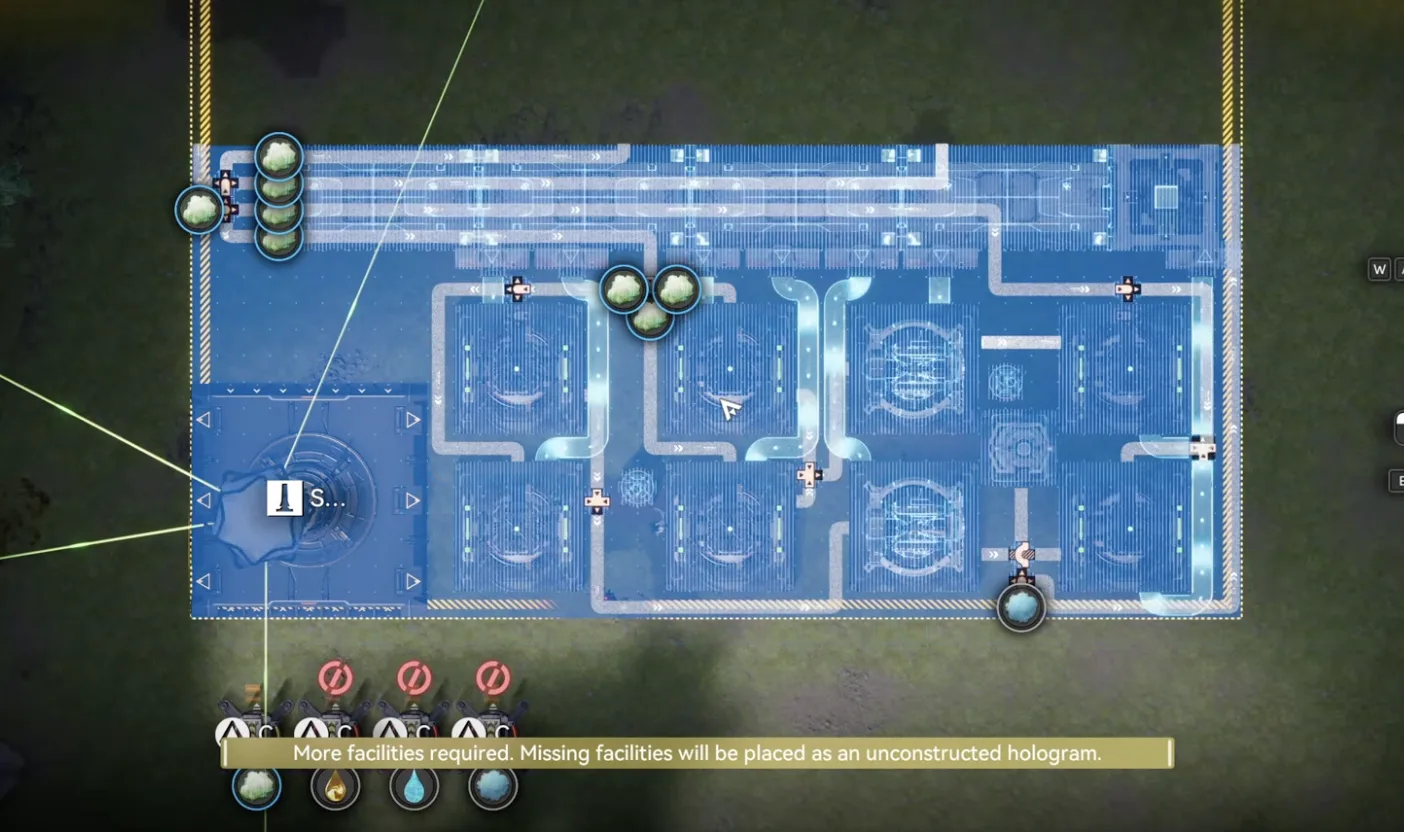
YP Bottom on the most bottom side
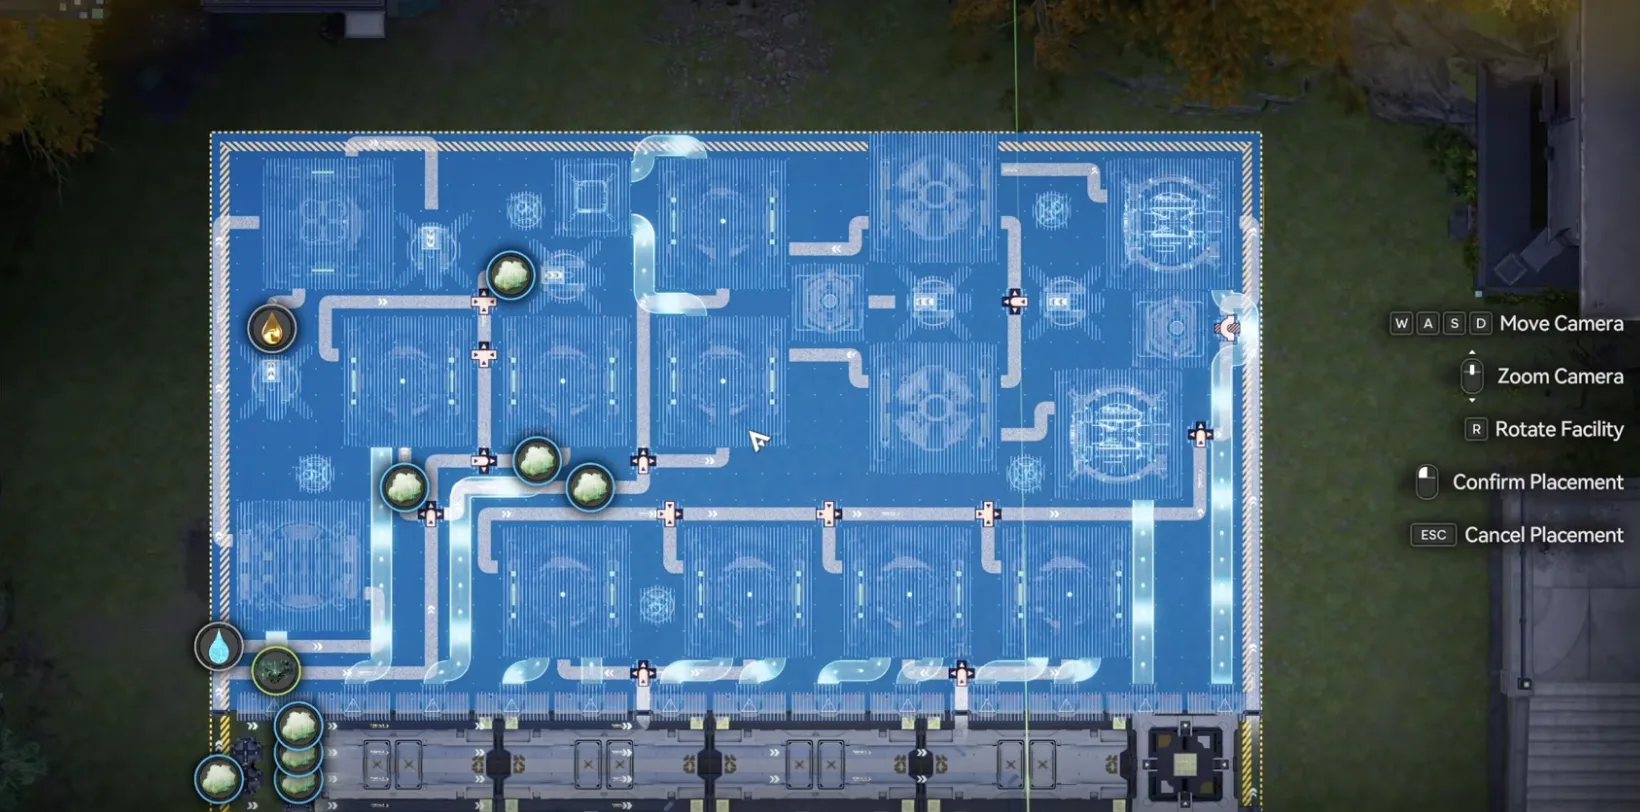
YP Top above it, matching the Depot Bus
Now listen carefully. On the bottom side you see the Inergen icon, so move the Inergen outlet and pipe to this input on the left. Move the Xiragen outlet and pipe to this input. Right above, you need a water input, so move the water outlet here and connect it. Finally, on the top left side, replace this conduit outlet with the acid outlet that actually works, the one you prepared earlier, and make sure they are all working.
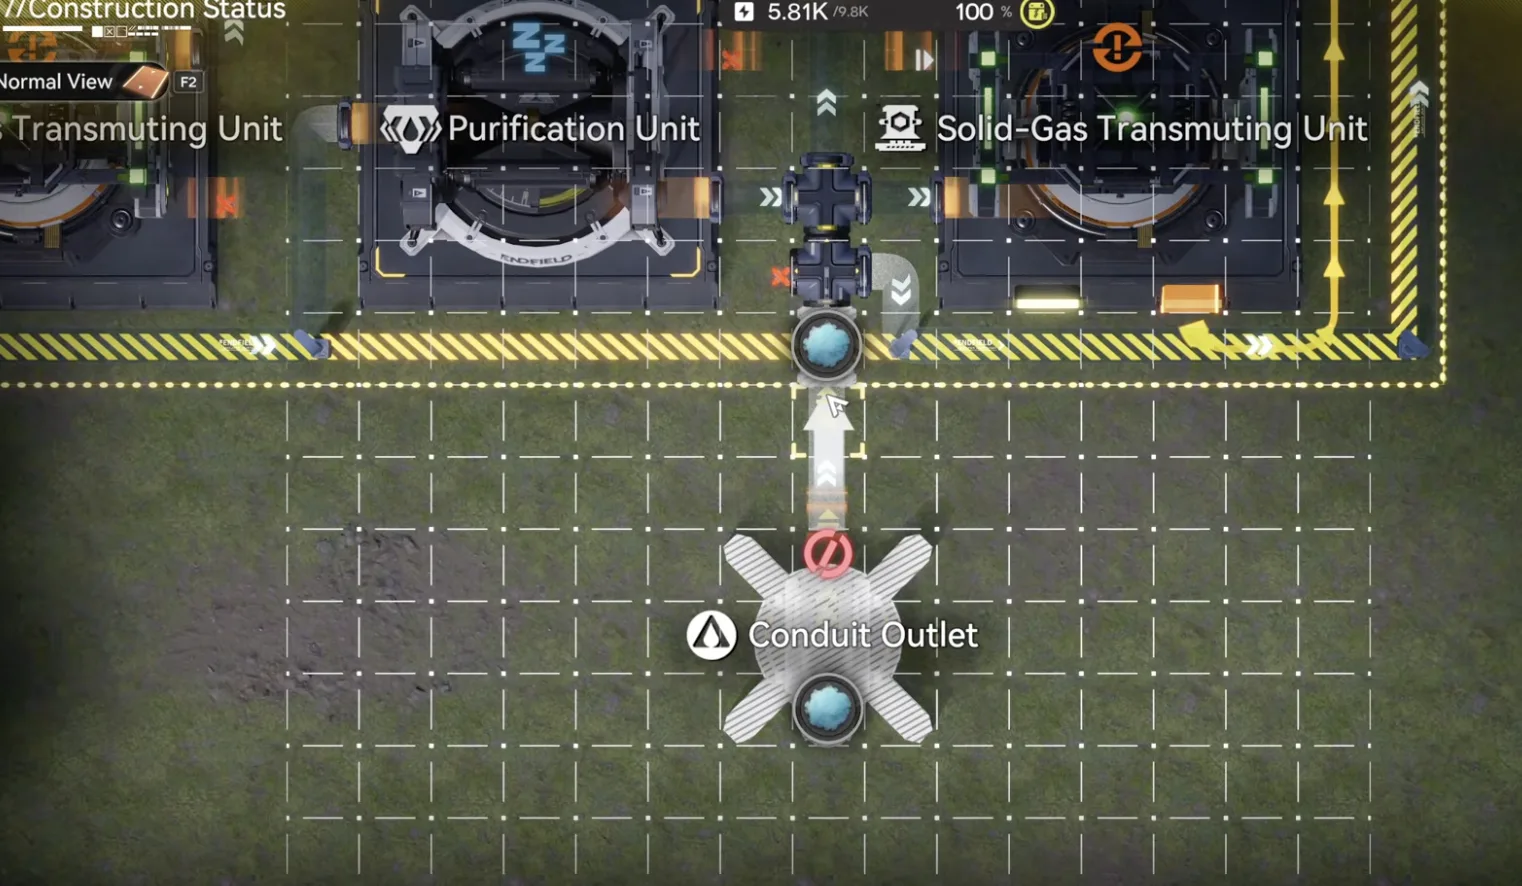
Inergen outlet into the bottom side input
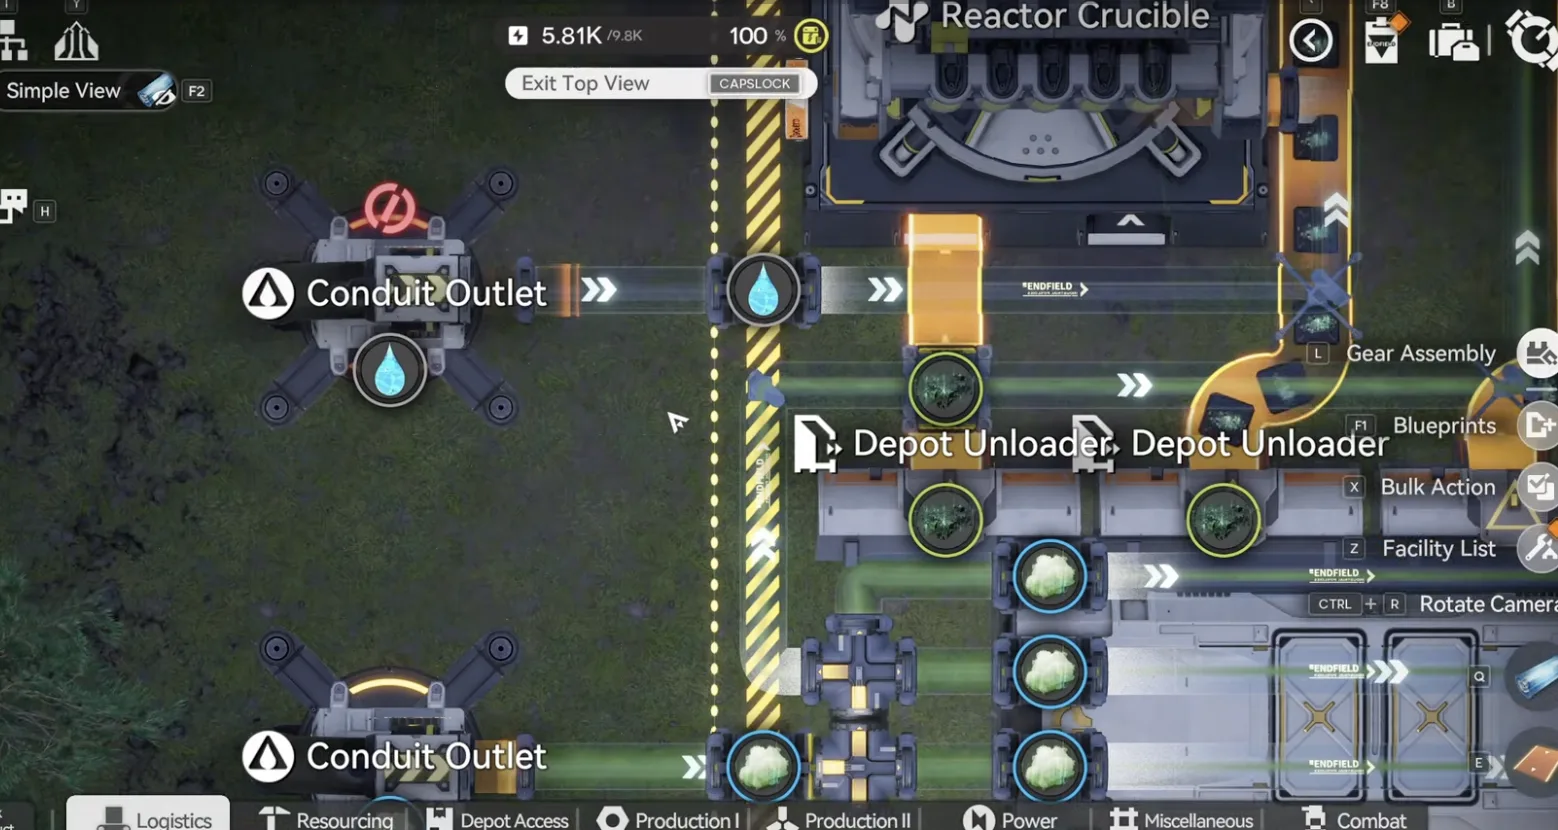
Xiragen and water outlets on the left hand side
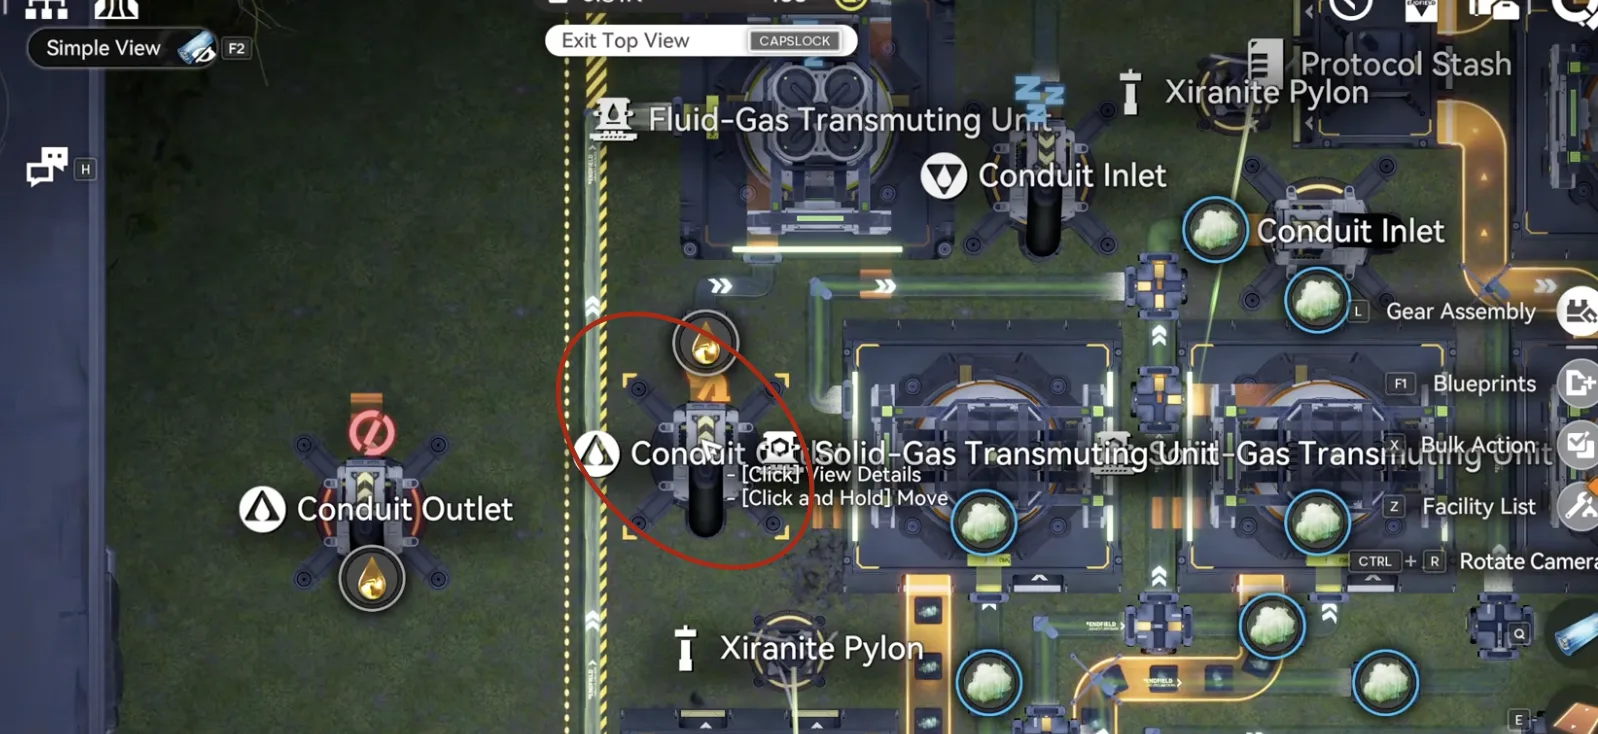
Replace the top left acid outlet with the working one
Extra Blueprints (1 & 2)
Go back to the Marker Stone sub AIC and remove the temporary Thermal Banks. So far the base uses most materials, but two lines of Cuprium (60 per minute) are unused. You get two options here, and both make the same side products, only the main item changes.
Extra 1: Syringe or Tea
If you want some Syringe or Tea for personal use or to sell, use the Extra 1 blueprint. Deploy it above the Depot Bus toward the right side, drag the seventh water pipe into this input, place one acid resistant pump, and connect it to the other acid input on the top side. Then put one stack of Yazhen or Jin Cao in this seed machine depending on which healing item you want. The output is already set up for both types, so no need to worry. Delete this conduit outlet and replace it with the Inergen outlet you prepared at the beginning. Turn off this Protocol Stash and set it to storage mode. Move the Core to this corner and set the top right side output as Heavy Xiranite.
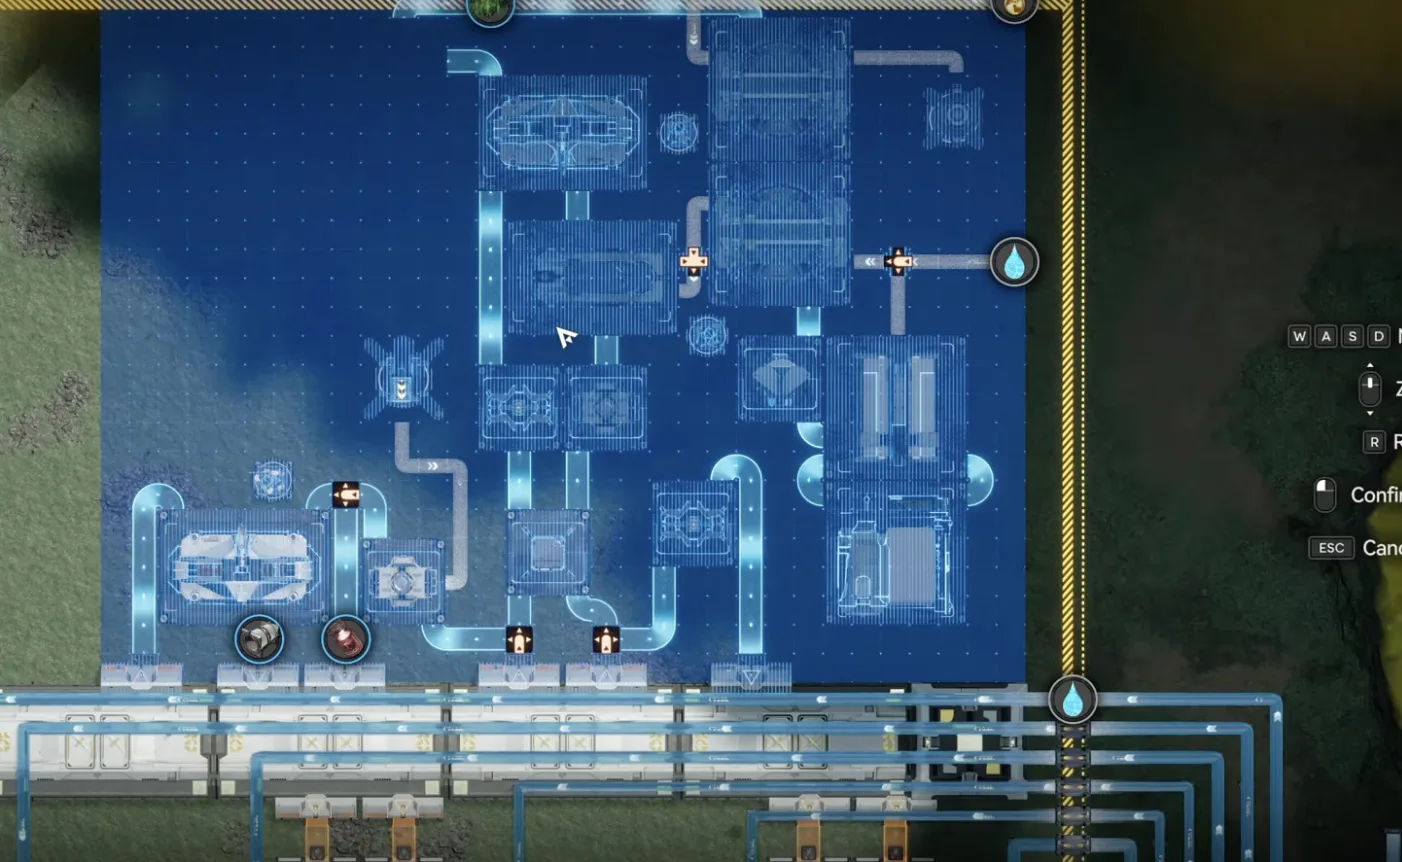
Deploy Extra 1 above the Depot Bus, toward the right
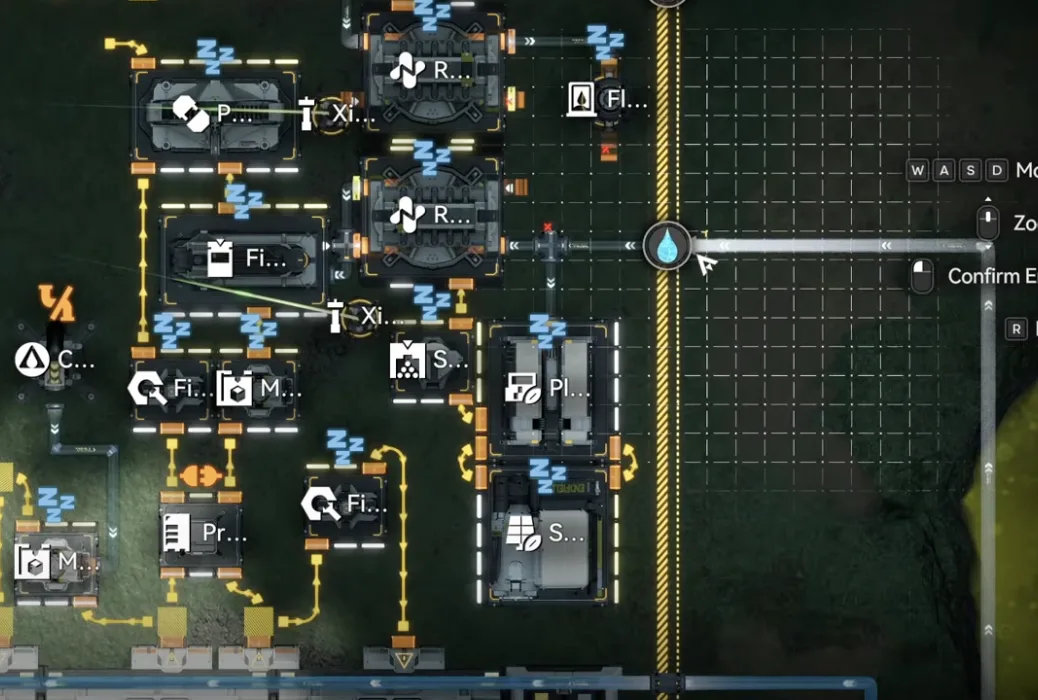
Drag the seventh water pipe into the input
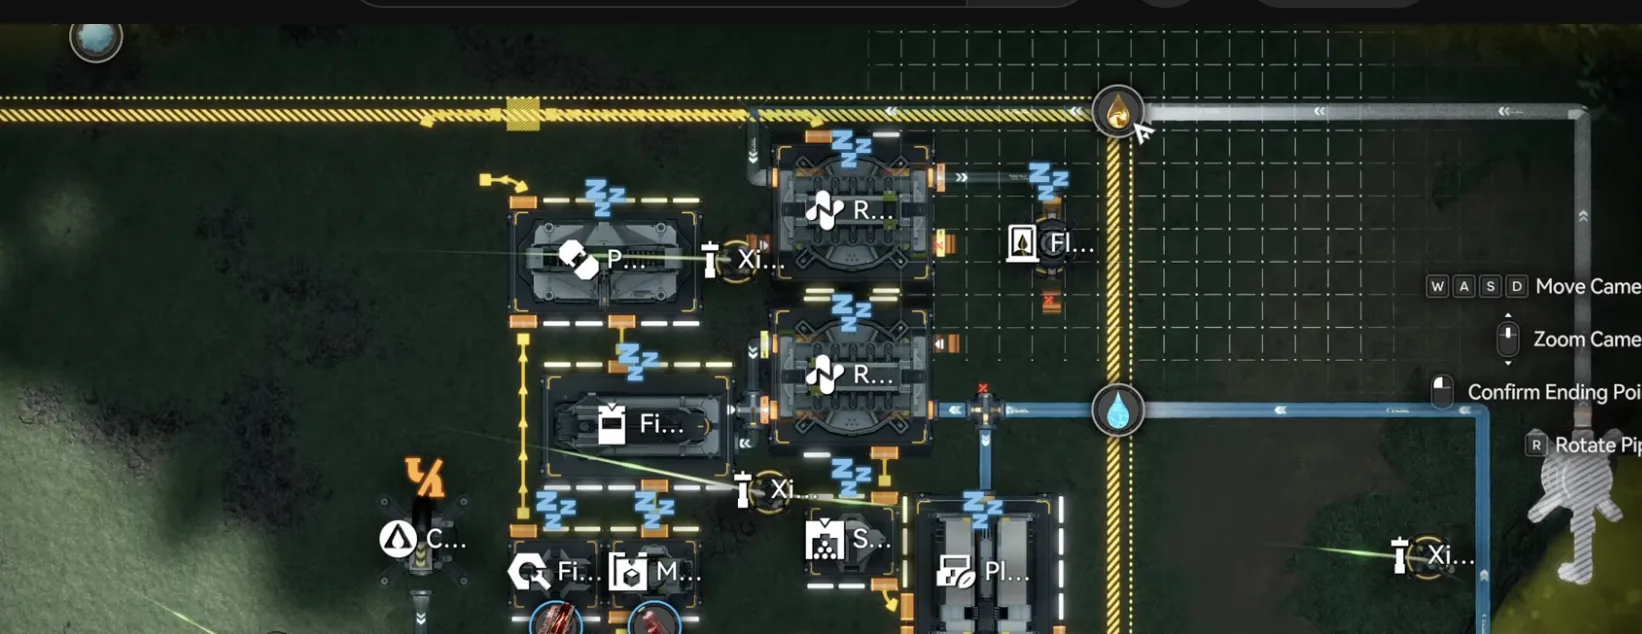
Acid resistant pump into the other acid input
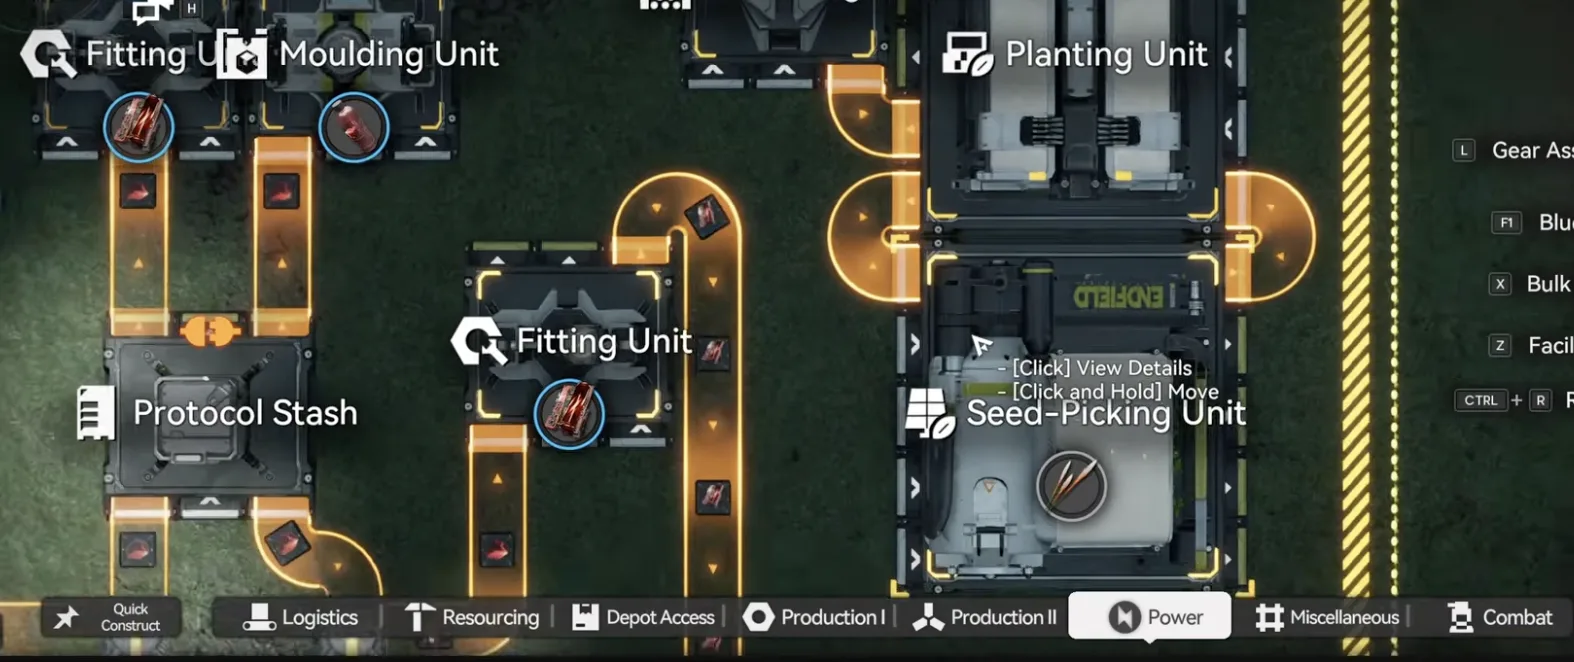
Yazhen or Jin Cao seed, depending on the healing item
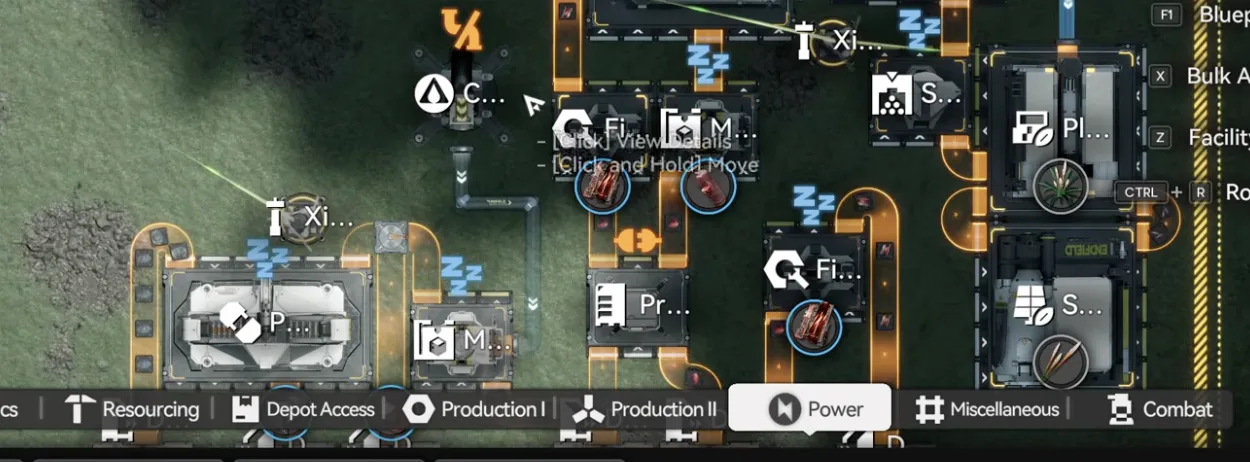
Replace the conduit outlet with the prepared Inergen
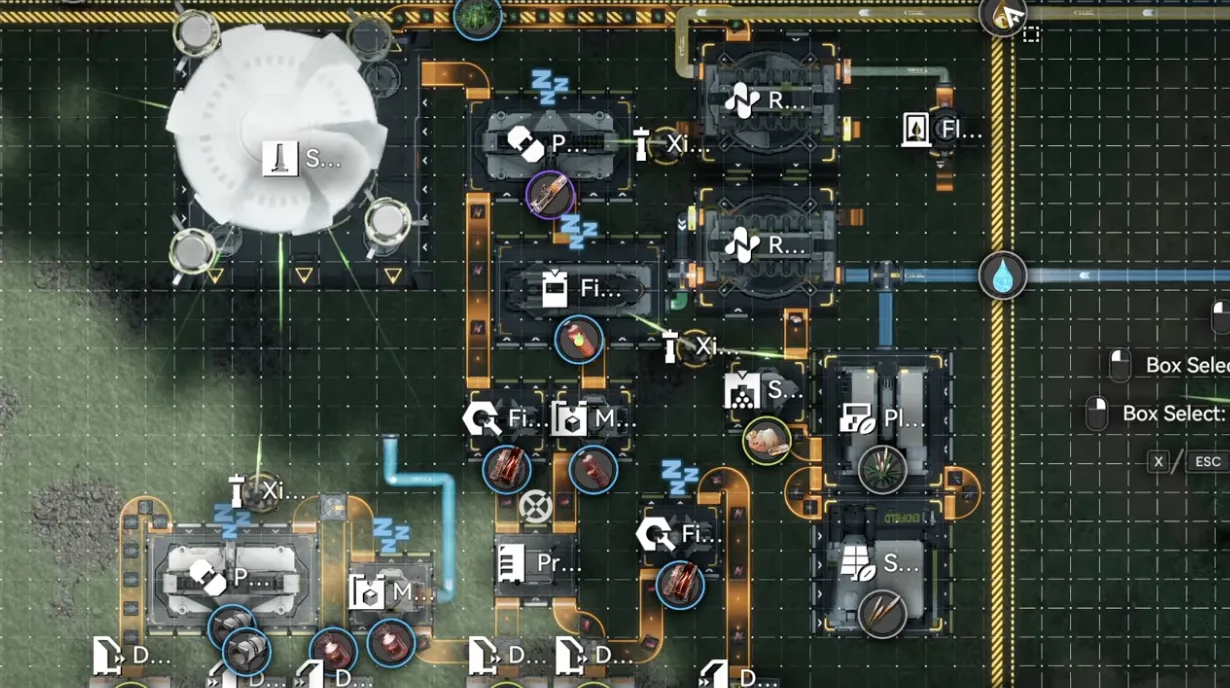
Core in the corner, top right output set to Heavy Xiranite
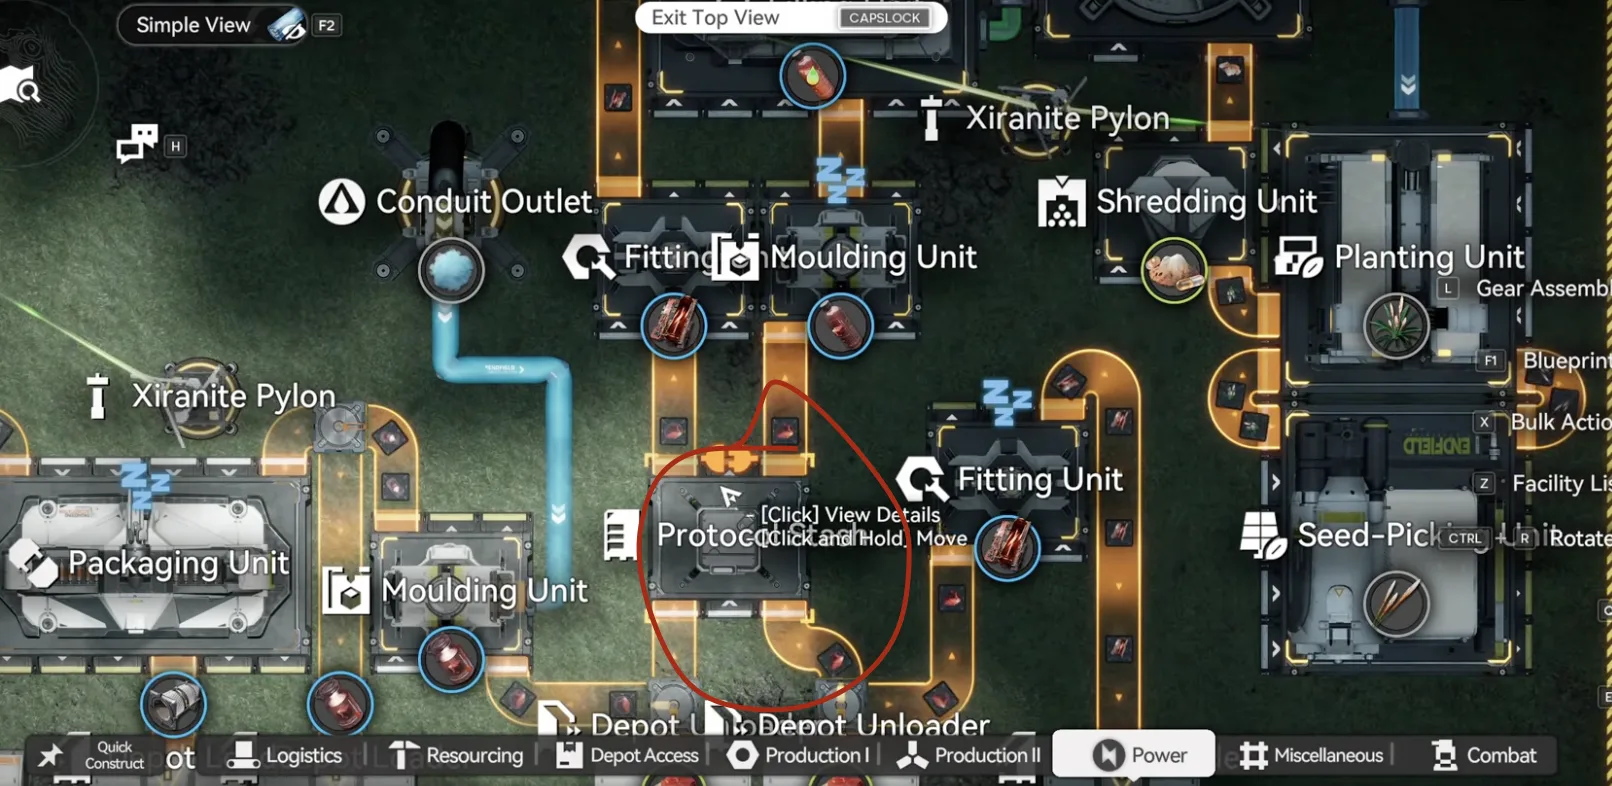
Turn off the Protocol Stash and set it to storage mode
Extra 2: Hetonite Parts
If you want some Hetonite parts to build turrets, use the Extra 2 blueprint instead. Deploy it above the Depot Bus, drag one acid pipe into this input, and connect the pipe coming out from the base to a Fluid Supply Unit in the acid lake. Make sure it is coming out from the base and it is into a Fluid Supply Unit. As before, delete this conduit outlet and replace it with the prepared Inergen outlet. Move the Core here and set the top right side output as Heavy Xiranite.
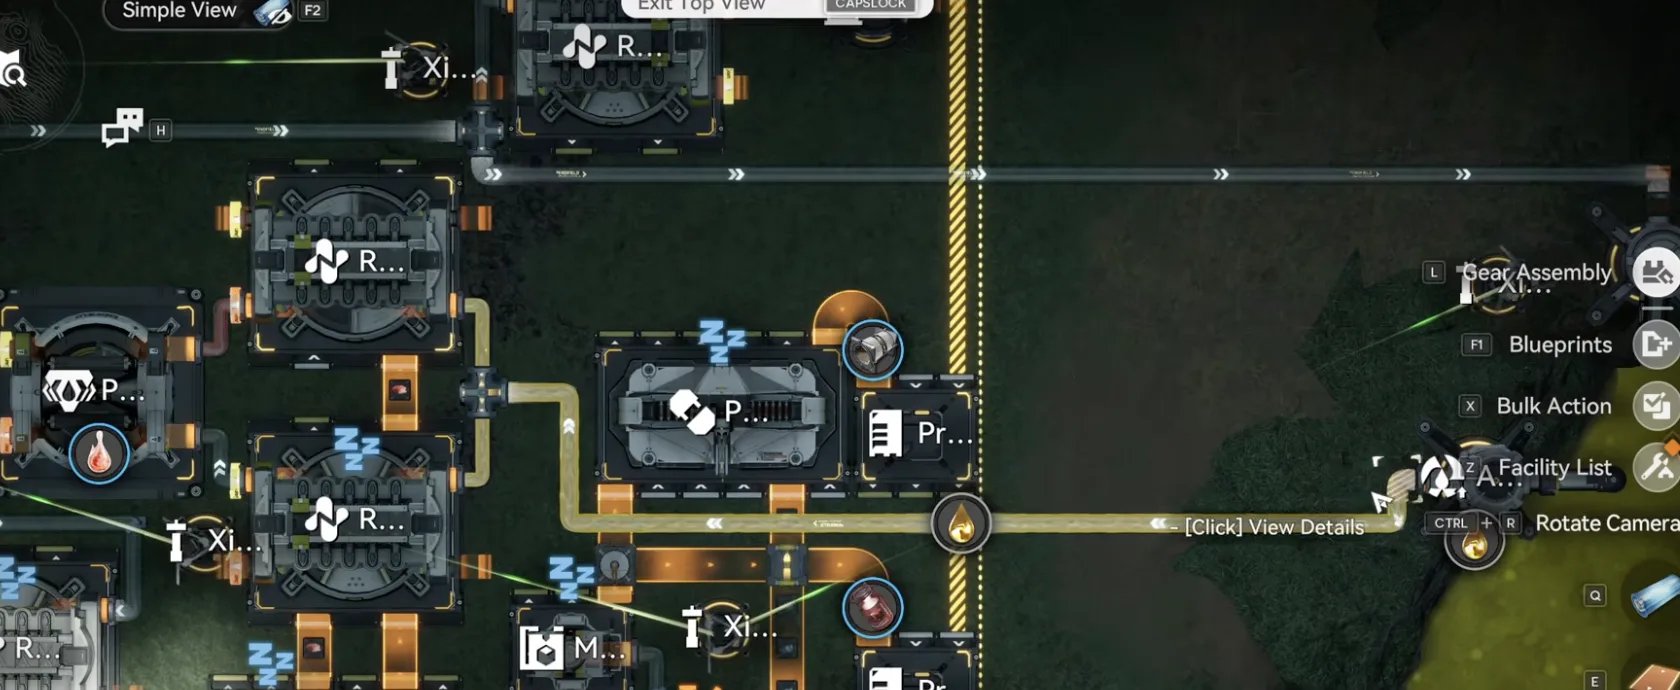
Acid pipe in, base pipe into a Fluid Supply Unit in the acid lake
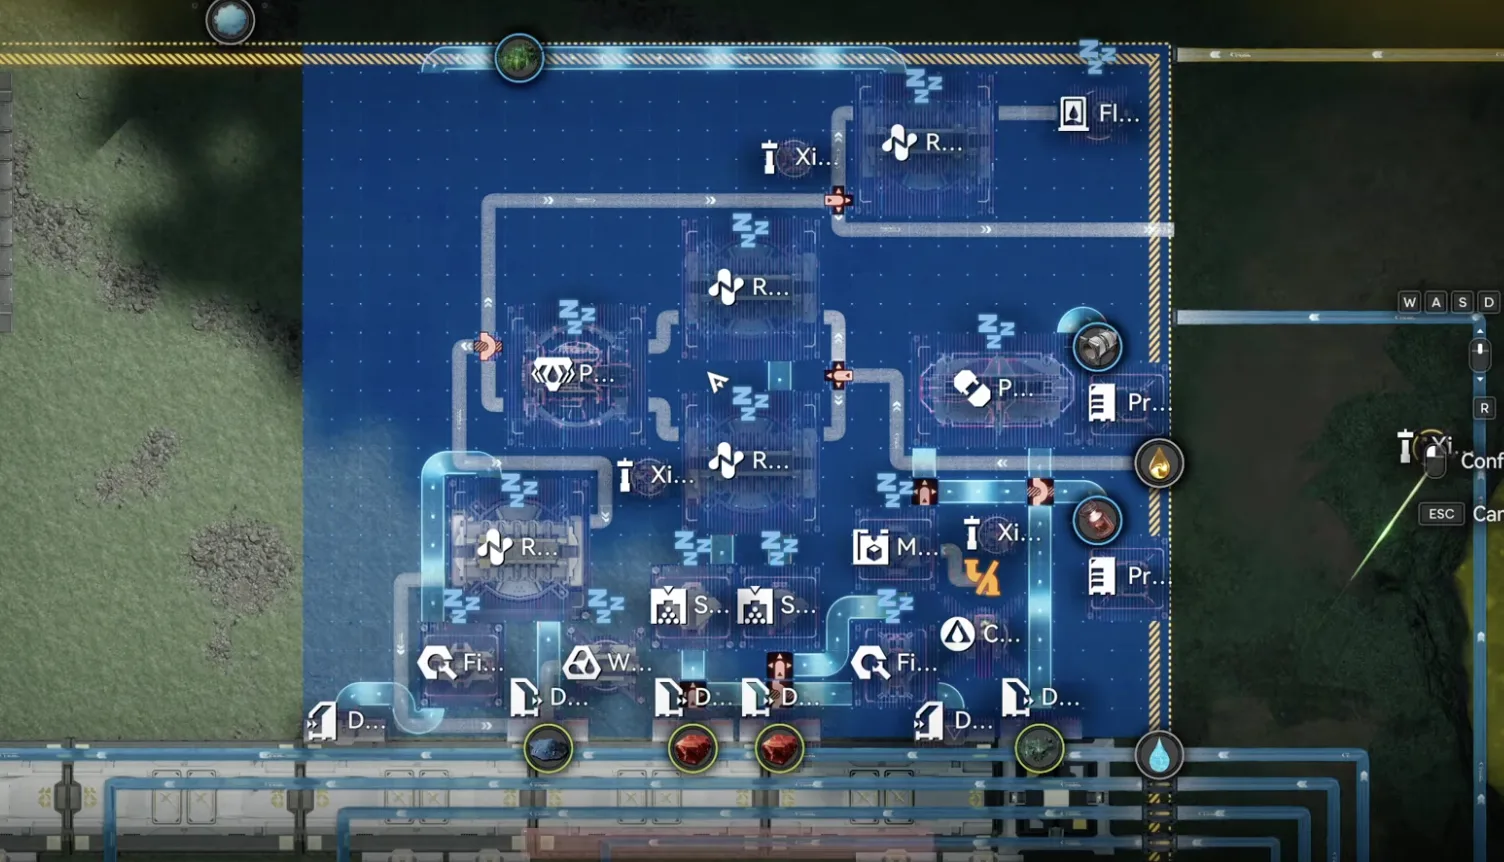
Extra 2 Hetonite parts connection
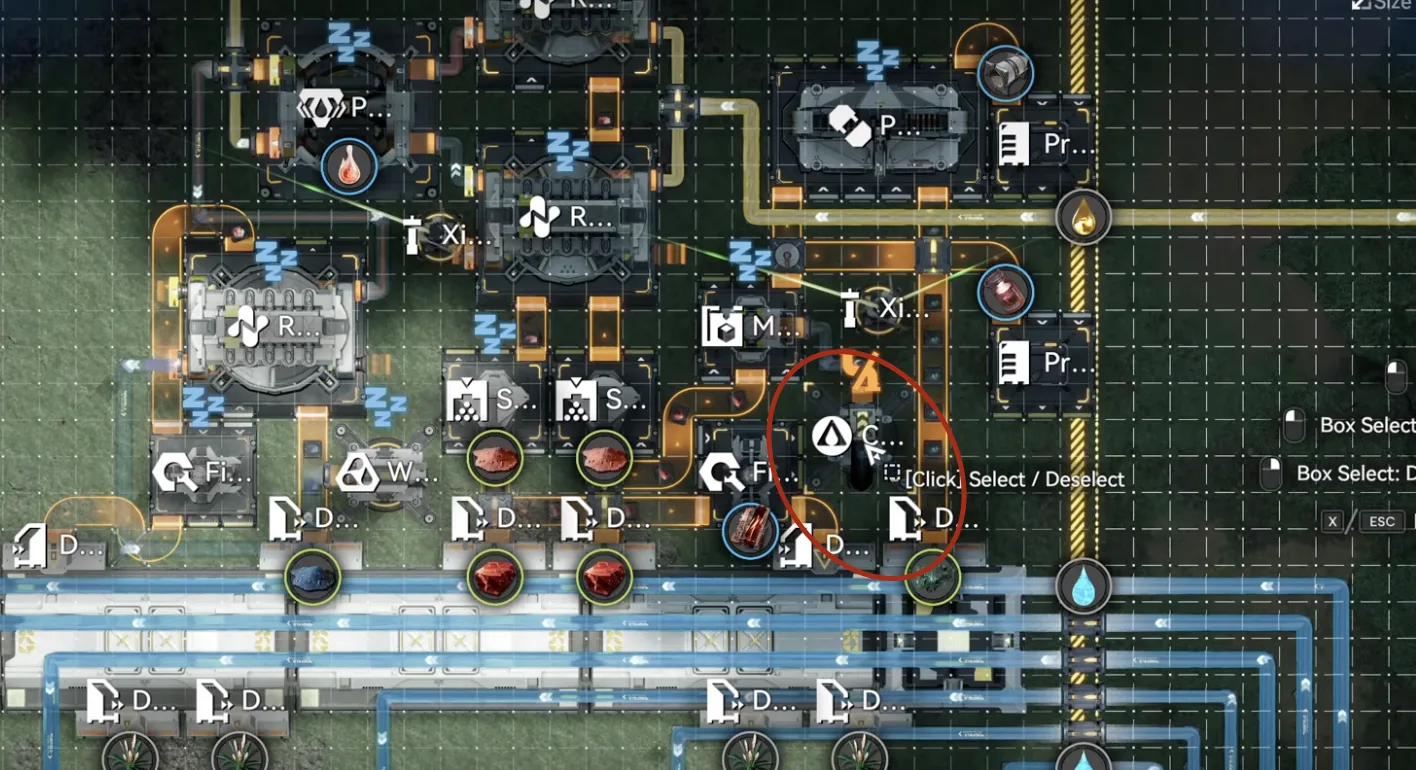
Replace the conduit outlet with the prepared Inergen
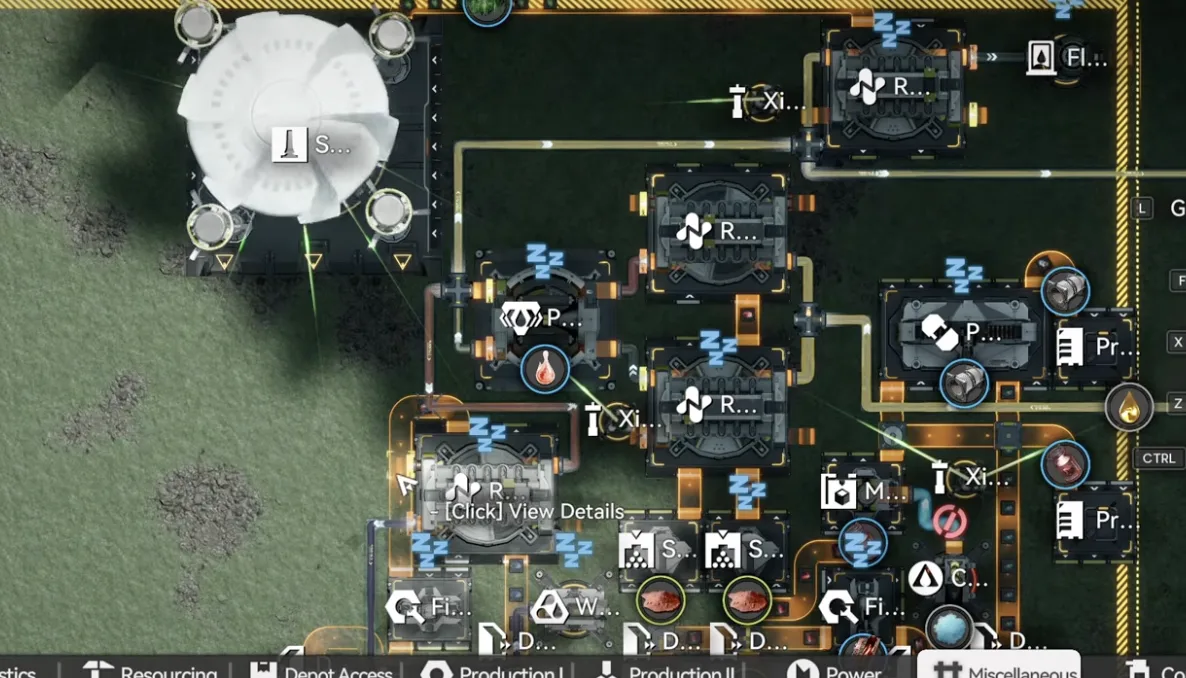
Core moved, top right output set to Heavy Xiranite
Meta Storage Transfer
Now set the Meta Storage Transfer to Dense Originium Powder. The Meta Storage Transfer generates material out of nowhere and does not consume anything from your Valley IV depot, but you need to reach the Valley IV Regional Development Level max, so level 12 first. Make sure it is set to Meta Storage and not a Stockpile Transfer. Go to the Originium transfer (it does not matter which one you have), click Edit, then Stop Transfer. Click Edit again, switch to Meta Storage, click on Wuling, select the Dense Originium Powder, and start a transfer.
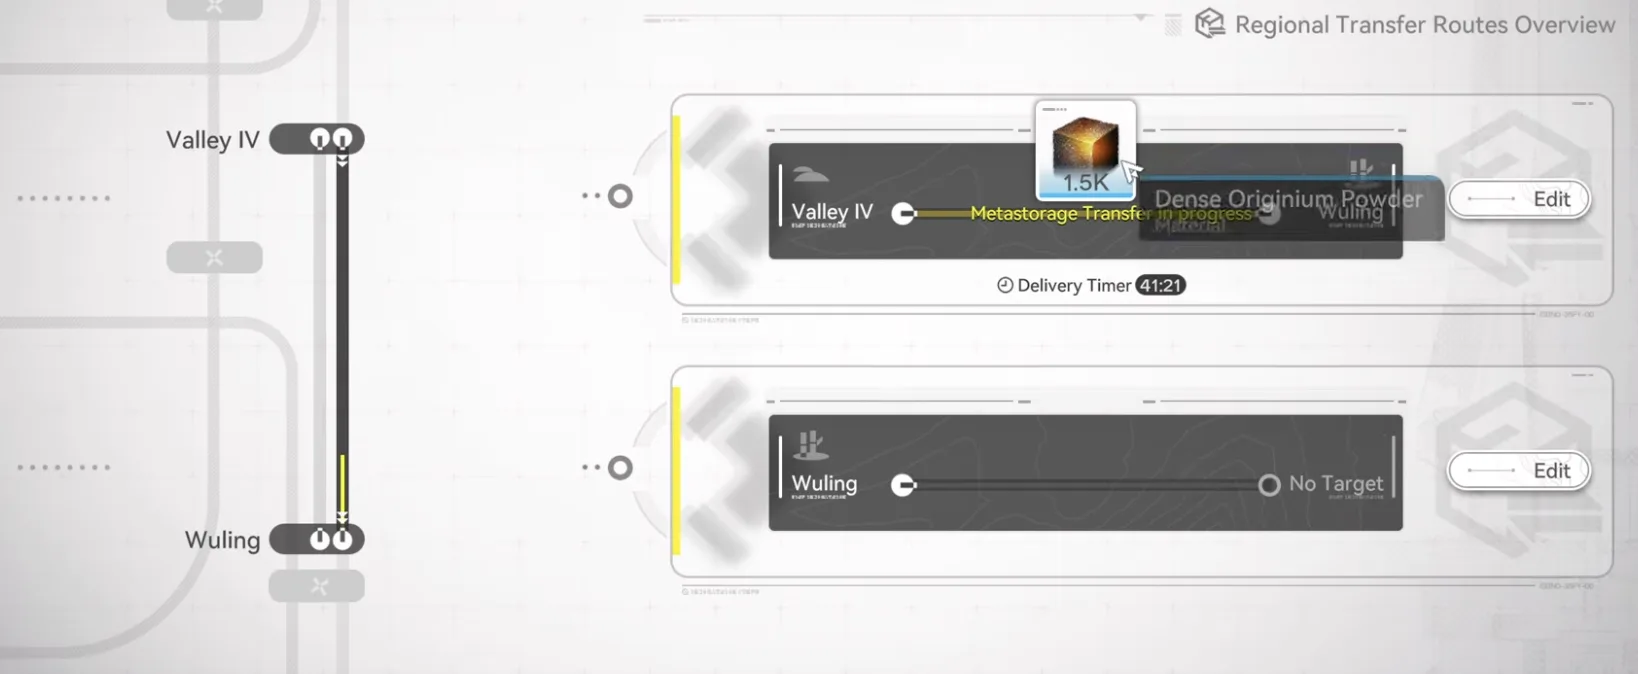
Set the Meta Storage Transfer to Dense Originium Powder
Power & Gear Component Speed
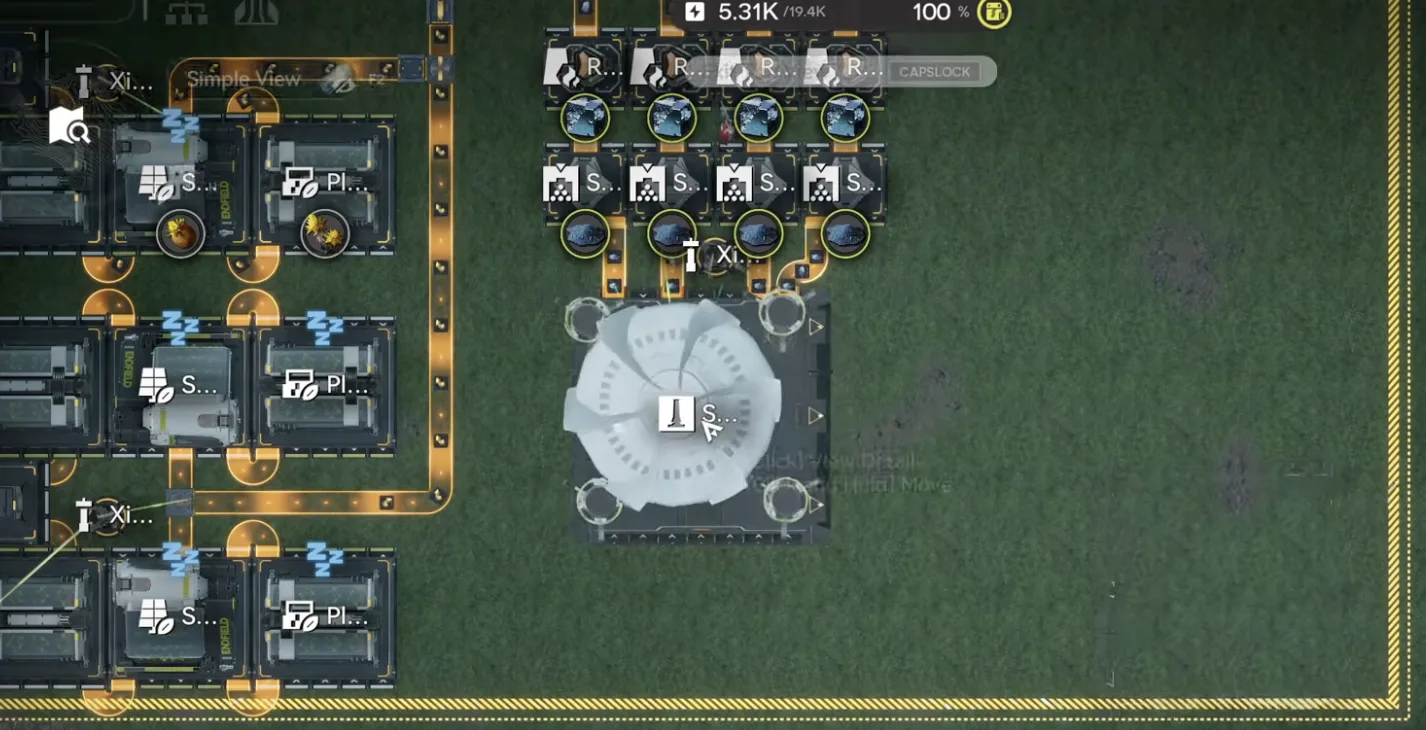
By default the base uses three Thermal Banks, so about 4.5 batteries per minute. If you do not have too many facilities around, are using batteries in your turrets, and you use the Purification Node instead of the water treatment units, two Thermal Banks are enough, so you can turn one off. If you used the Jingyu Valley sub AIC blueprint, the Thermal Bank is added there, otherwise the Thermal Banks are in the Core AIC.
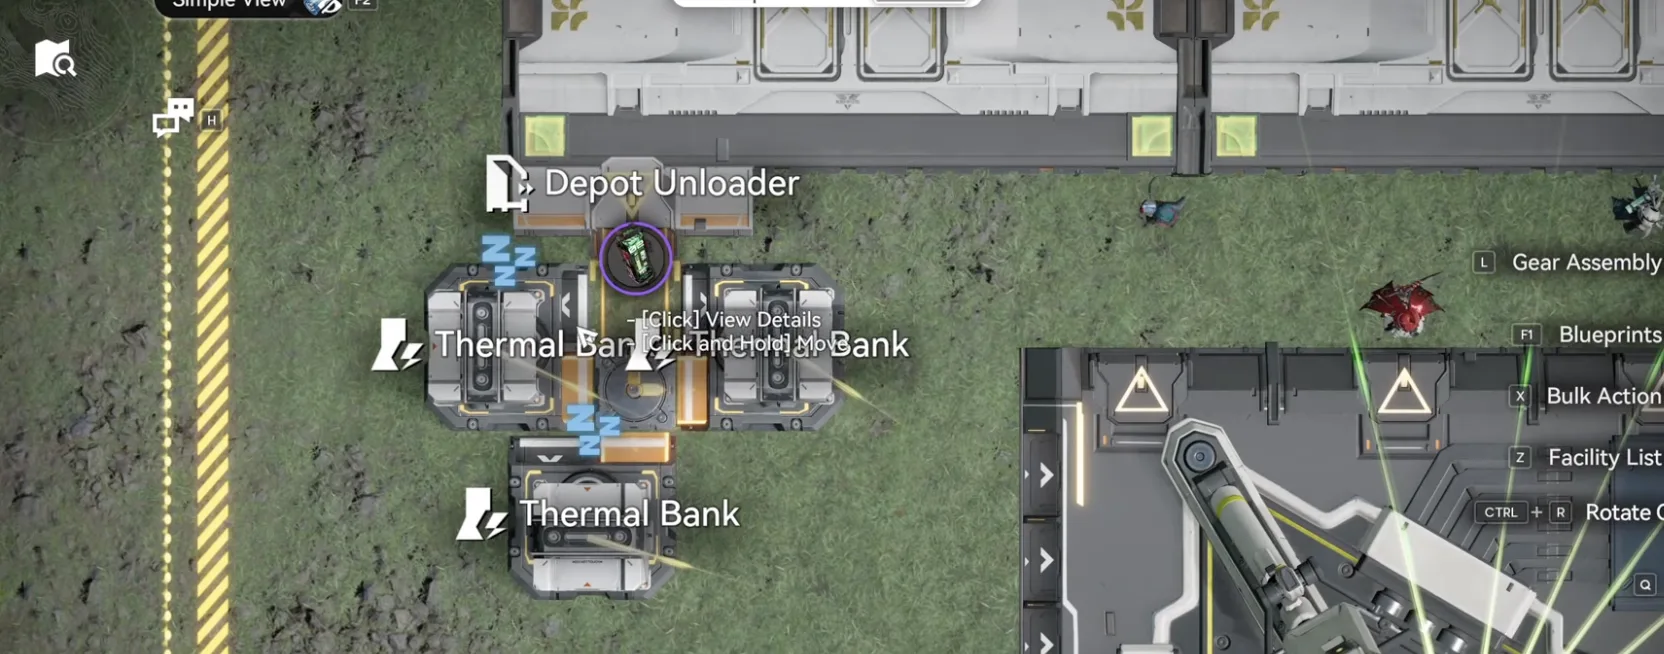
Core AIC Thermal Bank, turn one off if two are enough
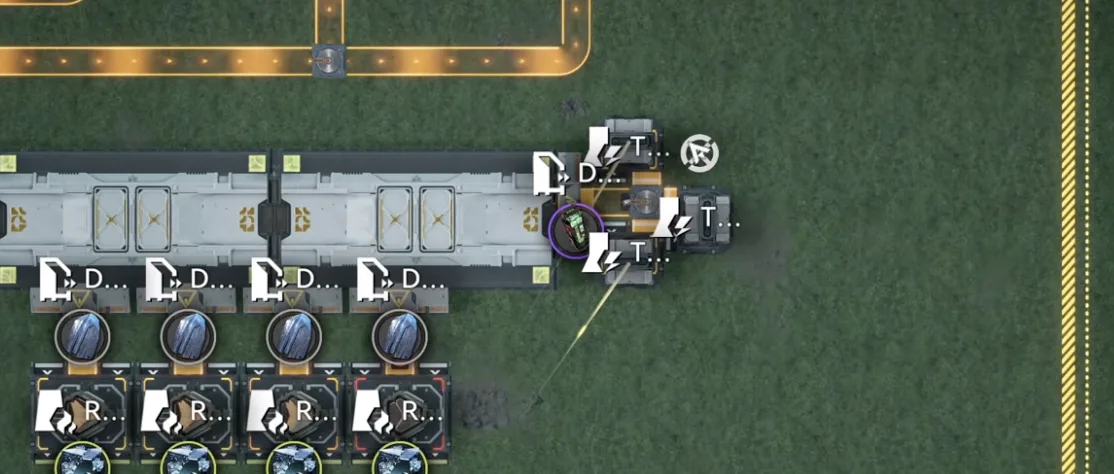
Jingyu Valley Thermal Bank location (Option B)
With the new gear crafting, you just craft the newest gear components, which is much easier to handle. By default the base makes 3 Pyrrolite components per minute (4,320 per day), and it is fully customizable at the Core AIC. There are two switches, and by default only the top one is off:
- Top switch off (default): 3 Pyrrolite components per minute.
- Top switch on, bottom switch off: 6 Pyrrolite components per minute (the maximum).
6 per minute is the ceiling because a single Gear Assembly is limited to 6 per minute. You would need a second gearing unit to go beyond that, and there is no reason to since 6 per minute is already very fast. The cost of going faster is more Heavy Xiranite.
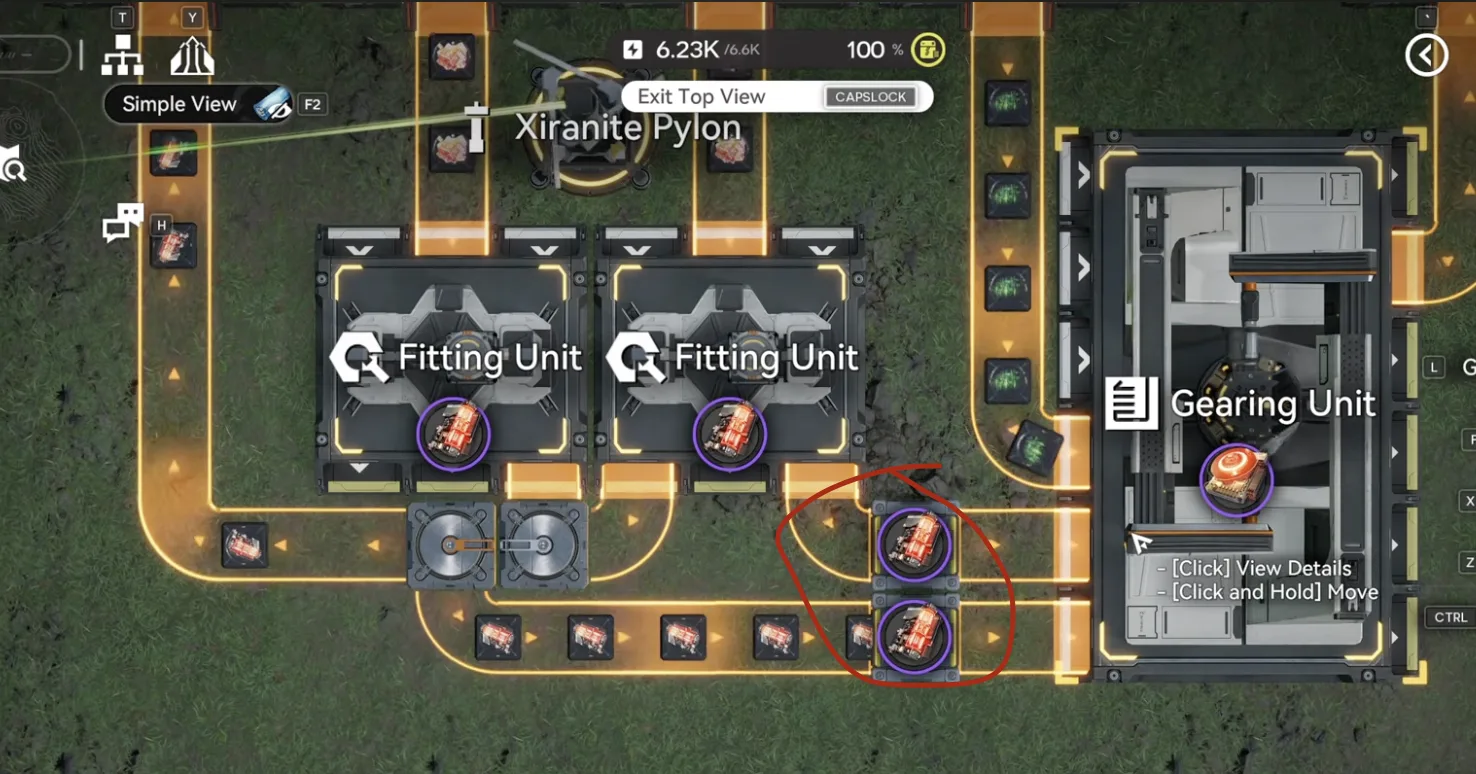
The two Core AIC switches that set Pyrrolite output speed
Production Summary
Here is what the base produces. Using Dense Originium Powder from the Meta Storage, it makes about 14.75 batteries per minute, 24 Heavy Xiranite per minute, and 12 Pyrrolite parts per minute, with the rest depending on whether you built Extra 1 or Extra 2. Both extras also make 200 canisters and a separator core to upgrade exploration items (fill them at the gas mine manually), keep making Cuprium parts for facility crafting until your depot is full (turn this off to craft at full speed once your stock is enough), and produce 500 liquid Heavy Xiranite for clearing blight during exploration.
- Extra 1: 3 Syringe or Tea per minute.
- Extra 2: 1.5 Detonate parts per minute.
The base also slowly stocks up normal Xiranite so you never miss it. You can leave the unused Fermium where it is. Every number in the infograph is correct. Even if the in-game graph shows the DP usage higher than the yield, that is normal: the Meta Storage Transfer yield is not shown on the graph, so its 25 per minute is invisible, which is why a figure like 295 DP usage is correct. Even if your Dense Originium Powder reaches zero, which should not happen unless you modify the base, it is still fine because the 12 per minute battery line is fully self sustaining and does not rely on the depot's Dense Originium Powder.
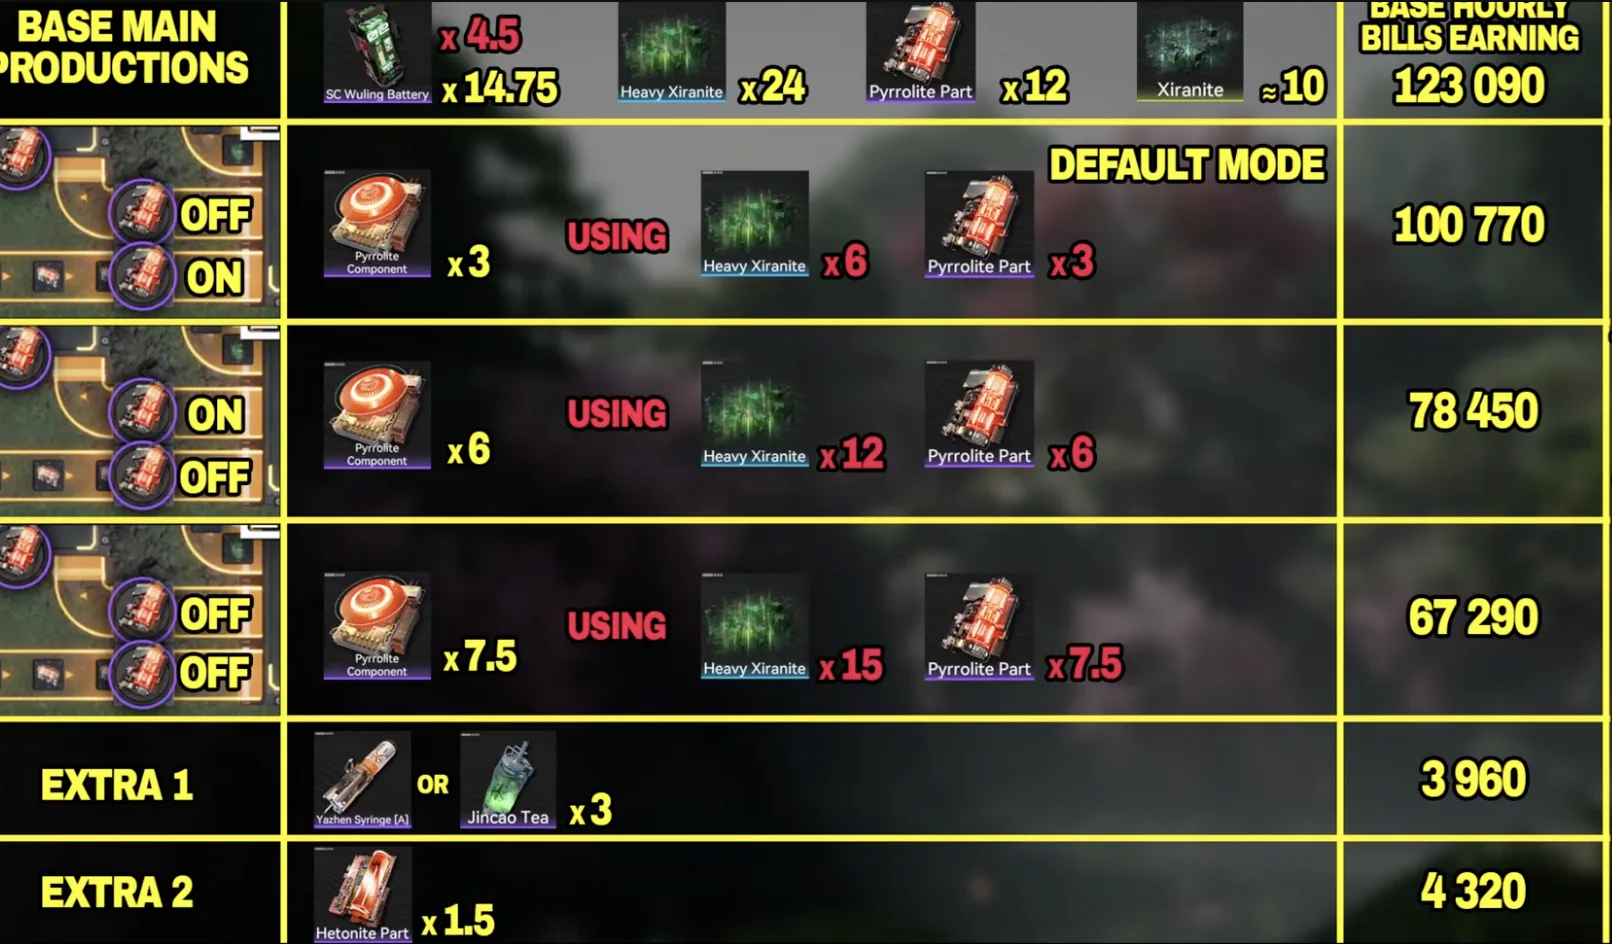
Full production infograph for the Wuling 1.4 mega base
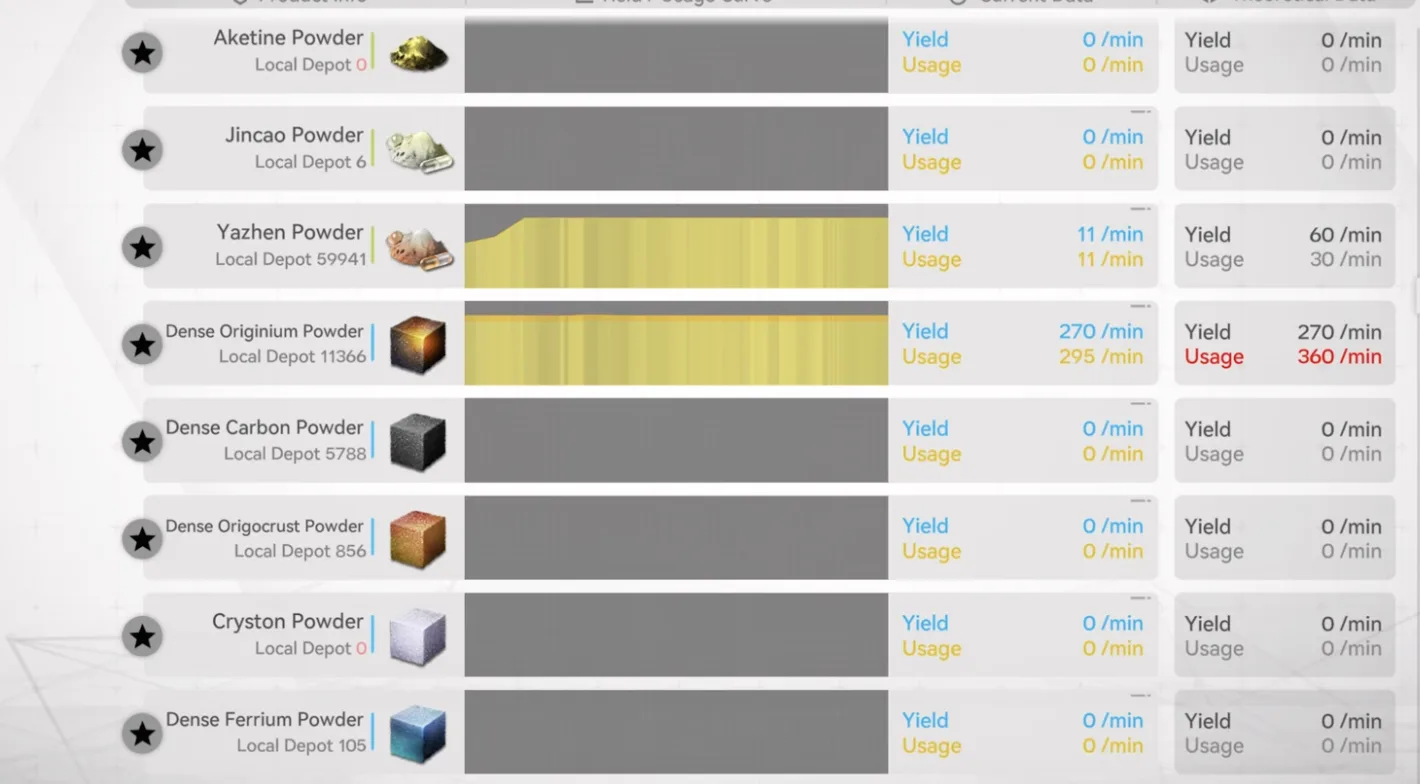
The 295 DP usage reads high because the Meta Storage yield is invisible
That is the full Wuling 1.4 mega base. If you are missing any upstream pieces, the Part 1 Valley IV pipeline and the Part 9 1.3 mega base cover what this build replaces, and Part 10 is the temporary version if you are not ready for the full base yet. The Blueprint Curation hub indexes single purpose factories by purpose.

Tap through for today's price on the official store. Affiliate link, we may earn a commission.