WULING 1.5 MEGA BASE BLUEPRINT
 Level Up & Save at RazerUp to 25% off when you buy any 2 eligible Razer items: keyboards, mice, headsets, and more.Shop Razer Deals
Bundle any 2 items. Offer runs through 31 December 2026. Affiliate link, we may earn a commission.
Table of Contents
This is the Wuling 1.5 mega base, and it is not a new factory. It is a straight upgrade on top of the 1.4 version, built because patch 1.5 unlocked Level 4 for the third outpost and pushed the hourly Stock Bill requirement up to 102,960. You get two options: a lazy version that only edits the Yinglung Pass sub AIC, and a full profit version that also rebuilds the top half of the Marker Stone sub AIC.
You must complete the Part 11 Wuling 1.4 mega base first. Every requirement, caution, and left side connection from that guide still applies and is not repeated here. The Part 12 overflow protector is the companion piece that stops the base clogging at the depot limit. For single purpose factories, the Blueprint Curation hub indexes everything by purpose.
Quick Answer
Patch 1.5 raised the third outpost to Level 4, so all outposts together now need 102,960 Stock Bills per hour. If you run the 1.4 base and have already hit the depot cap on Pyrrolite components, you are fine as is, since you make around 122,000 with nothing consuming your parts. If the base is still crafting 3 Pyrrolite components per minute you only make about 100,000, which is slightly under. This upgrade closes that gap with nine blueprints. The lazy version needs two of them and only touches Yinglung Pass. The full profit version needs three and also rebuilds the Marker Stone top half, taking output to 18 Pyrrolite parts per minute. The remaining four are temporary extra blueprints for Hetonite parts, meds, liquid Xiranite, and Cuprium parts. All codes are region locked for Asia and NA/EU.
Requirements & Access
Follow the 1.4 blueprint guide to completion before you start this one. Because that base is the foundation, all its requirements carry over and are not restated. On top of that you need:
- Complete the new story chapter, the snowy map.
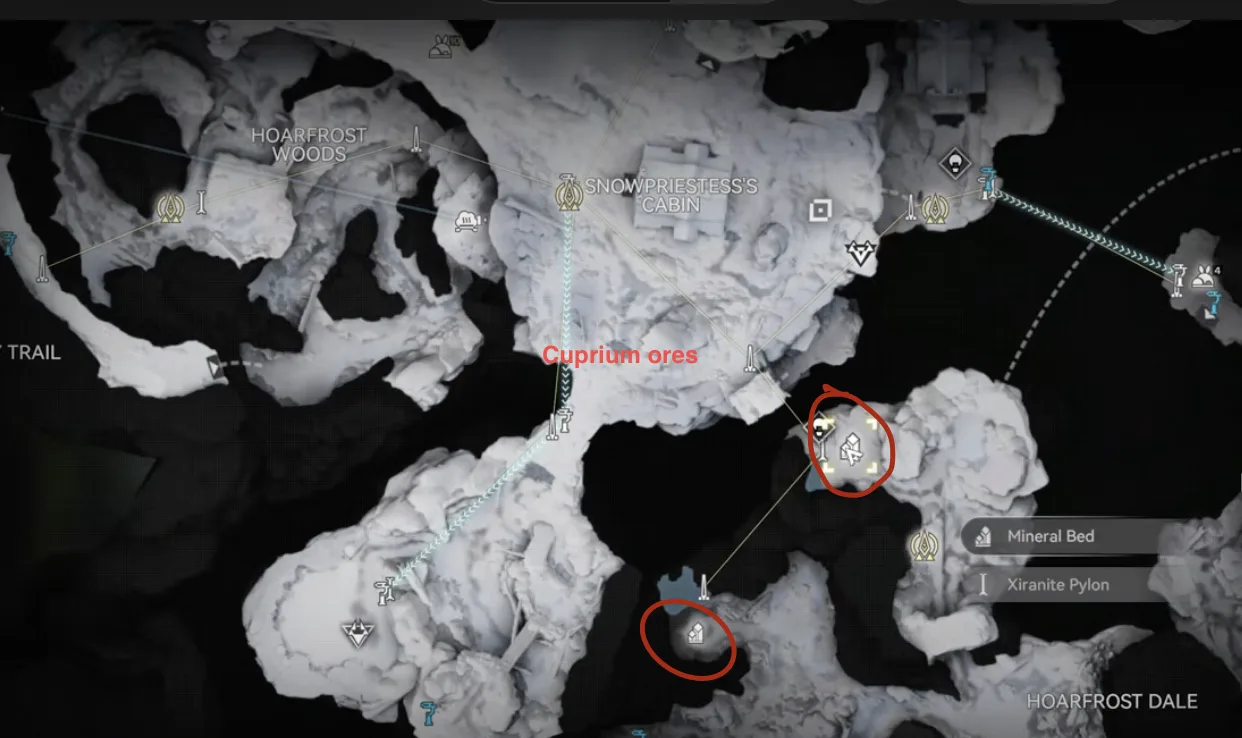
- Mining Rigs on the two new Cuprium ore spots for 90 more ore per minute.
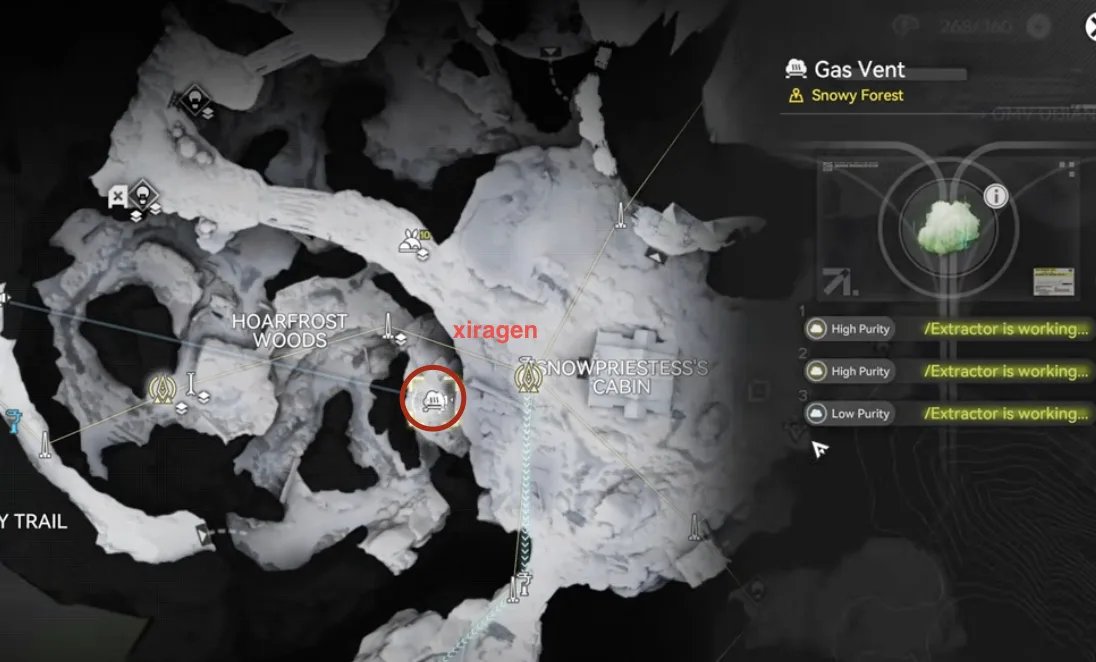
- The new 50 per minute Xiragen source connected back to the Yinglung Pass sub AIC.
- A second Gas Extractor at the Inergen spot. Part 11 only needed one.
- Yinglung Pass sub AIC: Area Expansion 2, and the Depot Bus limit raised to six in total. Expect roughly 2 million in upgrade costs.
Blueprint Codes
Import the codes first: open Blueprints, go to Shared Blueprints, click Import Blueprints, and paste the code that matches your server region. The copy buttons below avoid the most common typo, the letter O versus the digit 0, and watch for stray leading or trailing spaces. Codes are region locked, so Asia and NA/EU are not interchangeable.
You only need the blueprints for the path you pick. Lazy version: 1.5 Lazy Bottom and 1.5 Lazy Top. Full profit version: 1.5 MS Top, 1.5 YP Bottom, and 1.5 YP Top. The four Extra blueprints are optional and temporary, and they work with either path.
| Blueprint | Asia Server Code | NA/EU Server Code |
|---|---|---|
| 1.5 Lazy Bottom | EFO01ouiOAiAEa6OeIieO | EFO01eE7U8o22A499oui8 |
| 1.5 Lazy Top | EFO01A7u13u3a4Eai9ieO | EFO01eE7U8o22A49uoAi8 |
| 1.5 MS Top | EFO01I3A5UAUO19u65o08 | EFO01a709O5UU6A5aoe5e |
| 1.5 YP Bottom | EFO013o72e7e49a1U0579 | EFO0172UA3844i5AaO2Ai |
| 1.5 YP Top | EFO017i89o8o6E5A3O0Ai | EFO01eE7U8o22A49Oo9i8 |
| 1.5 Extra Heto | EFO01E50Ua0aA3ouE3uIa | EFO01A5ieIuOO7Eai9ieO |
| 1.5 Extra Meds | EFO01u8U47U75604aAoOU | EFO01u1IoAUaa804aAoOU |
| 1.5 Extra LiqX | EFO018IeEiei201i6UI73 | EFO010U96EOAA1ii5E179 |
| 1.5 Extra Cup.P | EFO017i89o8o6E5A8O2Ai | EFO01893u7e66I1iAUI73 |
Preparation: New Resources
Everything in this section is shared. Do it once, whichever version you end up building.
New Cuprium ore and the 50 per minute Xiragen
Complete the new story on the snowy map, then put Mining Rigs on the two new Cuprium ore spots, one here and one here, for 90 more ore per minute. After that, follow along to the new 50 per minute Xiragen waypoint.
Two new Cuprium ore spots, 90 more ore per minute
The new 50 per minute Xiragen waypoint
Three Gas Extractors into one pipe
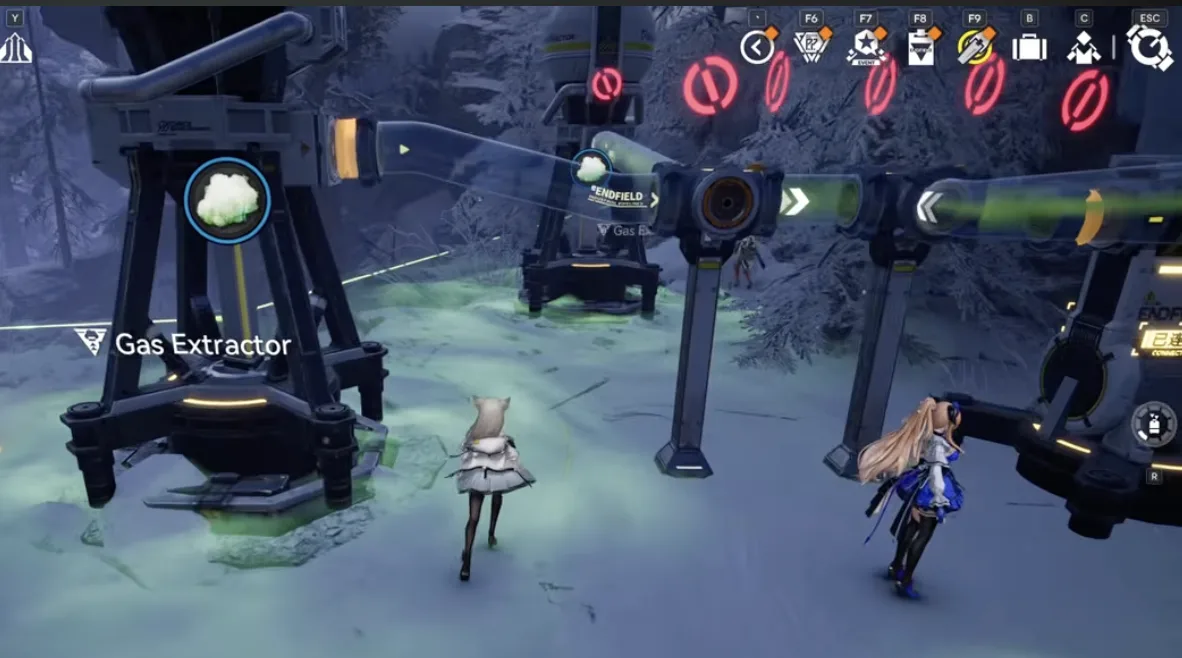
Put three Gas Extractors on these three spots, then converge them into one pipe. Do not run them out separately.
Three Gas Extractors converged into a single pipe
The three hop conduit chain
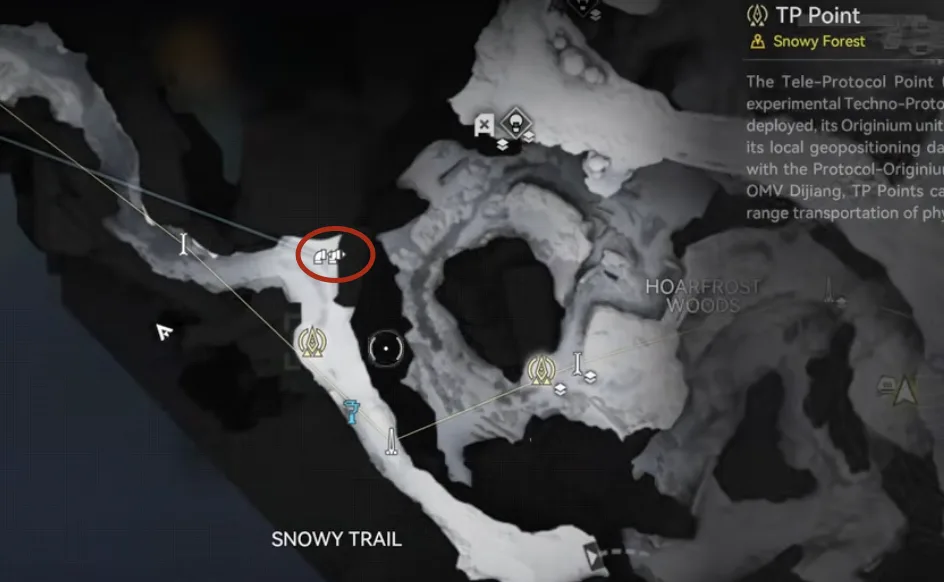
Now carry that gas back to the base. Feed the single pipe into a Conduit Inlet, start the connection, travel to the first waypoint and deploy an Outlet, then connect it. Plug that outlet into a new inlet, teleport to the next teleporter, and repeat. Each hop is the same pattern: outlet, then inlet, then connect. It takes three hops to reach the sub AIC, and for each one the map shot below shows where to go and the second shot shows the connection being made.
Hop 1: the first waypoint, on the Snowy Trail
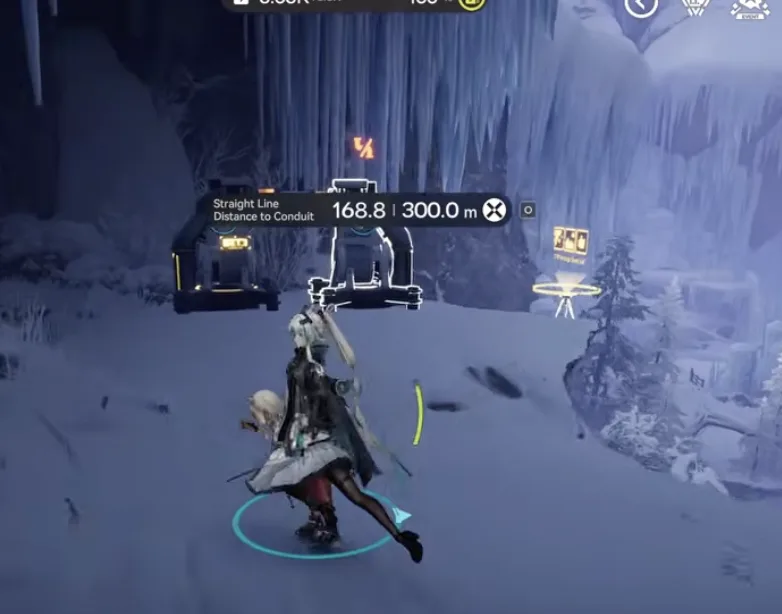
Hop 1 connected, well inside the 300m range
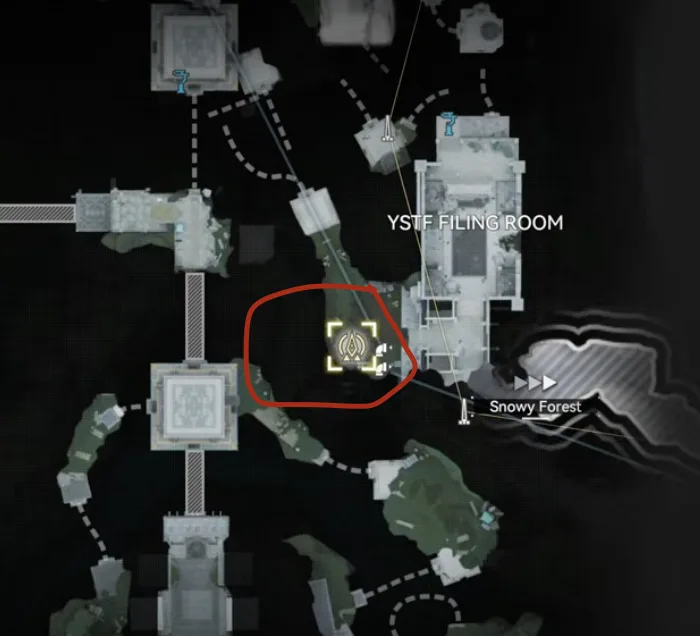
Hop 2: the next teleporter, by the YSTF Filing Room
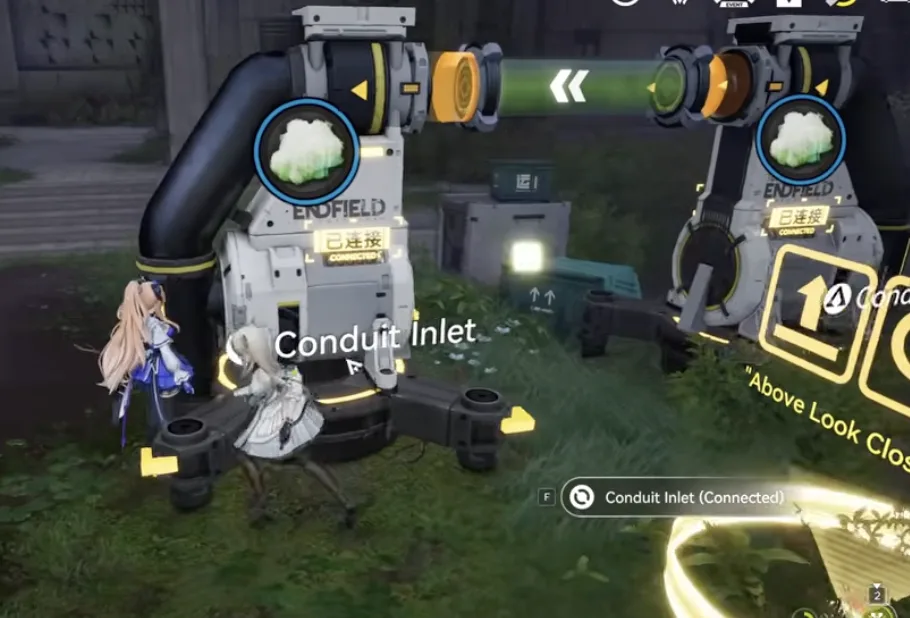
Hop 2 connected, the inlet reads Connected
For the last hop, connect the inlet to the final outlet by teleporting directly to the sub AIC. Leave it connected into this outlet for now.
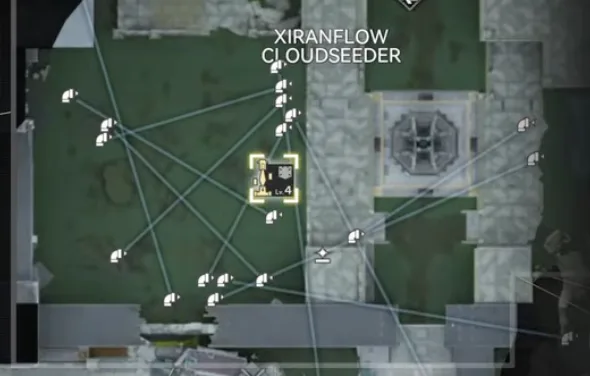
Hop 3: teleport straight to the Xiranflow Cloudseeder sub AIC
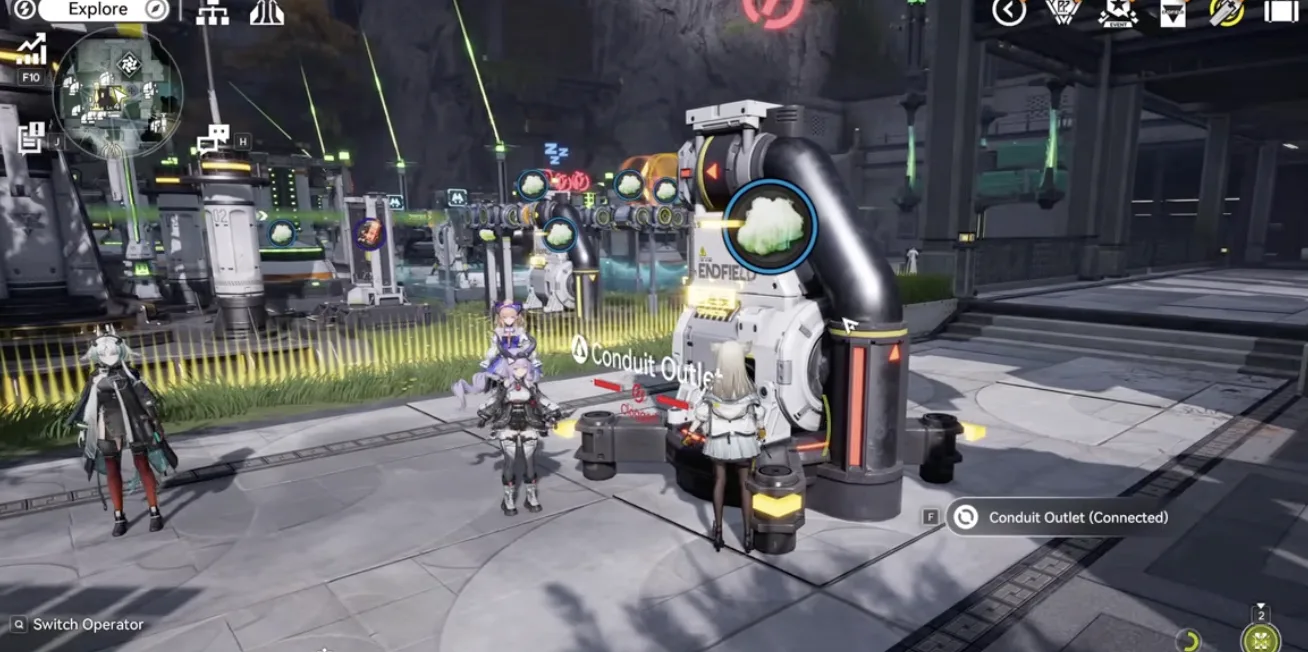
The final outlet at the sub AIC, connected for now
Inergen now needs two extractors
Go back to the spot with a lot of Inergen. In the 1.4 guide one single extractor was enough. Now you need two, both feeding into one single pipe.
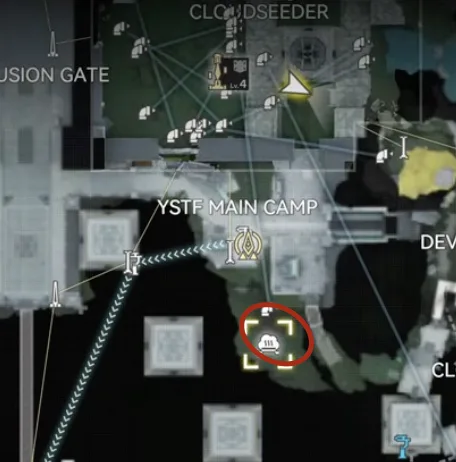
The Inergen location, just past the Xiragen spot
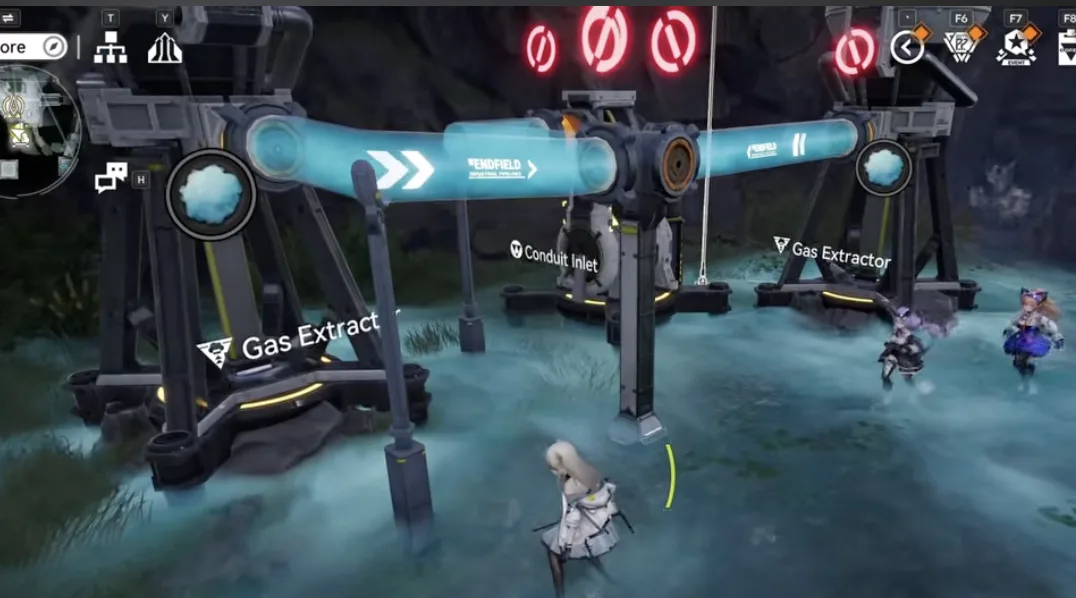
Two extractors this time, merged into one pipe
Head back to your main sub AIC base and move the Inergen conduit outlet down to the bottom, right beside the Xiragen outlet.
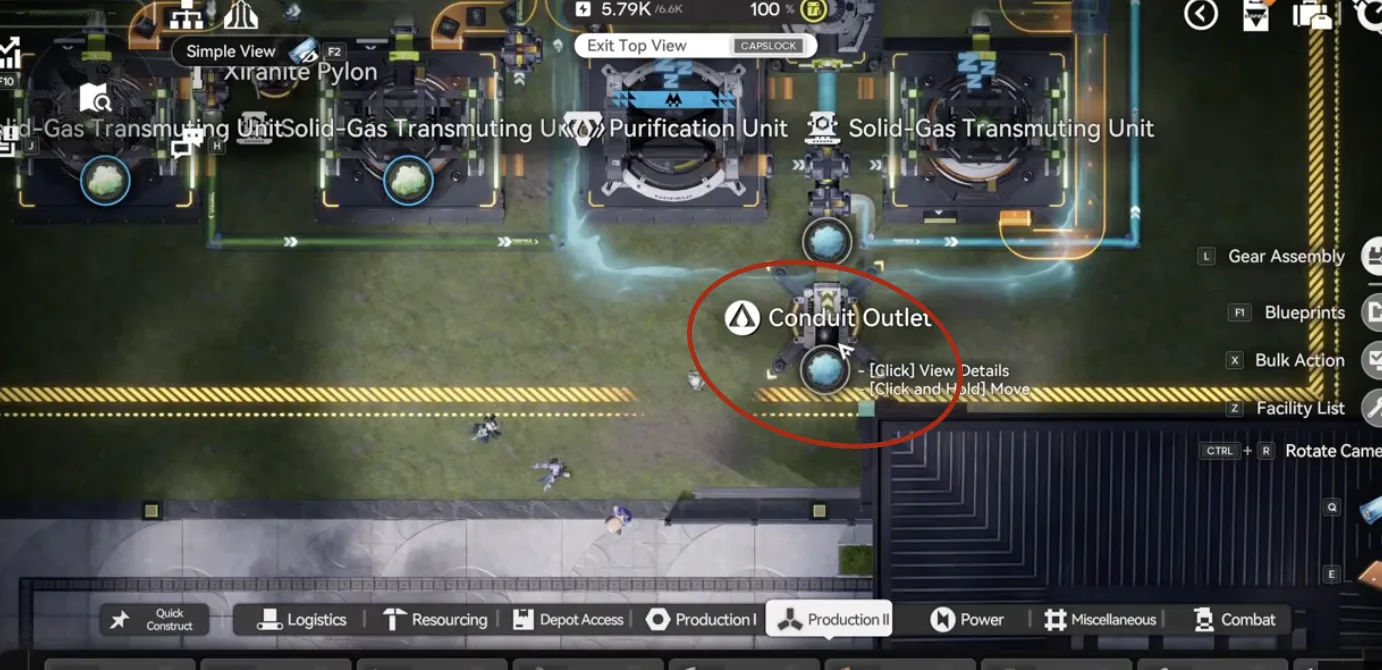
Move this Inergen conduit outlet to the bottom
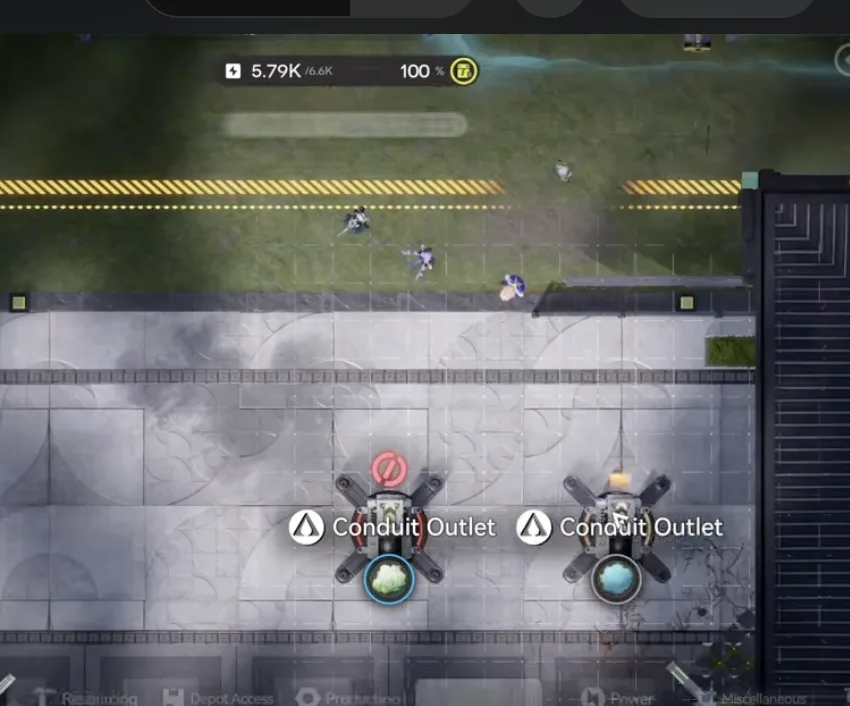
Parked beside the Xiragen outlet
Yinglung Pass AIC upgrades
Last piece of preparation: upgrade the Yinglung Pass sub AIC to Area Expansion 2 and raise the Depot Bus limit to six in total. That is around 2 million in upgrades. Preparation done, now pick your version.
Lazy Version
Two blueprints, one AIC. Even on the lazy path you make enough Stock Bills while the base keeps producing 3 Pyrrolite components per minute, so this is a perfectly valid stopping point.
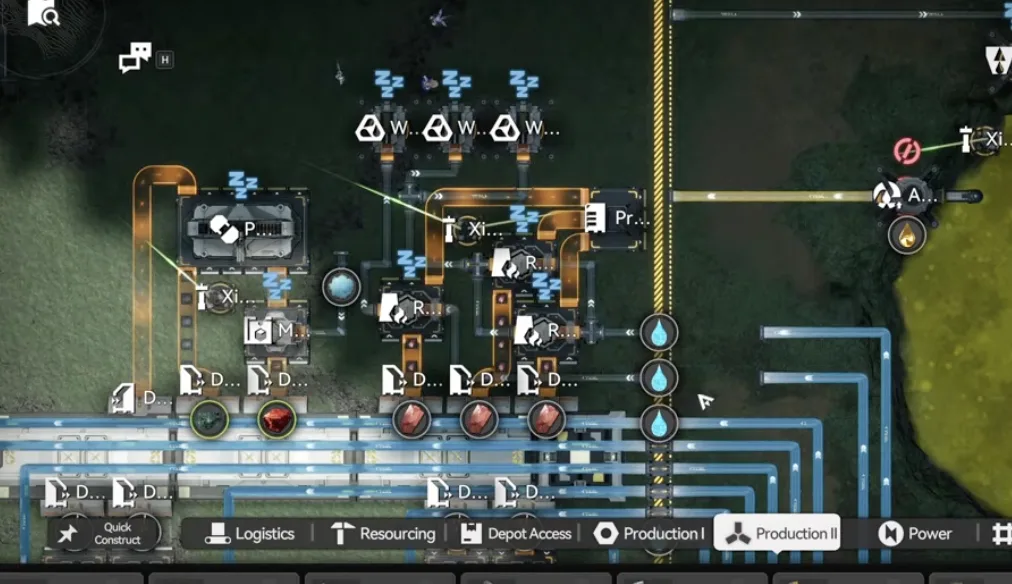
Start by moving the outlets that bring in outside resources so they sit outside the blueprint boundary, along the bottom and left side, where you can pick them up again later. That includes the Inergen and Xiragen pair you just parked at the bottom.
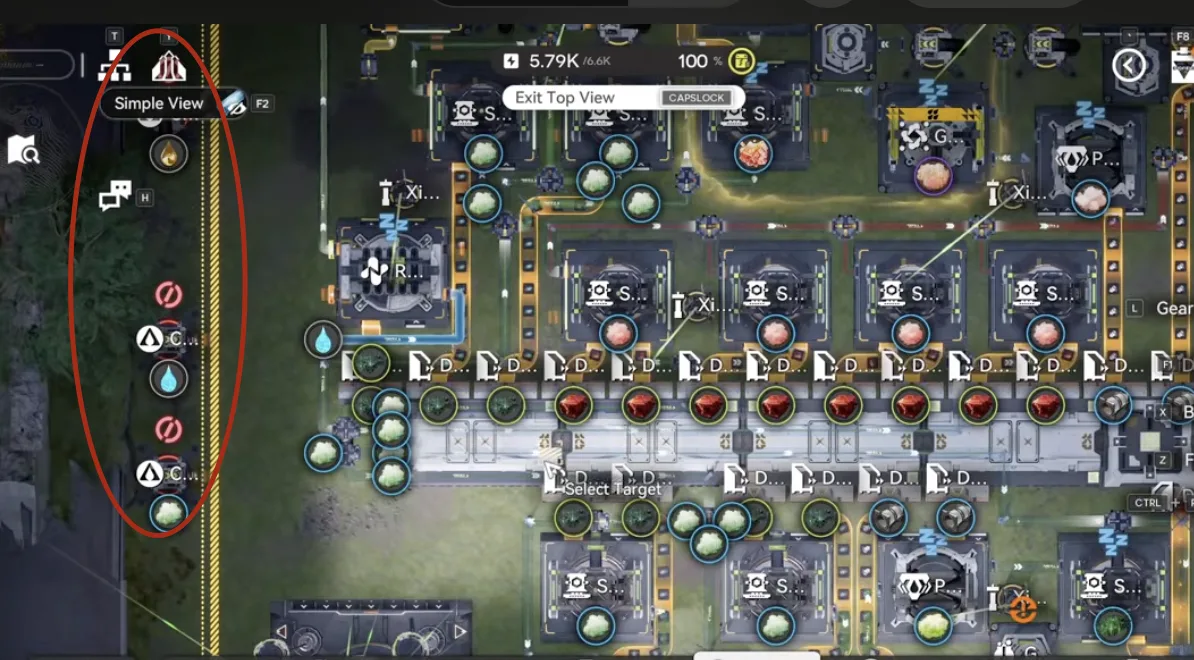
Left side outlets pushed outside the boundary
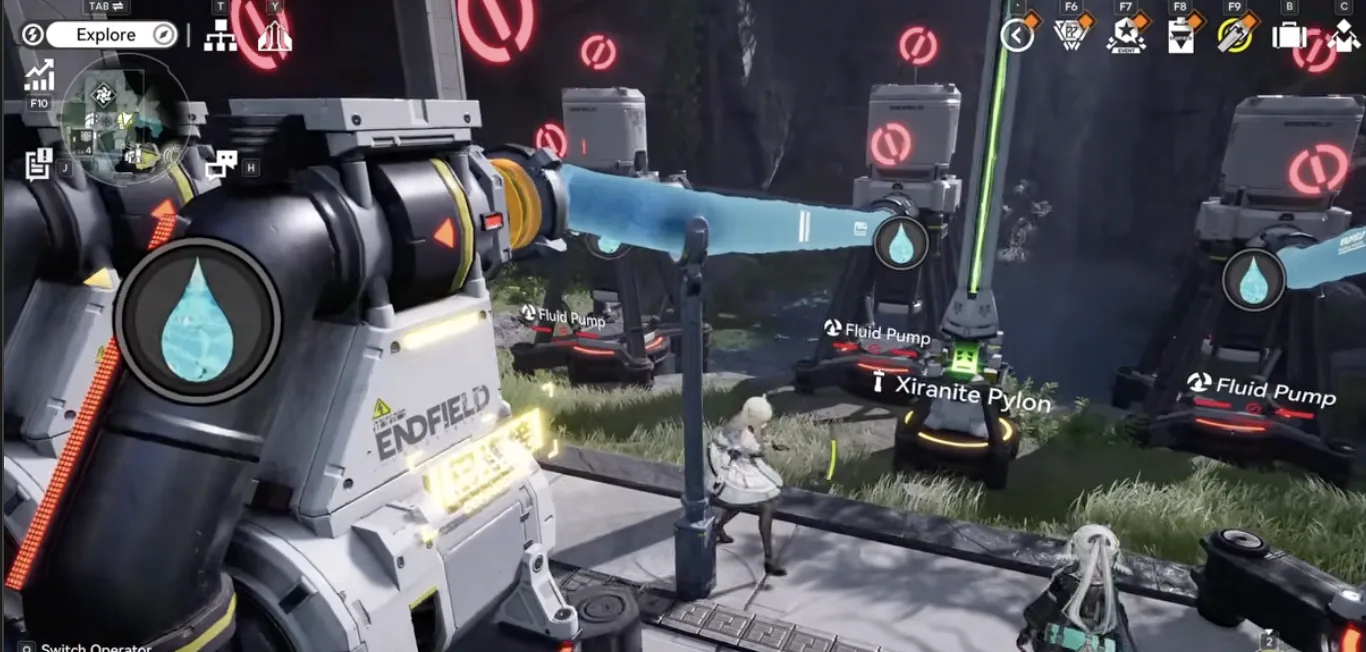
Two more Fluid Pumps into a double inlet
The connections for the left hand side outlets are unchanged, so refer back to the 1.4 guide for those. What is new is a double outlet for clean water: place two more Fluid Pumps, run them into a double inlet, and connect that to a double outlet at the base.
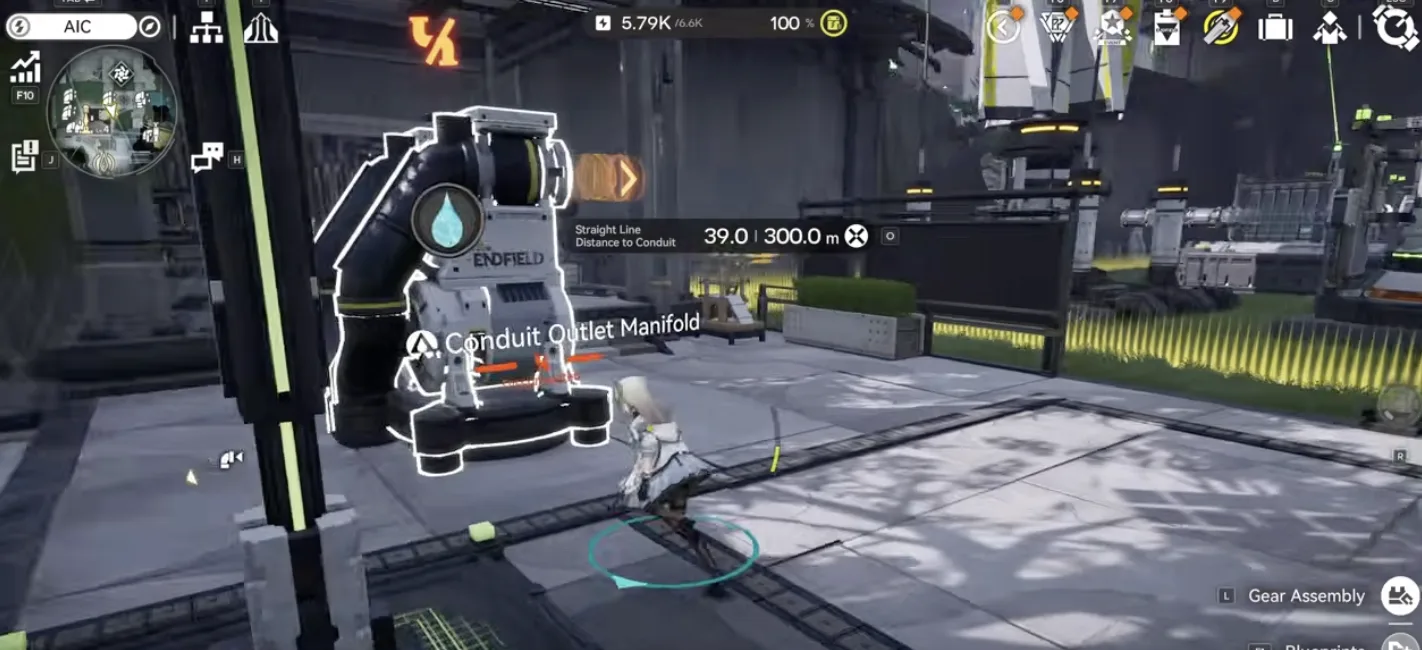
The new double clean water outlet at the base
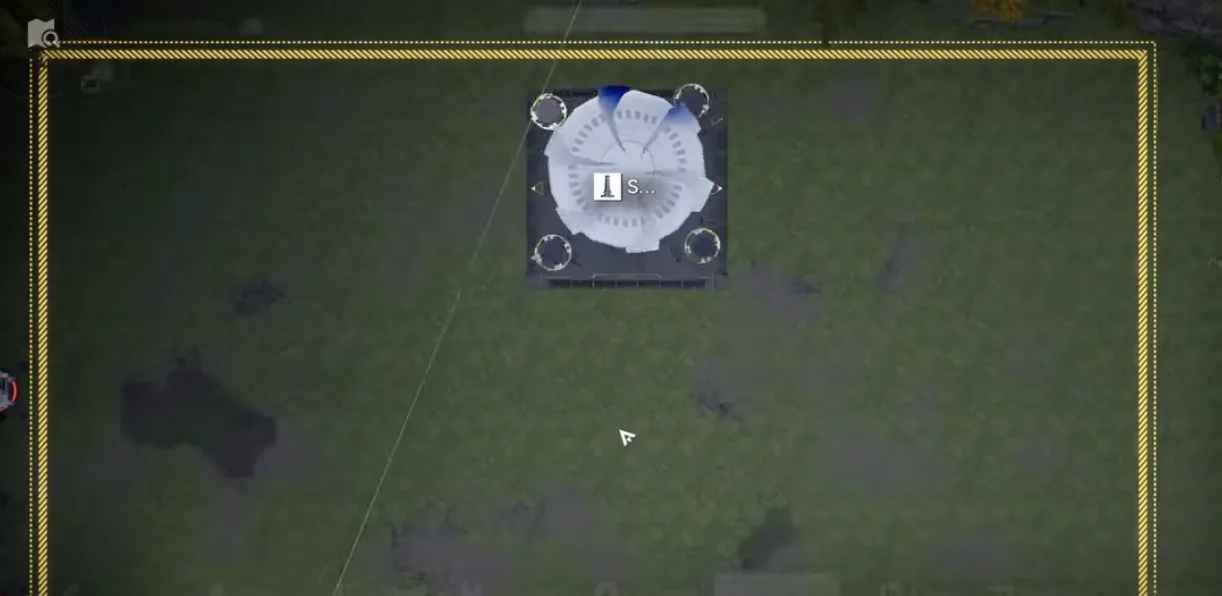
Base cleared, Core moved to the top side
With all six outlets prepared, remove everything from the base and move the Core to the top side. Then deploy 1.5 Lazy Bottom along the very bottom, slot the Core into place, and set the top right output to Pyrrolite.
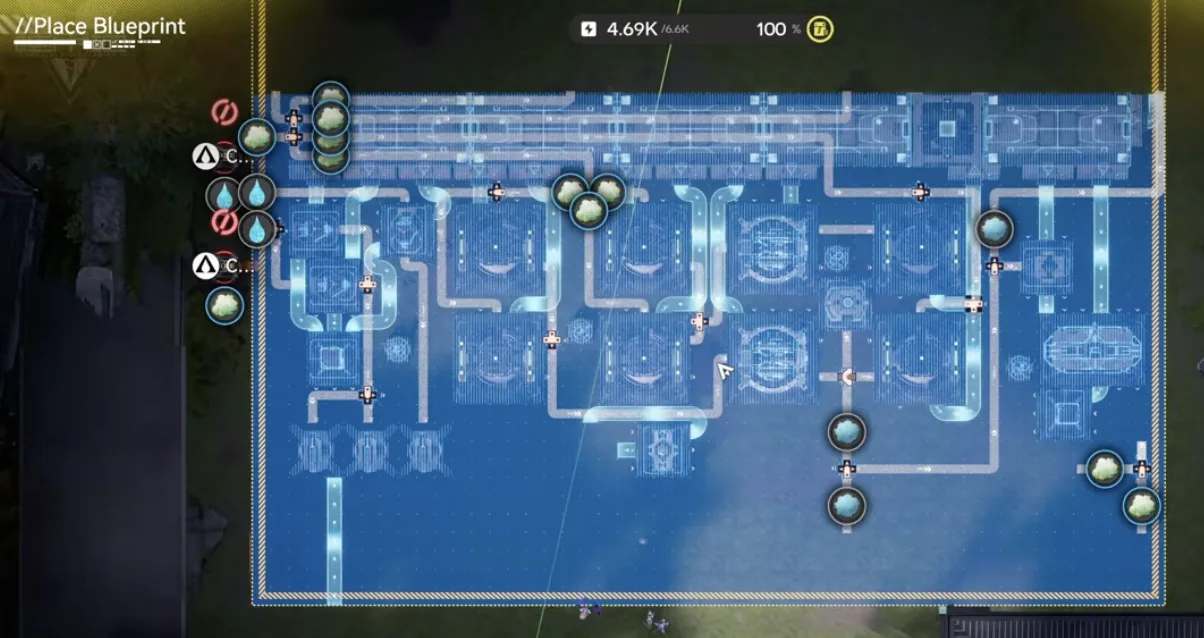
1.5 Lazy Bottom on the very bottom side
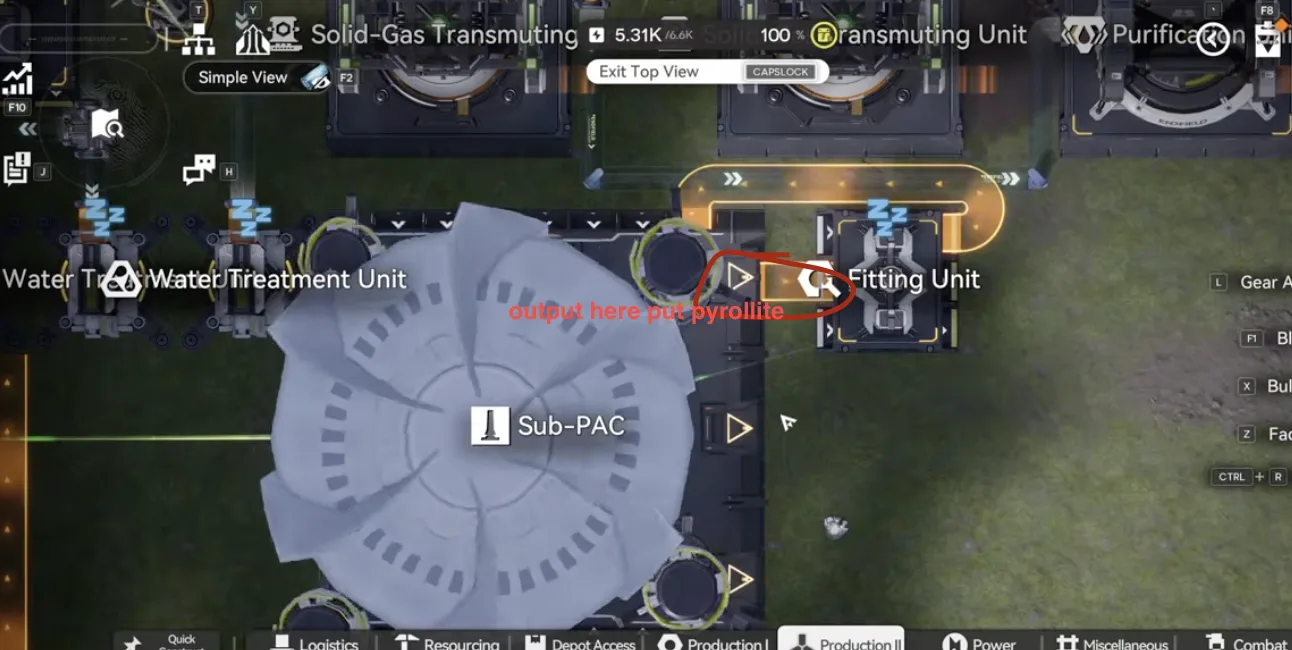
Core slotted in, top right output set to Pyrrolite
Now put 1.5 Lazy Top on the top side, like this.
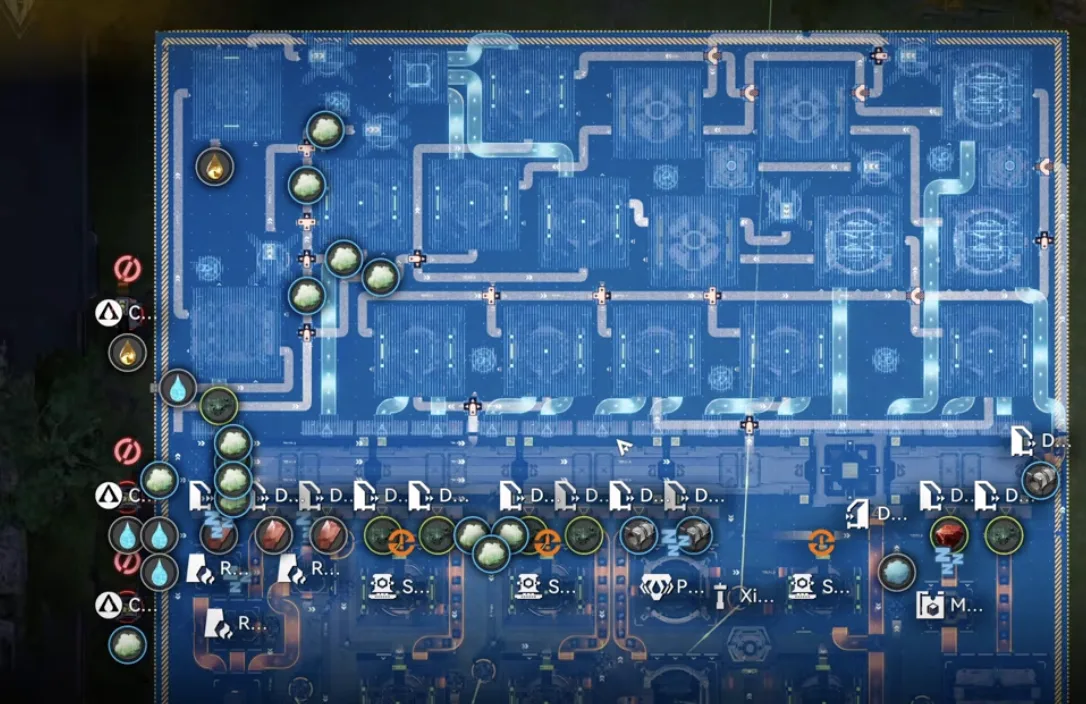
1.5 Lazy Top on the top side
With both halves down, bring the six outlets back to their final positions. The acid outlet goes here on the top side, and the single clean water outlet goes here.
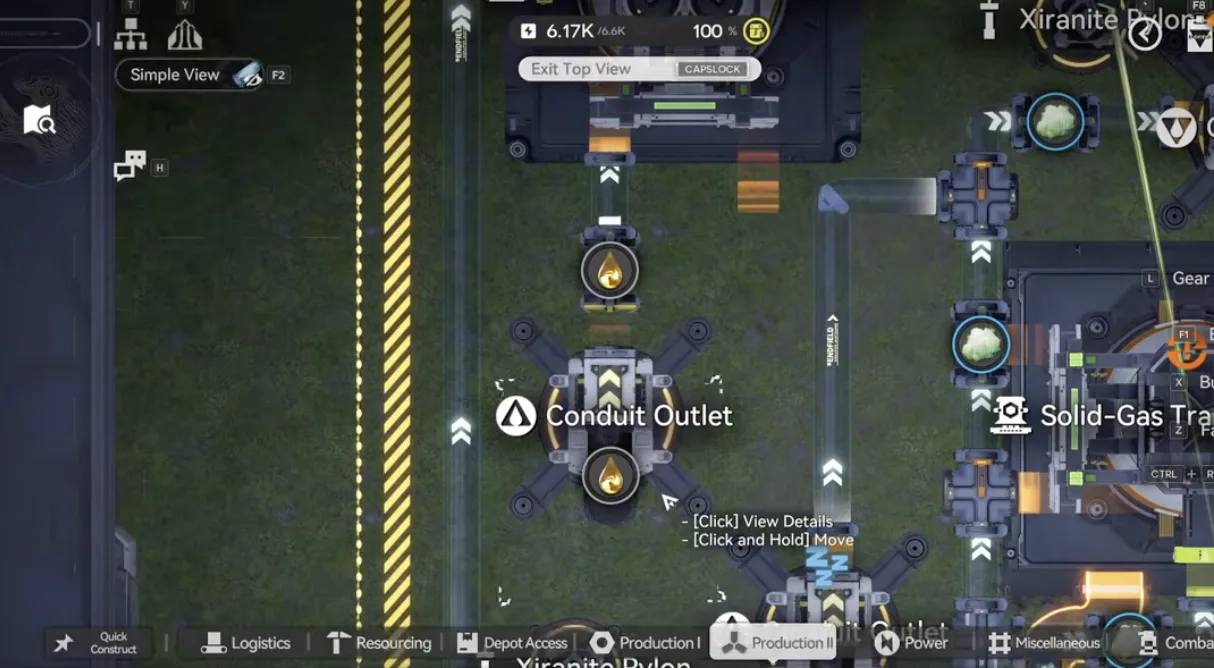
The acid outlet, back on the top side
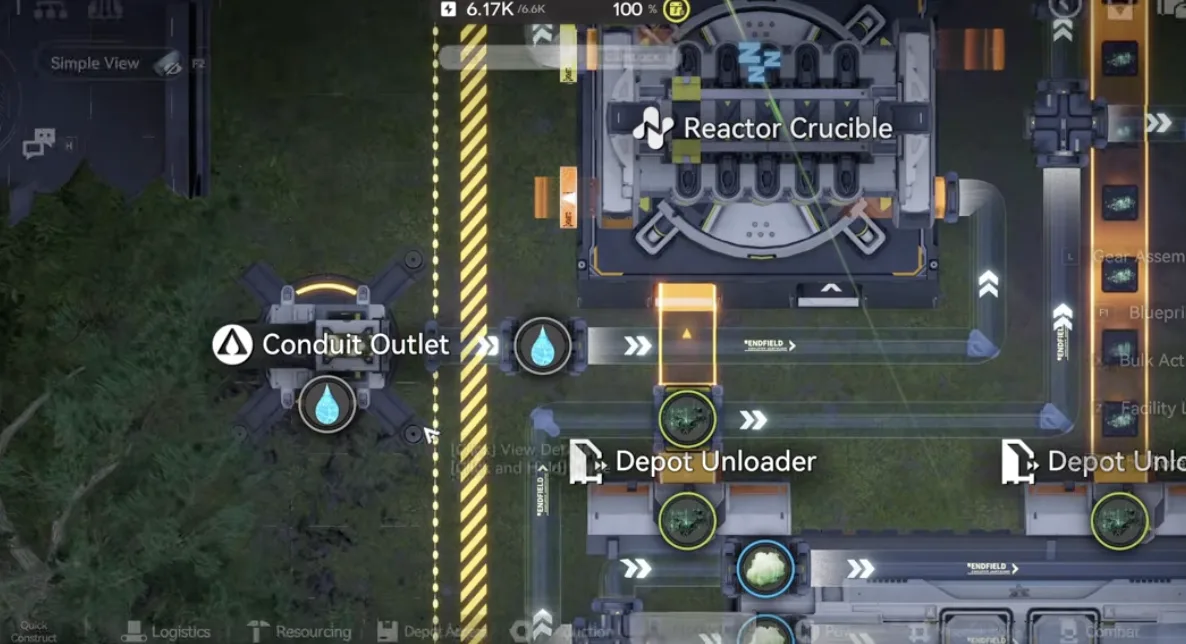
The single water outlet, connecting up to the top side
The left side Xiragen outlet sits just below the water on the left, and the double water outlet goes just below that, feeding its two pipes.
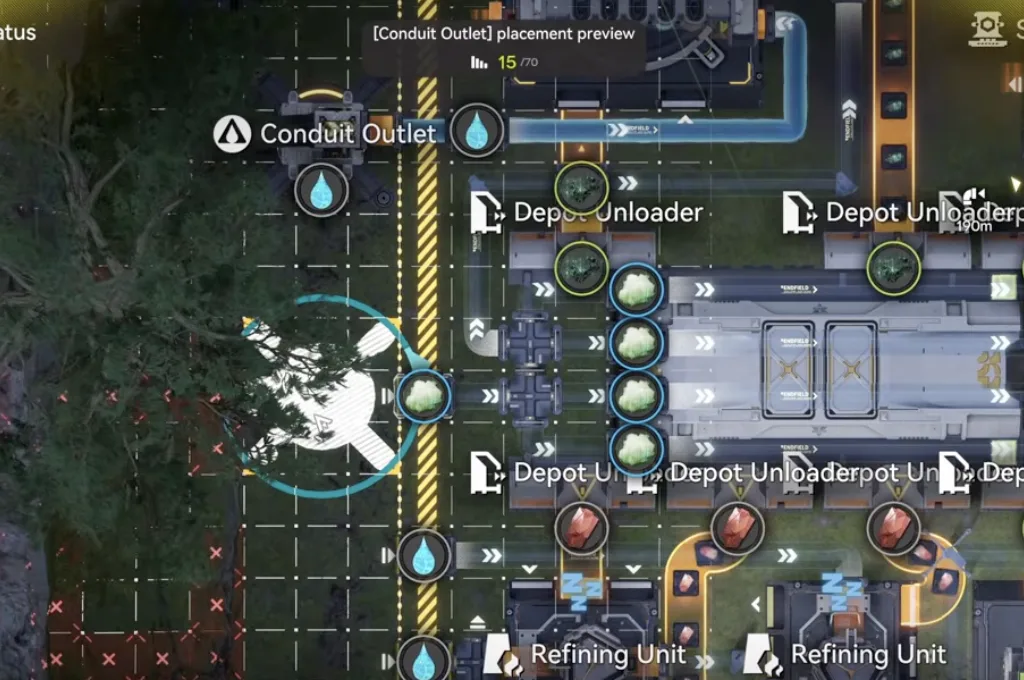
Left side Xiragen outlet, just below the water
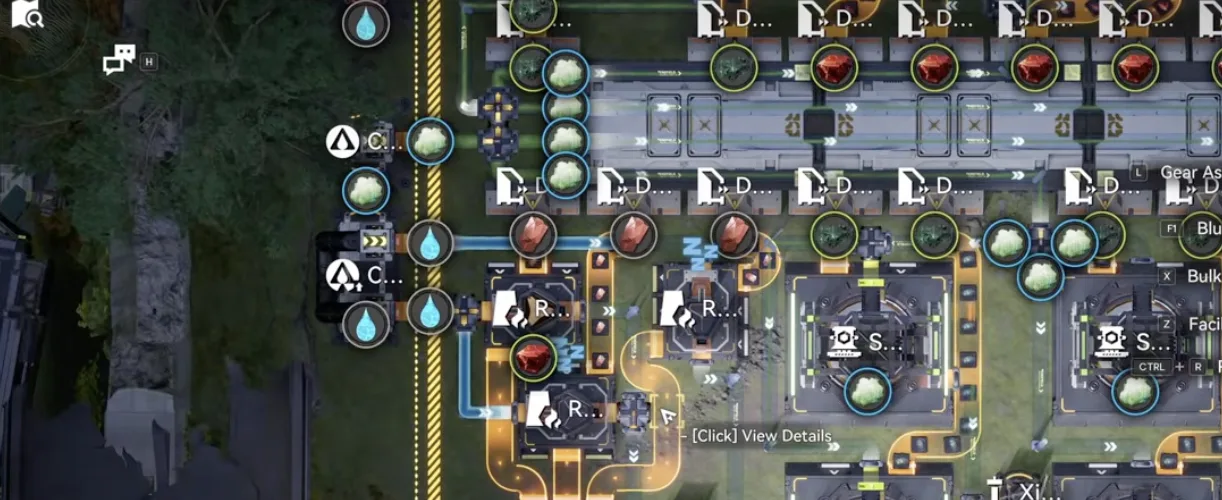
The double water outlet and its two pipes
Finally the 50 per minute Xiragen outlet goes at the bottom, and the Inergen outlet beside it.
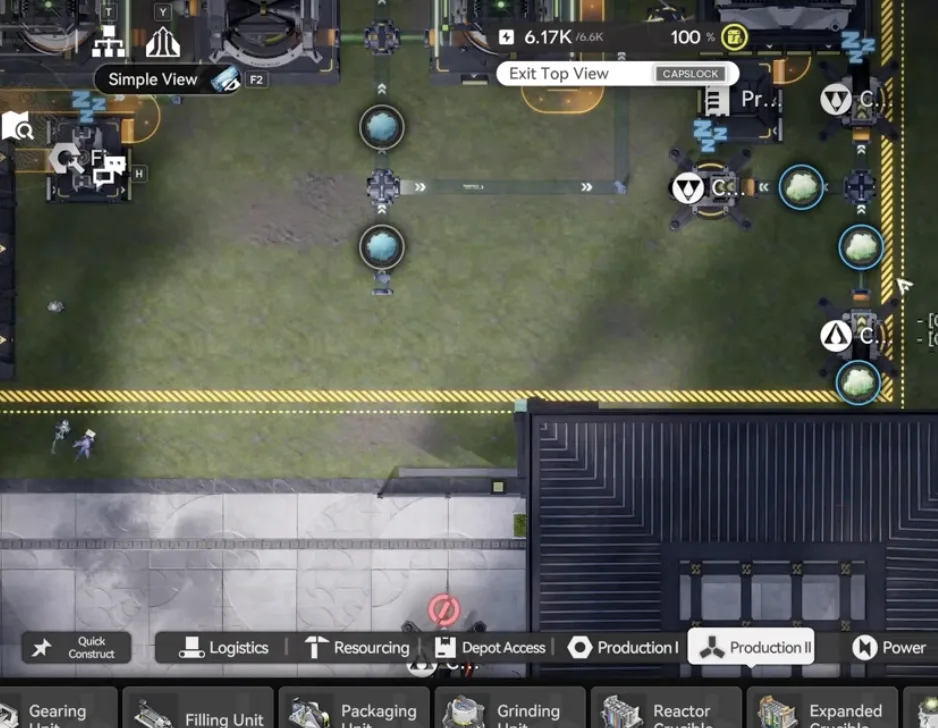
The 50 per minute Xiragen outlet at the bottom
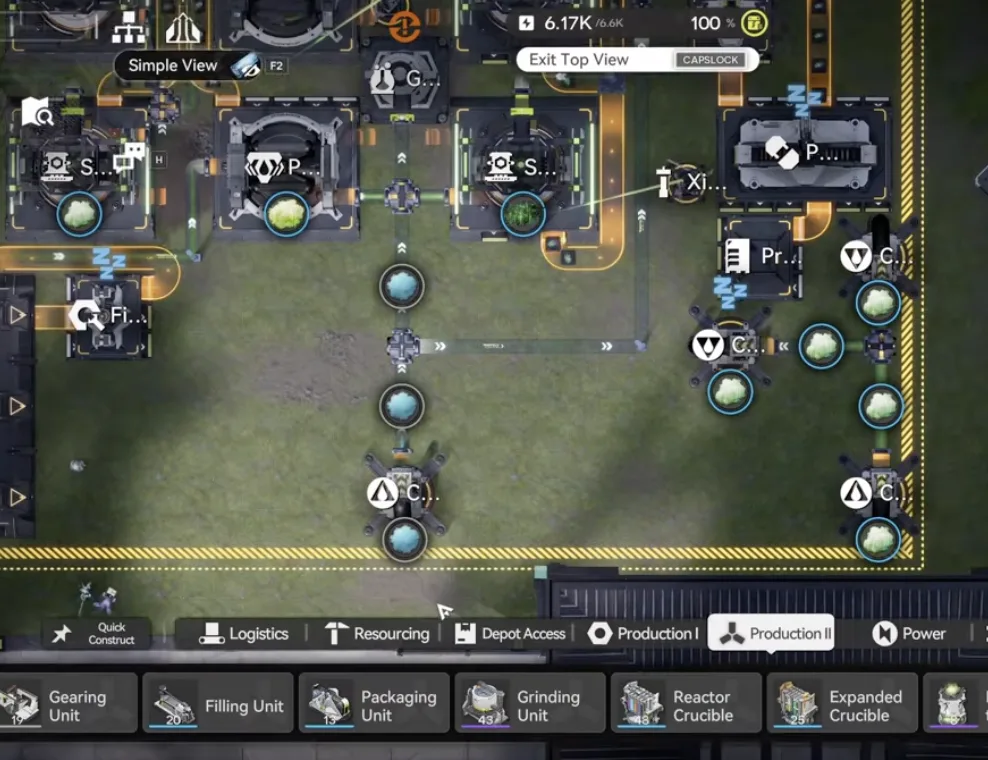
The Inergen outlet, bottom side
That is the lazy version finished. Output matches the 1.4 base plus 3 more Pyrrolite parts per minute, which on its own covers the new Level 4 outpost requirement. If that is all you wanted, skip ahead to the overflow protector section.
Full Profit: Marker Stone Sub AIC
The full profit path starts at the Marker Stone sub AIC. Before you delete anything, move the Inergen outlet up to the top, because you are about to wipe the half it currently sits on. Then delete the whole top half side.
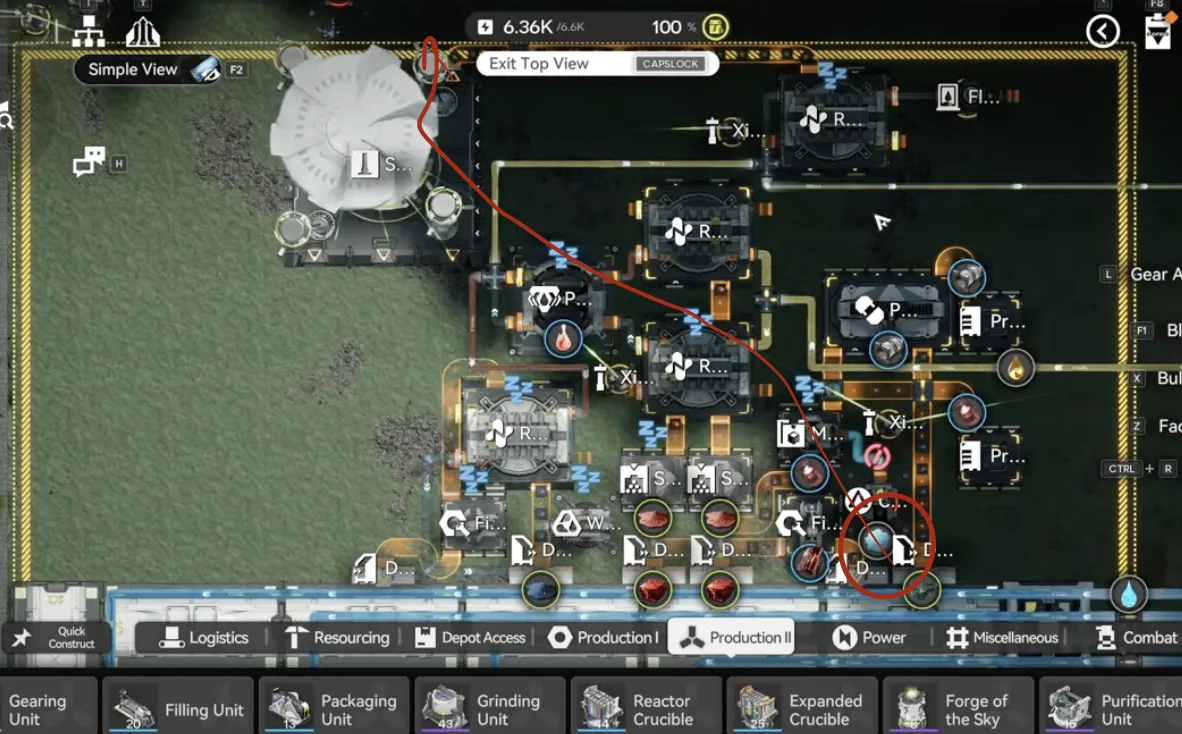
Move the Inergen outlet to the top first
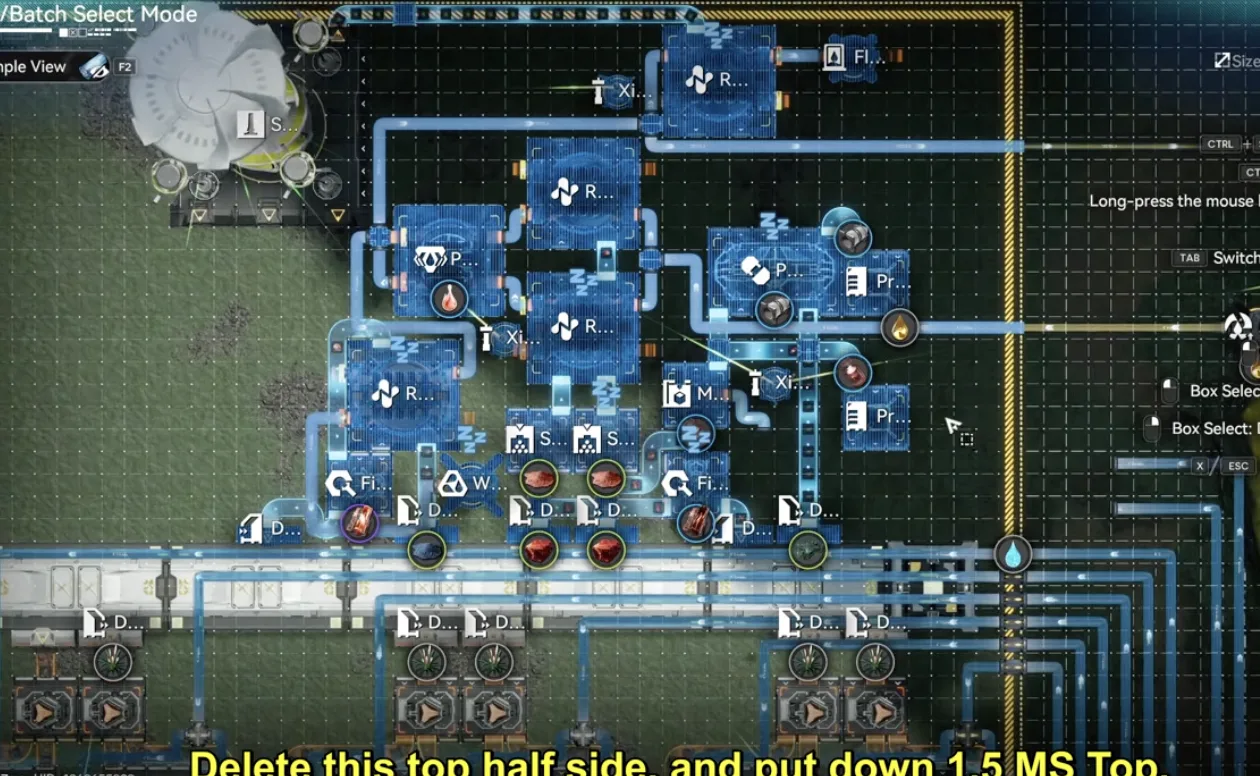
Delete the entire top half side
Now put down 1.5 MS Top, then connect the two water inputs into these two pipes. Each one needs its own 30 per minute water source. In theory the lake here supports eight Fluid Pumps, six already used by the bottom side and two for the top. If it will not take them, pull water from any nearby river with conduits instead. One rule matters here: never split one pipe into two. Run two pumps into one double inlet, then out through a double outlet.
1.5 MS Top in place, two water pipes at 30 per minute each
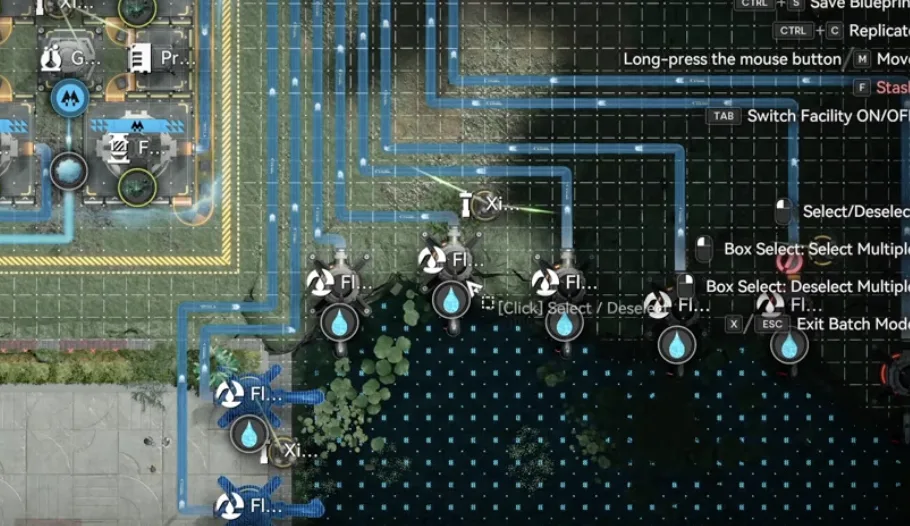
Two more pumps in the lake, eight in total if it allows
Then deploy the Inergen outlet here. That is everything for the Marker Stone sub AIC.
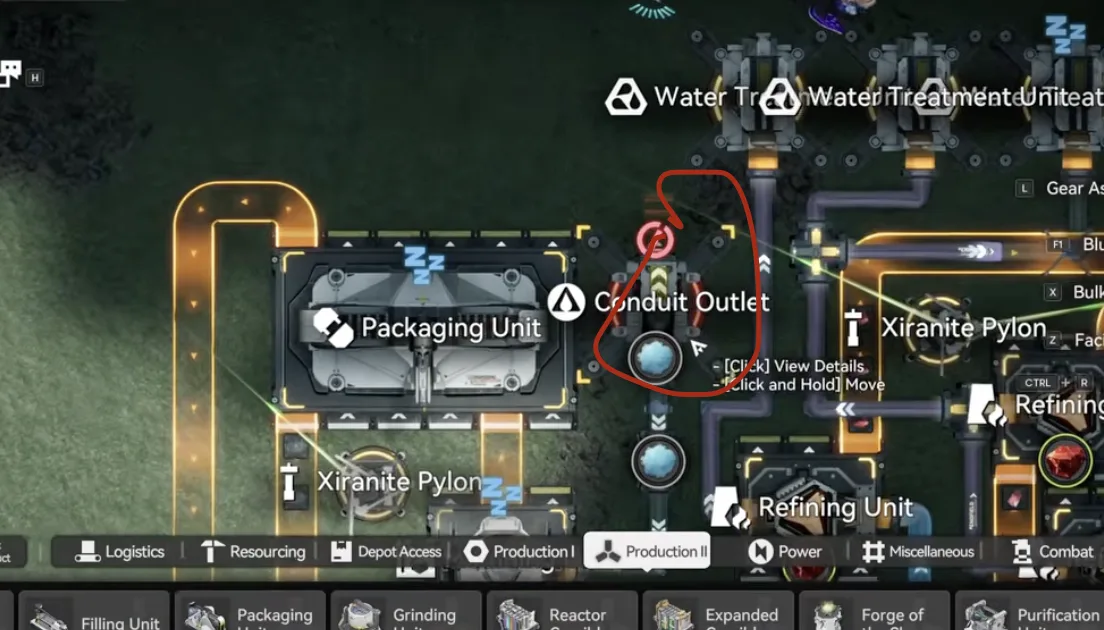
The Inergen outlet in its final spot
Full Profit: Yinglung Pass Sub AIC
Back to the Yinglung Pass sub AIC. Just like the lazy version, first move the left side and bottom outlets outside the blueprint area. Then delete everything from the base and move the Core to the top side.
Deploy 1.5 YP Bottom along the very bottom, move the Core into this position, and set the top right output to Pyrrolite, same as the lazy version.
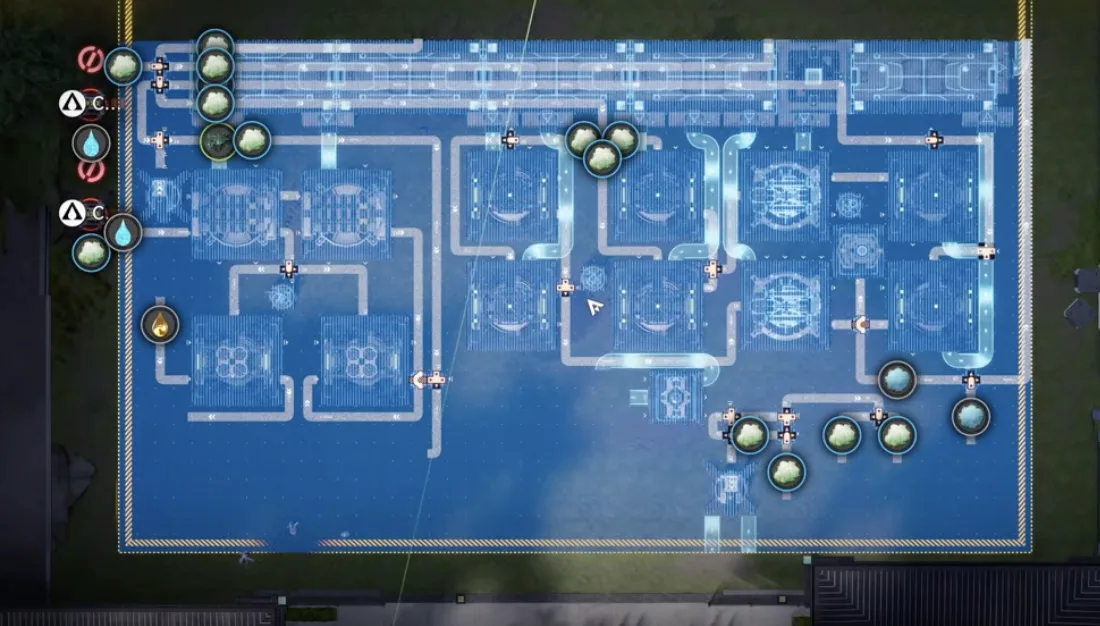
1.5 YP Bottom on the very bottom side
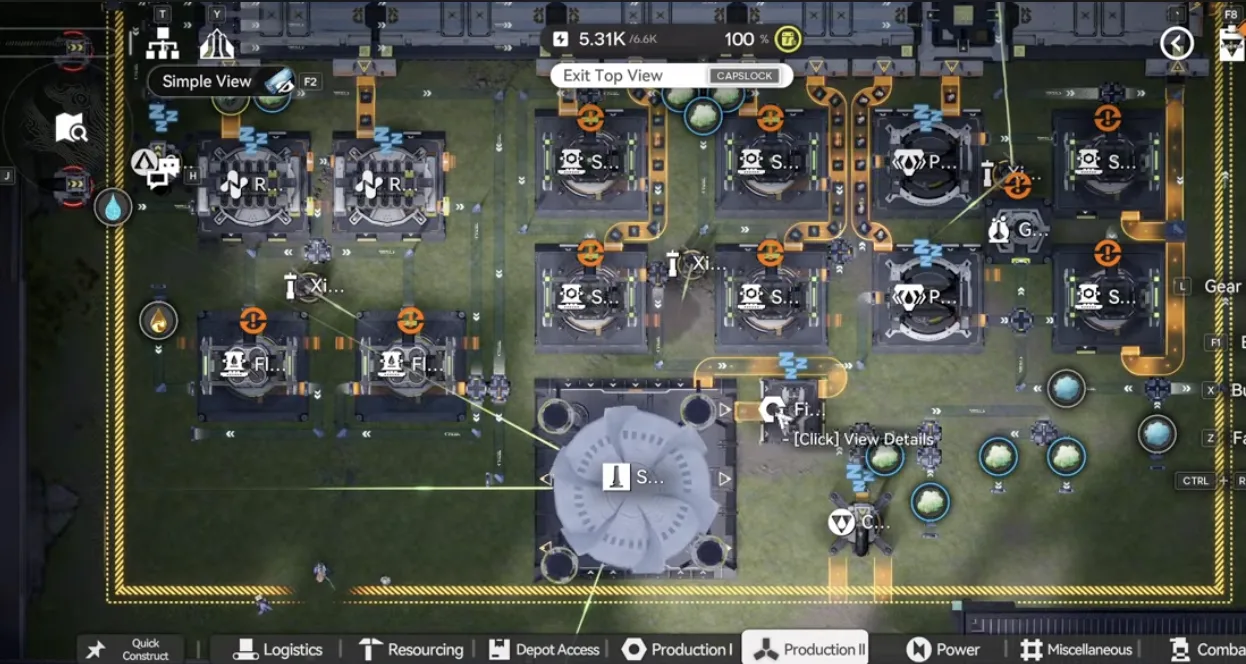
Core moved into place, top right output on Pyrrolite
Now deploy 1.5 YP Top on the far right side, like this.
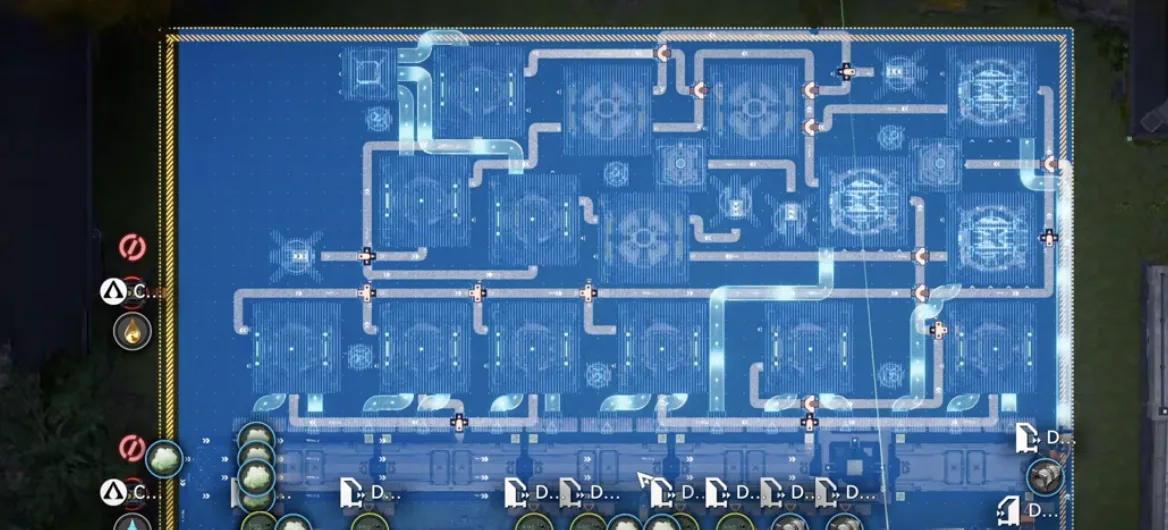
1.5 YP Top on the far right side
With both halves down, move the outlets to their places. The Inergen outlet goes on the bottom right, and the 50 per minute Xiragen outlet next to it.
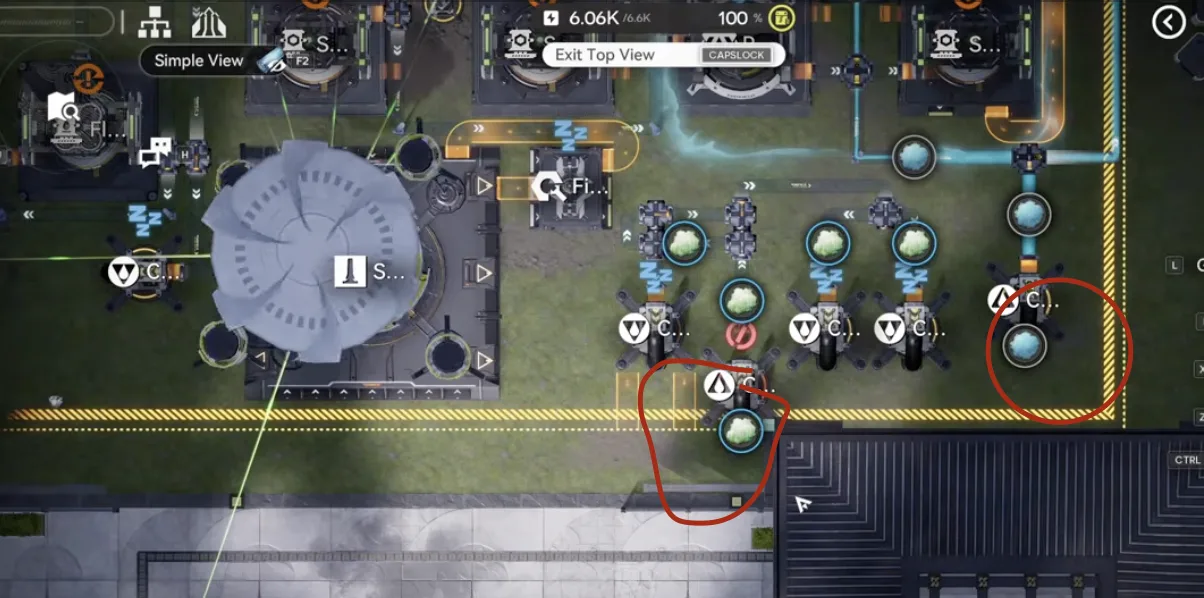
Inergen and the 50 per minute Xiragen outlet, bottom right
Then the acid outlet here, and the clean water outlet here.
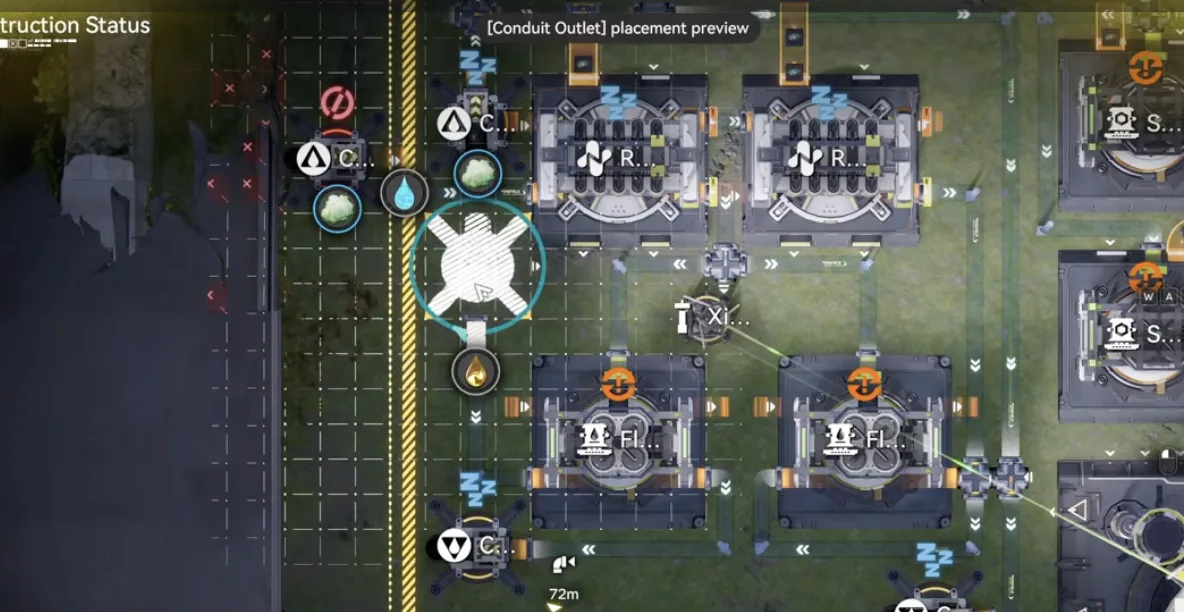
The acid outlet in position
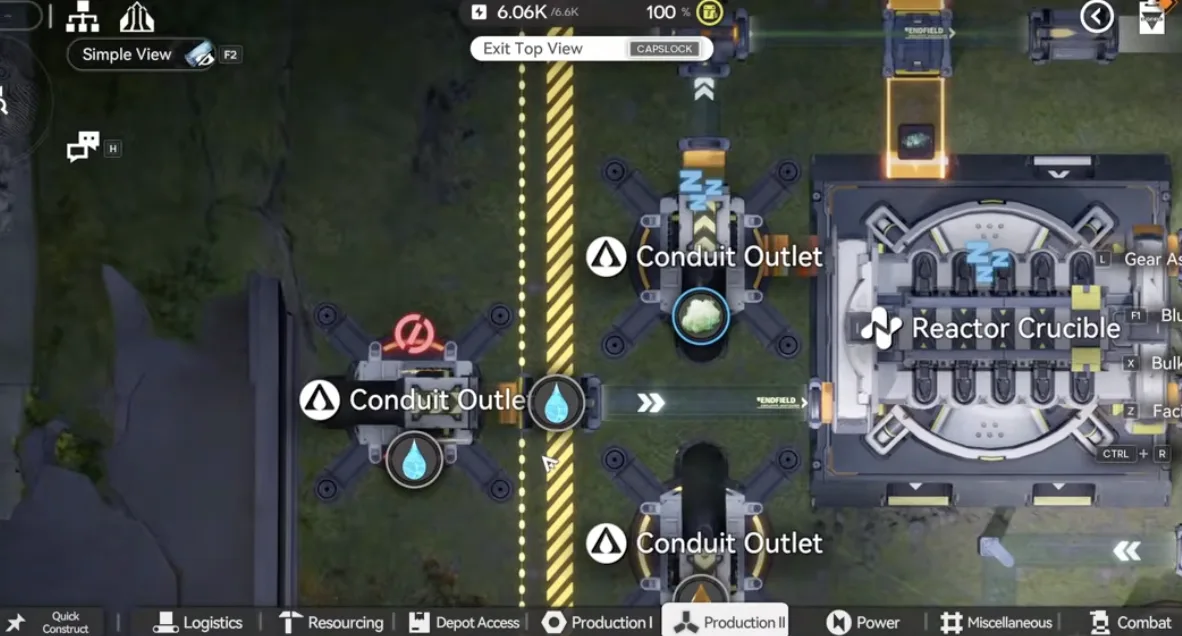
The clean water outlet in position
Last one, the 100 per minute Xiragen outlet. The base is now fully set up.
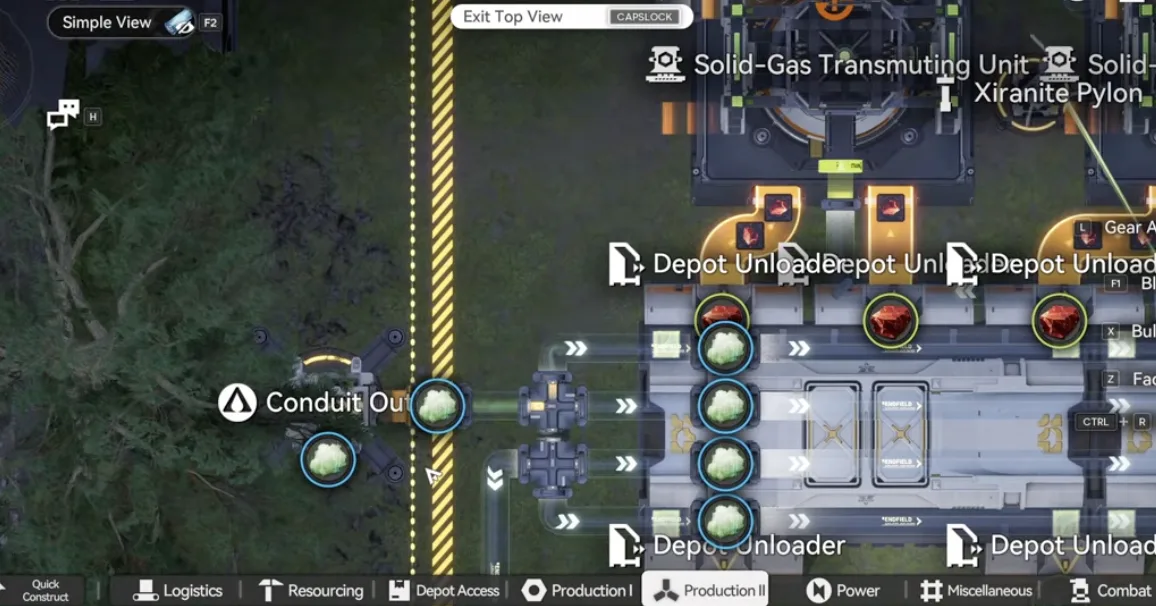
The 100 per minute Xiragen outlet finishes the build
The base now produces 18 Pyrrolite parts instead of the 12 from the previous patch. What it will not make is anything extra, so no Hetonite parts and no meds. That is what the extra blueprints are for.
Extra Blueprints
These four are temporary by design. Every one of them has an Item Control Port with a quantity limit, because they consume Cuprium that was supposed to become Pyrrolite parts, and Pyrrolite parts are worth more when sold. Deploy one, take what you need, then remove it. All four are variations you can drop on the Marker Stone sub AIC.
1.5 Extra Heto
If you need Hetonite parts to craft the related turrets, deploy 1.5 Extra Heto on the left side of the Marker Stone sub AIC. Plug in an acid pipe, and route the pipe going out into a Fluid Supply Unit.
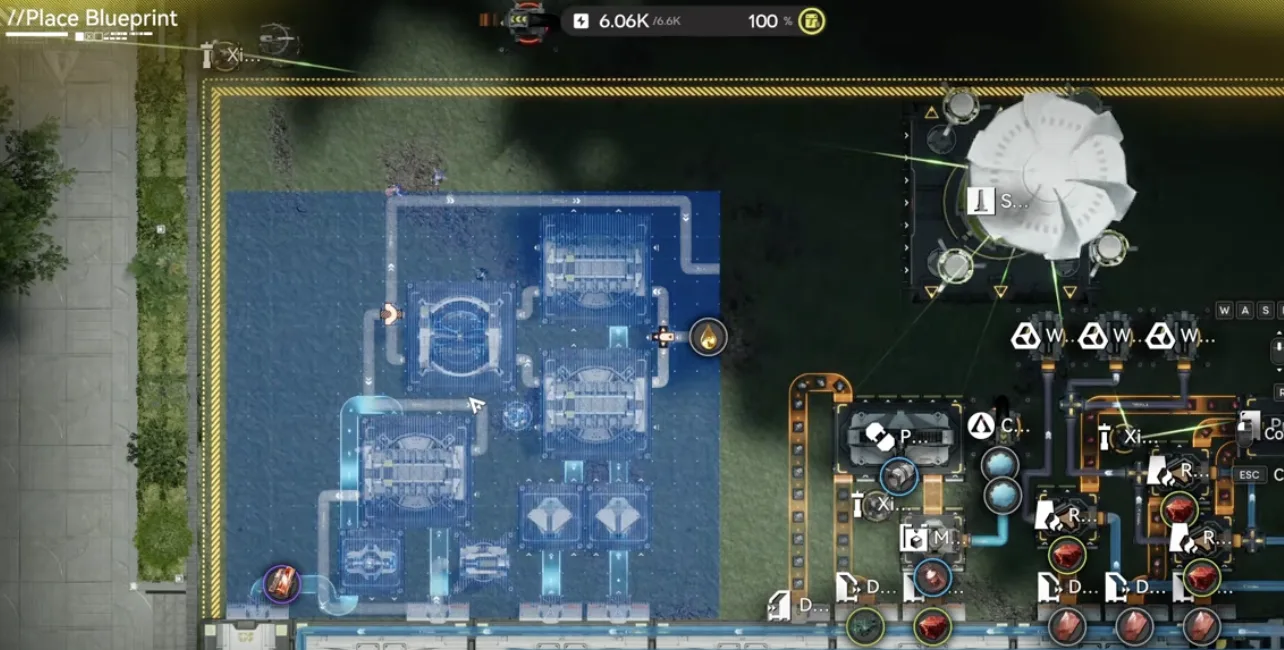
1.5 Extra Heto on the left side
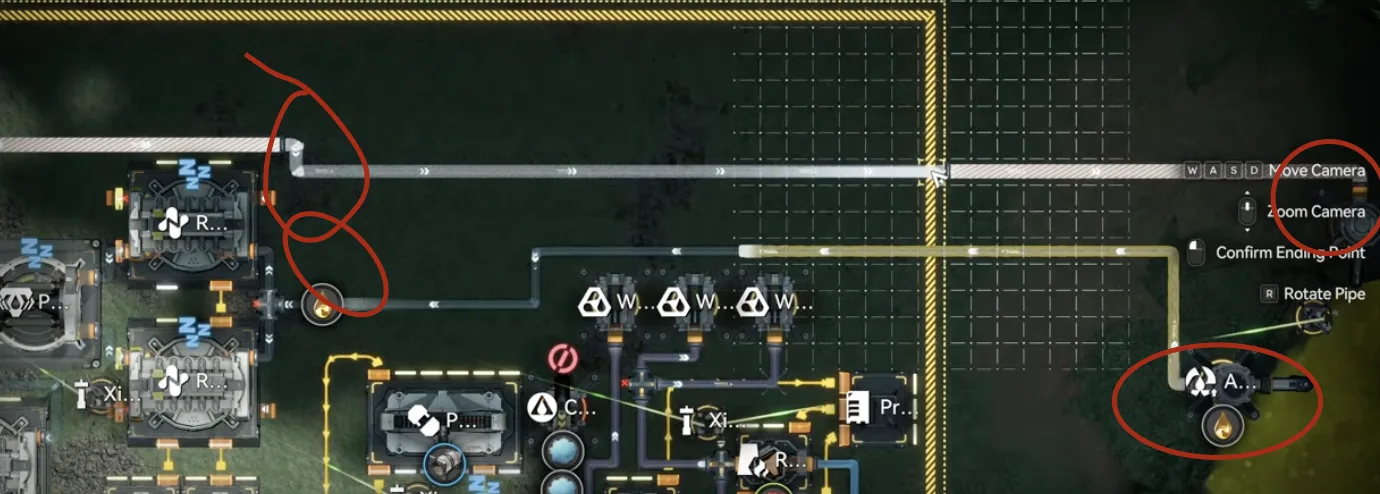
Acid in, and the outgoing pipe into a Fluid Supply Unit
The Item Control Port is set to 500 Hetonite parts by default. Change the number if you need more, but do not run it forever, since it slows the Pyrrolite parts line.
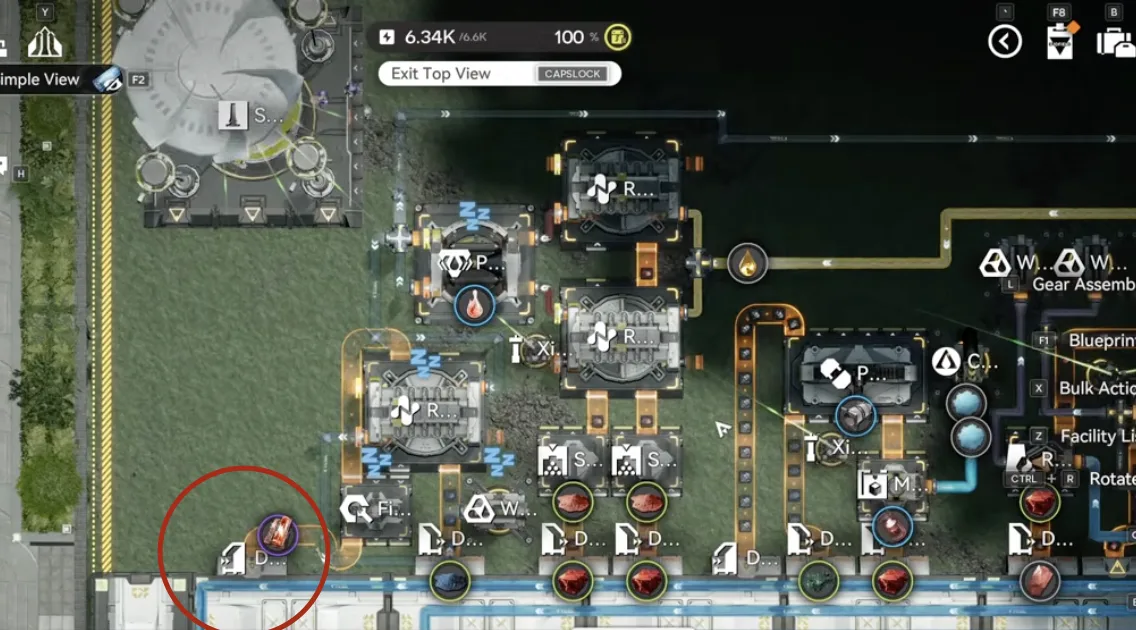
Where to find the Item Control Port
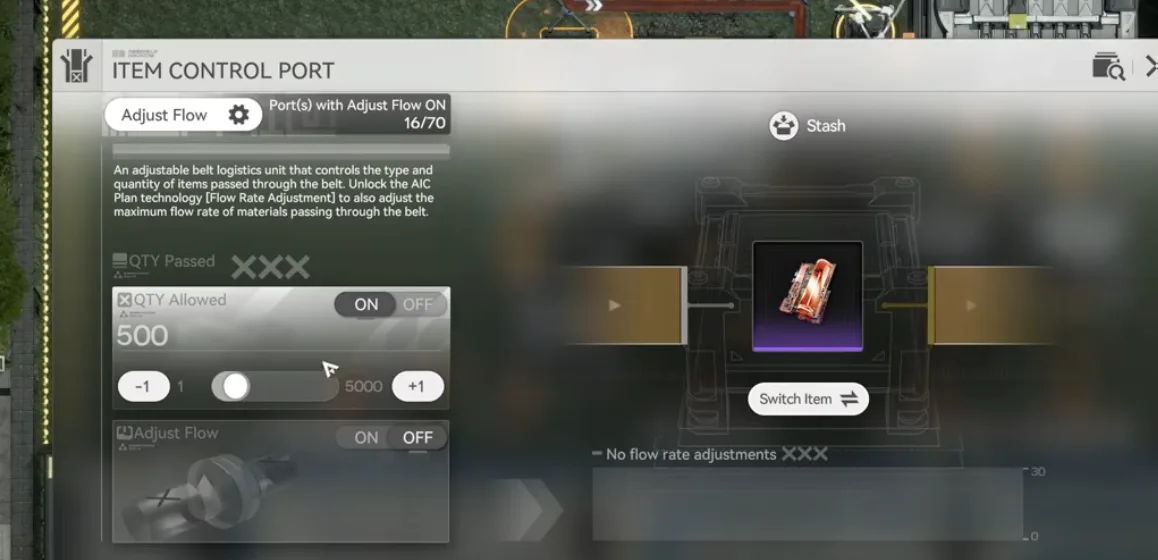
QTY Allowed set to 500 by default
1.5 Extra Meds
Ran out of meds? Deploy 1.5 Extra Meds and plug in a clean water pipe to make it run. Put one stack of Yazhen in the seed machine and by default it passes Yazhen Syringes. If you would rather have Jin Cao tea, change the item port to Jin Cao, set the number manually, and swap the crop in the seed machine to Jin Cao as well.
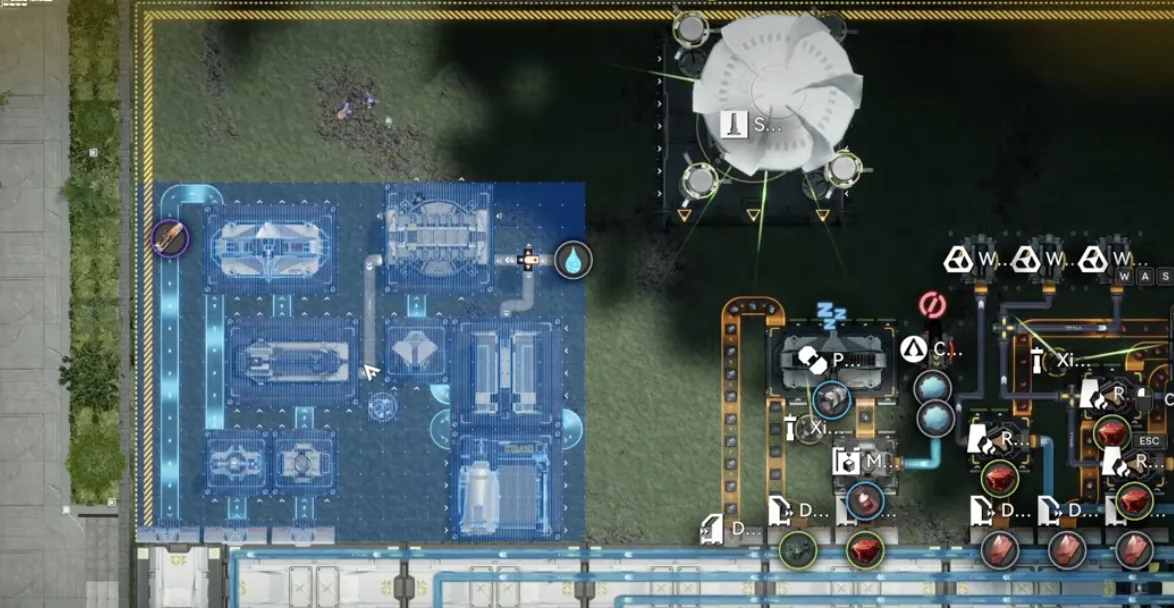
1.5 Extra Meds, clean water plugged in
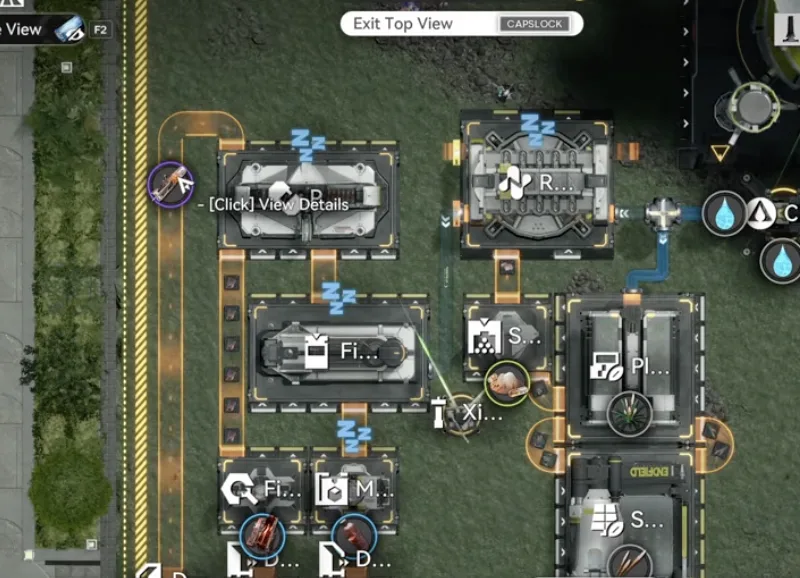
One stack of Yazhen in the seed machine
1.5 Extra LiqX
For exploration you sometimes need liquid Xiranite. Deploy 1.5 Extra LiqX here, take the Heavy Xiranite from the Core, and plug the acid input into this pipe. It produces 1,000 liquid Heavy Xiranite and stores it in two fluid tanks, so you can bottle it straight from there.
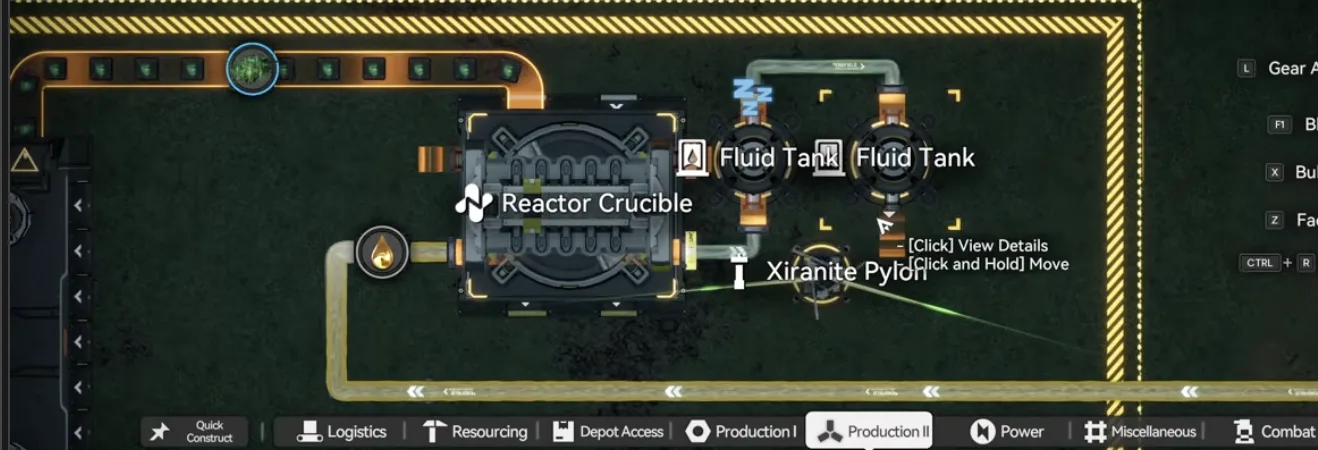
1,000 liquid Heavy Xiranite, stored in two fluid tanks
1.5 Extra Cup.P
Most Wuling devices need plain Cuprium parts to craft. This one is the simplest of the set: deploy it and let it run. It makes 2,000 Cuprium parts, and you can raise the number if you need more.
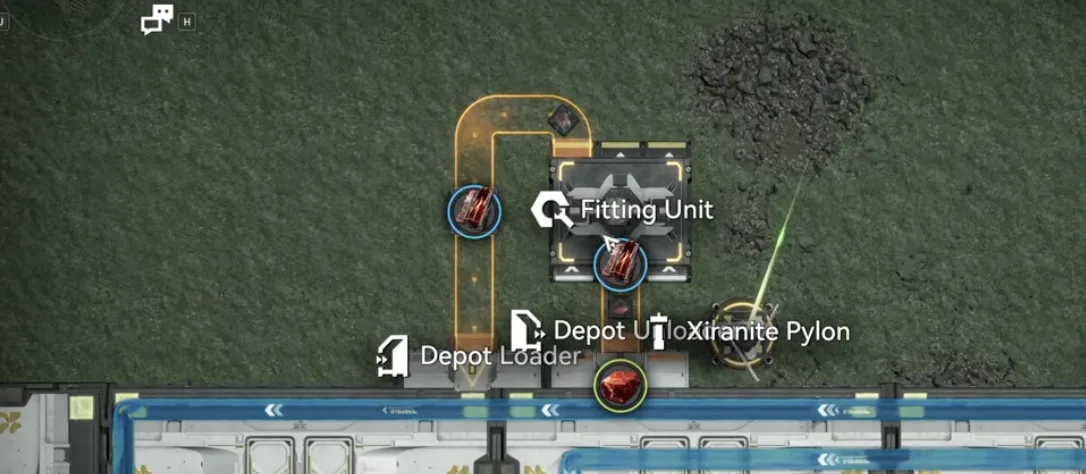
A small blueprint for 2,000 Cuprium parts
Overflow Protector Changes
The overflow protector blueprints handle items that reach the depot limit so the base never clogs, which means you do not have to watch every material. They are already updated to the newest version.
If you deployed an older one, the fastest fix is to redeploy them by following that guide again. Otherwise, replace the Depot Loader with a Protocol Stash. The Depot Loader sometimes bugs out and still clogs the production line, while the Protocol Stash works every time.
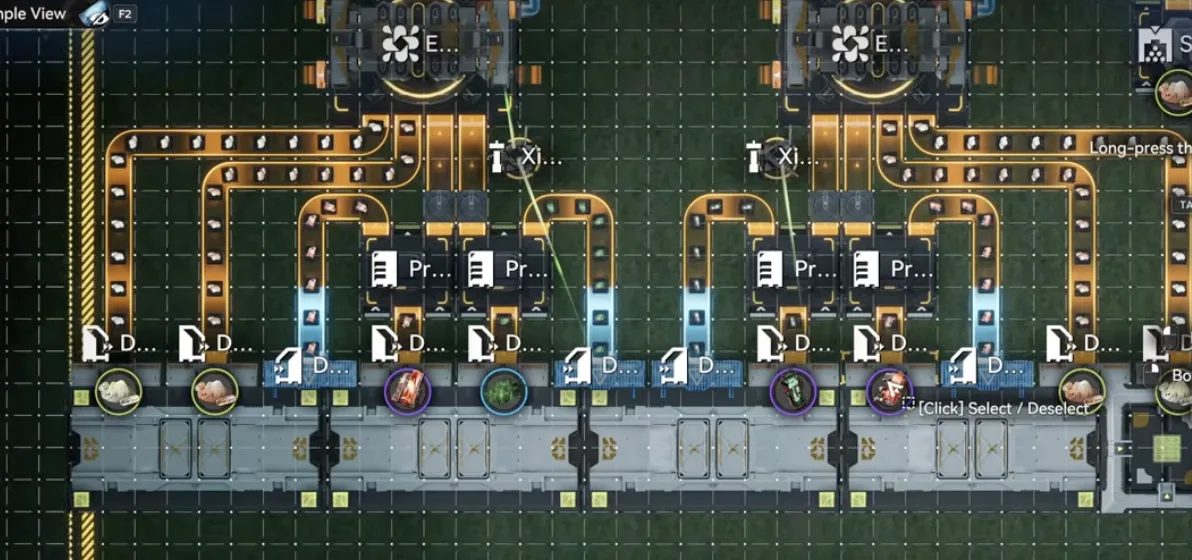
Swap the Depot Loader for a Protocol Stash
One more thing if you are on an Asia server and used the Asia codes from the 1.4 guide. Go to the Core AIC area and check every Expanded Crucible: the old blueprint did not save the Multi-Clog Auto-Fix option, so you need to enable it manually on each one. It is not a severe issue, but it is better on. The NA/EU blueprints saved it correctly, and the Asia blueprint has since been fixed, so new imports carry the setting.
Power & Meta Storage
Leave the Meta Storage Transfer on Dense Originium Powder exactly as the 1.4 guide set it. Do not touch it.
For power you will most likely want three Thermal Banks, the default. Two is enough only if you have zero turrets running on Pylons and not many zip lines in the area. It does not matter much either way, because the base overproduces power regardless.
Production Summary
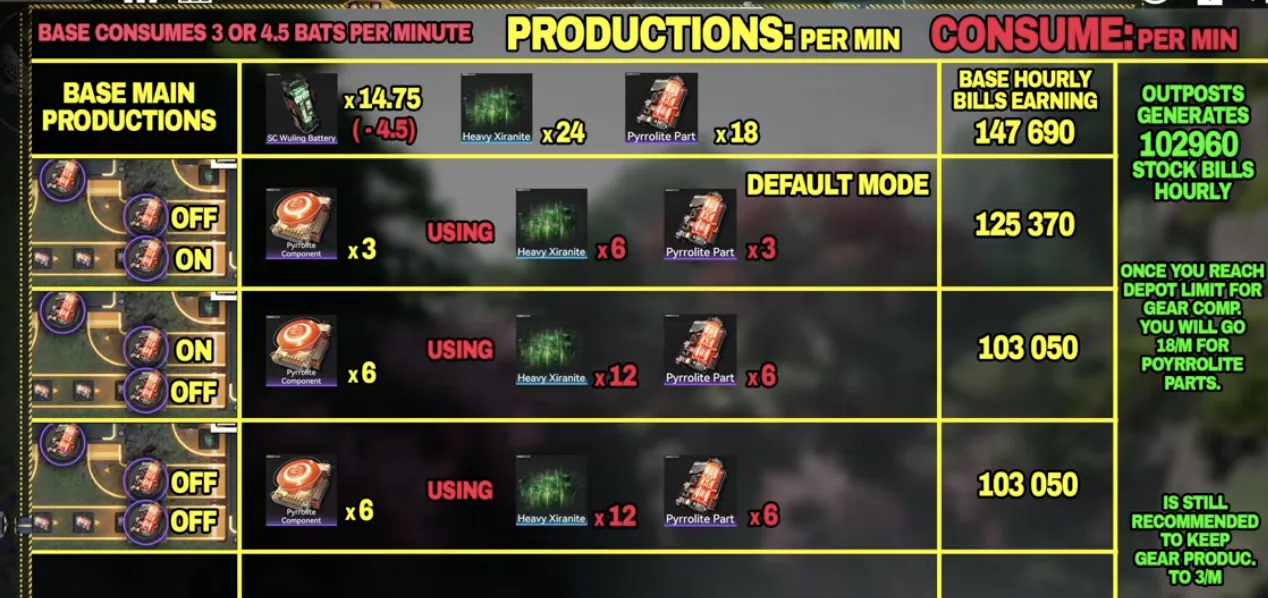
Per minute output and hourly Stock Bills at each gear component setting
On the full profit setup the base produces 14.75 SC Wuling Batteries, 24 Heavy Xiranite, and 18 Pyrrolite Parts per minute. The Thermal Banks burn between 3 and 4.5 batteries a minute depending on how many you run, so assume the worst case of 4.5 and you still keep 10.25 batteries per minute as profit.
With gear components switched off entirely, that is 147,690 Stock Bills per hour. At the default 3 Pyrrolite Components per minute the base consumes 6 Heavy Xiranite and 3 Pyrrolite Parts, leaving 125,370 per hour. At the maximum 6 per minute it consumes 12 Heavy Xiranite and 6 Pyrrolite Parts, leaving 103,050 per hour.
With all three outposts at Level 4 and the tower defense done you need 102,960 Stock Bills per hour, so even the worst case clears it. That 103,050 breaks down as 33,210 from batteries, 50,400 from Pyrrolite parts, and 19,440 from Heavy Xiranite.
Honestly, you do not need that many components. Keep it at 3 per minute. Whether you craft 3 or 6, you reach the component depot limit sooner or later, and at 6 per minute that takes around 10 days. Once you hit the cap the base stops consuming and falls back to the full 18 Pyrrolite Parts per minute and 147,690 per hour. That is fine: with the overflow protector in place, items that overflow at the depot limit get handled and nothing clogs.
On the lazy version the numbers are the same as 1.4 plus 3 more Pyrrolite parts per minute, which is more than enough to cover the new Level 4 outpost requirement on its own.
One final note, and it applies to every blueprint in this guide: whatever you see inside the blueprint, do not touch anything.

Tap through for today's price on the official store. Affiliate link, we may earn a commission.