MARKED BY DARK SHADOWS: UMBRAL MONUMENT GUIDE
Table of Contents
Marked by Dark Shadows is the 7th Umbral Monument series, live since October 5, 2026: four stages, Normal and Agony. Its event, Monumental Etching: Shadow Marked, ends October 19 at 04:00 server time.
TL;DR - Key Points
- Four stages, in this order: Tri-Aggelated Targeting, Feral Carnage of Shadow, Sudden Roar of Oblivion, Arc of Shadow Flare
- Monumental Etching: Shadow Marked closes October 19, 2026 at 04:00 server time. The stages are permanent; only the event pay-out is on a clock
- Stage 1 pins several Heavy Sting α in place with huge range, and on Agony the first kill buffs the rest. Bring their HP down together
- Stage 2 swaps two Ethereal (untargetable) Blightshade beasts back and forth. Arts Burst, Breach or Crush on the Quillbeast makes Lightning Orbs, the only answer to the undodgeable Thunder Strikes (5 on Normal, 7 on Agony)
- Stage 3 turns off SP regeneration but hands every operator 1,000 SP. Exploding Blightshades are on timers, and Stagger pauses those timers
- Stage 4 adds 60 seconds to every battle skill cooldown. Every 4th Electric Infliction on your squad resets those cooldowns and puts a Level 4 Electrification on the boss
- Agony raises enemies to Lv. 90 and bans Tacticals and consumables. Both modes flatten every enemy’s elemental resistances
Monumental Etching: Shadow Marked, What the Deadline Gates
The series opened on October 5, 2026 at 12:00 server time, the same moment the event did. Monumental Etching: Shadow Marked runs until October 19, 2026 at 04:00 server time. That is a fixed two-week window, not “until the next version”, so it closes regardless of when Version 1.6 lands.
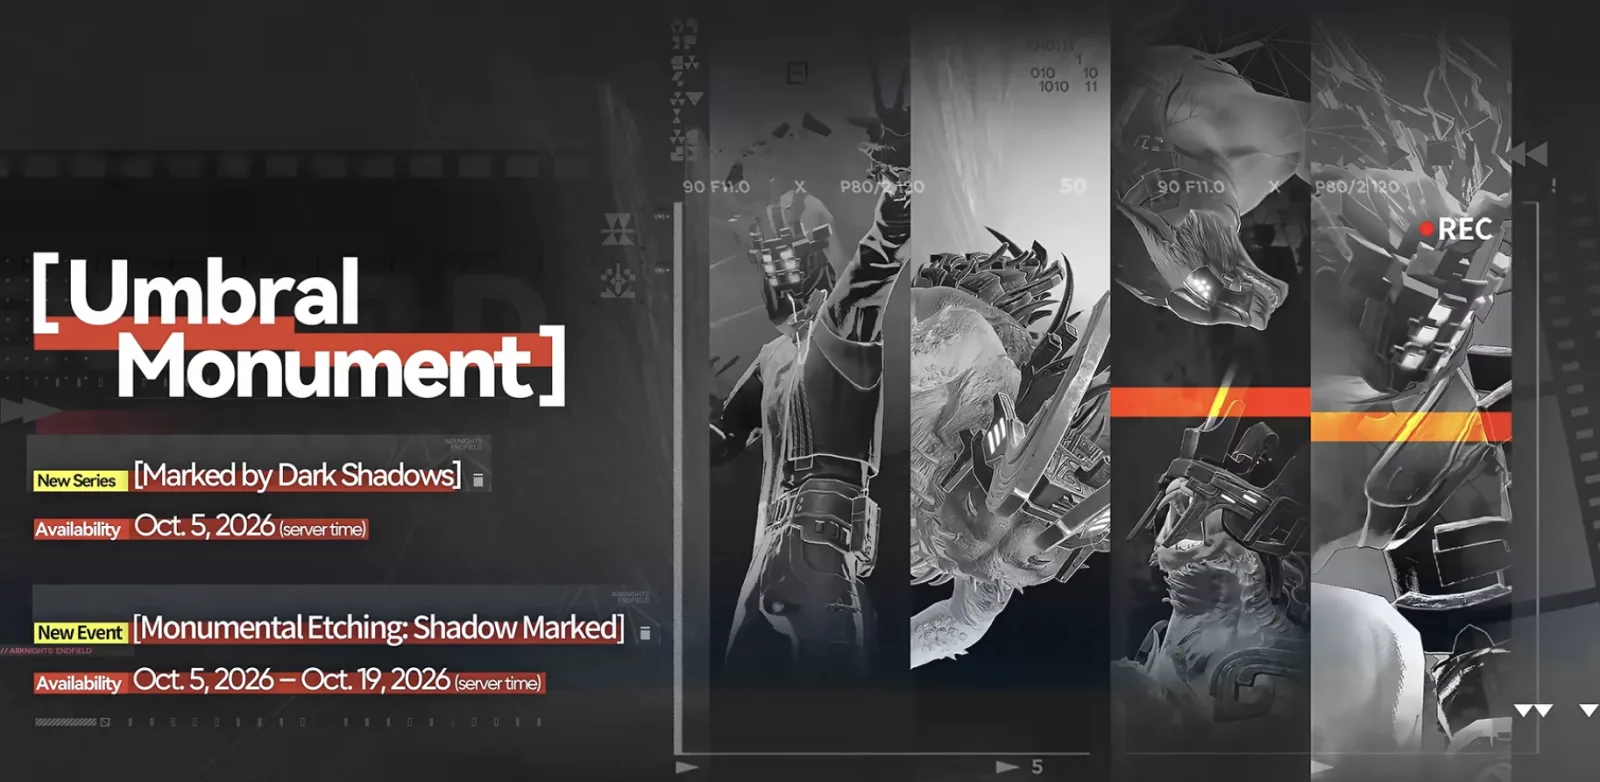
The series and event dates from the Version 1.5 update announcement. Graphic (c) Gryphline.
The event pays 1,200 Oroberyl and an Advanced Progression Selection Crate I across its missions. That matches the 1,200 Oroberyl that Corrupting Surge paid, so the Etching events are holding steady. The mission text in the game data shows what counts:
- Clearing individual Marked by Dark Shadows stages on Normal
- Challenging any Marked by Dark Shadows stage on Agony once (an attempt, not a clear)
- Clearing all Marked by Dark Shadows stages on Normal, then all on Agony
The practical instruction: bank four Normal clears and one Agony attempt before October 19, then take the full Agony set at your own pace. The game data also lists two Protocol Pass missions tied to the series, worth 3,000 pass EXP each: one for clearing Feral Carnage of Shadow and Arc of Shadow Flare on Normal, the other for Sudden Roar of Oblivion and Tri-Aggelated Targeting.
When and How to Access
Unlock requirements are the same as for every series:
- Complete the main mission Chapter I Process II: Paving the Way
- Reach Authority Level 30
The mode rules carry over too: four operators, two difficulties per stage, and Agony unlocks only after you clear that stage on Normal. The game data sets the recommended level at Lv. 60 for Normal and Lv. 90 for Agony, and every stage costs 0 Sanity, so retries are free.
What Changed in Series 7
| Series | Name | Stages | Event |
|---|---|---|---|
| 1 | Those Forsaken by the Land | 3 | Monumental Etching: Old Wounds |
| 2 | Inorganic Construct | 3 | Monumental Etching: Old Wounds |
| 3 | Searing Scars | 3 | Monumental Etching: Scorch Mark |
| 4 | Turbidity Manifest | 6 | Monumental Etching: Corrupting Surge |
| 5 | Contention of Deathly Silences | 6 | Monumental Etching: Dirge of Grief |
| 6 | Howlers of the Crag | 4 | Monumental Etching: Beastly Howl |
| 7 | Marked by Dark Shadows | 4 | Monumental Etching: Shadow Marked |
Three things set this series apart.
It is a Blightshade series. Three of the four stages are filled with Blightshades, the residual-Æther “shadows” of Yinglung Pass that our Blightshade bestiary covers in depth. The beasts (Tuskbeast, Quillbeast, Rakerbeast) and the YSTF soldiers (Vanguard, Elite, Glaiver, Captain) all show up. The odd one out is Stage 1, which brings back an Aggeloi: Heavy Sting α.
Elemental resistance is off the table. Every stage carries the line, on Normal as well as Agony: “Enemies have the same resistance against every element.” By base data, most Blightshades resist Electric (0.65x) and Physical (0.8x). Those numbers appear in the tables below, but in this series they should not decide your team.
Every stage is a rules test, not a DPS check. The common complaint about this series is that it is the hardest Umbral Monument yet. It mostly isn’t, once you have read what each stage does. Each one has a mechanic that kills you if ignored and carries you if used: the first-kill buff, the Lightning Orbs, the Stagger-paused timers, and the 4-stack cooldown reset.
All four stages in one 9-minute run. Stage 1 starts at 0:00, Stage 2 at 2:23, Stage 3 at 5:19 and Stage 4 at 7:10.
Stage 1: Tri-Aggelated Targeting
Enemies: several Heavy Sting α (Aggeloi), the energized ARL141α variant the game calls the Varykentron Anavon.
Enemies cannot move but have vastly extended attack ranges. When an enemy is defeated for the first time, the other enemies gain an ATK boost and faster ATK speeds.
The Heavy Sting α are pinned in place, but their range covers the arena, so there is no safe corner to fight from. Their two abilities from the game data set the pace: Originium pillars erupt under your operators, and each one summons stone pillars around itself when you get close. You will be standing next to one target while the others keep firing at you from across the map.
The rule that matters is the second sentence, and the game data shows it is Agony only: Normal lists just the immobility and the extended range. On Agony, the first kill buffs every survivor’s ATK and attack speed, so the classic “delete one, then the next” plan makes the last fight the hardest. The fix is the same one Howlers of the Crag’s Stage 1 taught: spread damage so all of them reach low HP together, then finish them in quick succession. AoE ultimates and kits that hit several targets at once are worth more here than single-target burst.
| Heavy Sting α | Lv. 60 (Normal) | Lv. 90 (Agony) |
|---|---|---|
| HP | 195,528 | 724,559 |
| ATK | 2,156 | 3,717 |
| DEF | 100 | 100 |
| Poise | 180, 7.5s recovery | 180, 7.5s recovery |
| Base resistances | Physical, Heat, Nature 0.8x; others 1.0x | Same (flattened in-stage) |
The stage’s in-game death tips only say “equip gear” and “promote operators”, which tells you how the designers see it: a stat check. If you are losing here, it is usually because your operators are underbuilt, not because you missed a trick.
Tri-Aggelated Targeting on Agony, a full clear of the stationary Heavy Sting α group.
Stage 2: Feral Carnage of Shadow
Enemies: Quillbeast Blightshade and Rakerbeast Blightshade.
An enemy in Ethereal state is immune to DMG and cannot be targeted. Once the battle begins, the Quillbeast Blightshade will enter its Ethereal state and constantly perform ramming attacks. Meanwhile, the Rakerbeast Blightshade will regularly apply Shield on itself. The Quillbeast Blightshade’s ramming can shatter this Shield.
The stage runs in three phases, and knowing which one you are in is most of the work:
- Rakerbeast phase. The Quillbeast is Ethereal and keeps ramming. The Rakerbeast is your only target, and it keeps shielding itself. The Quillbeast’s ramming breaks that Shield, so position so the rams pass through the Rakerbeast rather than chasing the shield down yourself.
- Thunder Strike phase. Once the Rakerbeast is at low HP, the two swap. The Rakerbeast turns Ethereal and casts Thunder Strike on your controlled operator, up to 5 times on Normal and 7 on Agony. Thunder Strike cannot be dodged. The Quillbeast drops its Ethereal state and becomes the target.
- Together phase. When the Quillbeast also reaches low HP, its Ethereal state ends and both beasts attack at once.
Phase 2 is where runs die. The only defence is the Lightning Orb: “Applying Arts Burst, Breach, or Crush on the Quillbeast Blightshade will create Lightning Orbs.” Picking up one orb gives the controlled operator a shield that blocks one Thunder Strike. With up to 7 strikes coming on Agony, you want a team that can trigger those three effects again and again. Arts Burst comes from stacking the same Arts Infliction. Breach and Crush are the Physical statuses. That is why full Physical teams do well here: Breach and Crush come up constantly in a Physical rotation.
| Stat | Rakerbeast Blightshade | Quillbeast Blightshade |
|---|---|---|
| Tier | Elite | Advanced |
| HP (Lv. 60 / Lv. 90) | 222,753 / 825,447 | 173,253 / 642,014 |
| ATK (Lv. 90) | 4,130 | 2,684 |
| Poise | 320, 9s recovery | 200, 7s recovery |
| Base resistances | Physical 0.8x, Electric 0.65x | Physical 0.8x, Electric 0.65x |
Feral Carnage of Shadow on Agony. Watch the switch to the Quillbeast once the Rakerbeast goes Ethereal.
An alternative Agony clear with a full Physical team, where Breach and Crush keep the Lightning Orbs coming.
Stage 3: Sudden Roar of Oblivion
Enemies: Tuskbeast, YSTF Vanguard, YSTF Elite and YSTF Glaiver Blightshades.
Operators no longer have SP regeneration. Final Strikes and Finisher attacks no longer recover SP. After the battle begins, operators’ starting SP and Max SP are increased to 1000.
The middle sentence, Final Strikes and Finishers refunding no SP, is the Agony addition. The Normal rules in the game data stop at no regeneration plus the 1,000 SP pool.
On top of the SP rule:
- Tuskbeast and YSTF Vanguard Blightshades self-detonate after a while, dealing damage based on their Max HP to every operator.
- The YSTF Glaiver’s ultimate must be interrupted several times to stop it, and its damage cannot be dodged.
- If the battle takes too long, the Glaiver self-detonates and defeats every operator. That is a hard enrage.
- When enemies become Staggered, their self-detonation timer pauses.
That last line is what the stage is built around. Stagger is your clock control. Every enemy you keep Staggered is a bomb that stops counting down. The fodder breaks easily: the game data gives the Tuskbeast 60 poise and the Vanguard and Elite 80 each. Our stagger tier list is the right reference for this stage.
The Glaiver is the real gate. This stage uses its own version of the YSTF Glaiver with 460 poise, against 320 for the regular one, so it takes about 44% more Stagger to break. Since its ultimate needs several interrupts anyway, bring operators who can interrupt more than once.
The SP rule changes how you plan the fight. Our SP battery tier list means nothing here, because nothing regenerates. You get one 1,000 SP pool per operator, for the whole fight. Spend it on skills that group, stagger or delete the bombers, not on long single-target strings.
| Enemy | HP (Lv. 60 / Lv. 90) | ATK (Lv. 90) | Poise | Explodes? |
|---|---|---|---|---|
| YSTF Glaiver Blightshade | 222,753 / 825,447 | 4,130 | 460, 9s recovery | On enrage (squad wipe) |
| YSTF Vanguard Blightshade | 27,225 / 100,888 | 1,858 | 80 | Yes |
| Tuskbeast Blightshade | 22,275 / 82,545 | 1,858 | 60 | Yes |
| YSTF Elite Blightshade | 24,750 / 91,716 | 2,271 | 80 | No |
Two Blightshade traits from the game data still apply here. The Vanguard’s and Elite’s blade qi activates any Blightshade Energy it hits, and the Tuskbeast’s attacks do too. Downed Blightshades leave that energy behind, so dodge the delayed explosions the bestiary describes. Two of the four types also resist Electric at 0.65x by base data, but the series-wide resistance rule means that is not a reason to change teams.
Sudden Roar of Oblivion on Agony, clearing the bombers before their timers run out.
An Agony clear with Arcane, Perlica, Gilberta and Akekuri. Arcane and Gilberta gather the mobs into one pile, and Perlica and Akekuri are free-to-play friendly damage boosts.
Stage 4: Arc of Shadow Flare
Boss: YSTF Captain Blightshade, alone.
The cooldown of all operator battle skills has been extended by 60s. The YSTF Captain Blightshade will regularly apply 1 stack of Electric Infliction on all operators. At the start of battle, all operators will enter a Conductant state, and continuously take Electric DMG based on the number of Electric Infliction stacks they have.
And the clause that turns it into a puzzle:
After an operator in the Conductant state casts a battle skill, the YSTF Captain Blightshade applies 1 stack of Electric Infliction on all operators. After the YSTF Captain Blightshade applies Electric Infliction on operators for the 4th time, reset operator battle skill cooldowns, dispel all stacks of Electric Infliction from the operators, and apply a Level 4 Electrification on the YSTF Captain Blightshade.
Read the two together and the stage tells you how to beat it. Battle skills are nearly locked out by the +60s cooldown, and every stack of Electric Infliction on your squad hurts. But the 4th application is a reset button: your stacks vanish, every battle skill cooldown resets, and the boss takes a Level 4 Electrification.
So the loop is to cast battle skills on purpose to push the stack count to 4, take the reset, and dump your refreshed skills into the Electrified Captain. The Captain also adds stacks on its own timer, so the 4th application comes whether you push it or not. Pushing it yourself means you choose when the reset lands. The danger is the time spent at 2 to 3 stacks, when the Conductant damage ticks hardest. Healers and shields buy that time; Agony’s ban on consumables means it has to come from operator kits.
| YSTF Captain Blightshade | Lv. 60 (Normal) | Lv. 90 (Agony) |
|---|---|---|
| HP | 222,753 | 825,447 |
| ATK | 2,395 | 4,130 |
| DEF | 100 | 100 |
| Poise | 320, 9s recovery, 50% break threshold | Same |
| Base resistances | Physical 0.8x, Electric 0.65x | Same (flattened in-stage) |
The Captain carries a poise knot at 50% in the game data, so it has a mid-bar break point as well as the full Stagger. Save a burst window for it, and line your big ultimates up with a Stagger that lands inside a reset window.
Arc of Shadow Flare on Agony. Count the Electric Infliction applications to see each cooldown reset land.
An 86-second Agony clear with a Physical team built on Mi Fu, Chen Qianyu and Ember, and it isn’t even an optimized route.
Normal vs Agony: What Actually Changes
| Normal | Agony | |
|---|---|---|
| Recommended level | Lv. 60 | Lv. 90 |
| Enemy level | Lv. 60 | Lv. 90 |
| Tacticals and consumables | Allowed | Banned on all four stages |
| Elemental resistances | Same against every element | Same against every element |
| Tri-Aggelated Targeting | Enemies immobile, extended range | Adds the first-kill ATK and attack speed buff |
| Feral Carnage of Shadow | Up to 5 Thunder Strikes | Up to 7 Thunder Strikes |
| Sudden Roar of Oblivion | No SP regen, 1,000 SP pool | Also no SP from Final Strikes or Finishers |
| Unlock | Authority Level 30 | Requires the stage’s Normal clear |
| Medal | Engraved medal for all four | Trimmed medal for all four |
The stage quotes in this guide are the Agony versions. The table above compares them with the Normal rules in the game data, which also give every Normal stage the same resistance against every element. Arc of Shadow Flare’s Normal text is not in the data yet; our Umbral Monument database lists every stage’s rules side by side.
Recommended Teams
How this list was built. The criteria are each stage’s mechanic as quoted above, on Version 1.5, checked October 6, 2026. The picks come from what guide sites recommend for this series plus Agony clears posted publicly in the first two days, including the runs embedded above. We have not run these teams ourselves. “Confirmed” means a public Agony video clear exists with that team or one built on the same core. Elemental resistances played no part, because every stage flattens them.
| Rank | Team | Operators | Best stages | Why it fits |
|---|---|---|---|---|
| 1 | Mi Fu Physical | Mi Fu, Chen Qianyu, Pogranichnik, Lifeng | 2, 4 (Physical clears confirmed on both) | Breach and Crush feed Stage 2’s Lightning Orbs; heavy Stagger output lands Stage 4’s burst windows |
| 2 | Typhoeus hypercarry | Typhoeus, Arcane, Liino, Ardelia | 1, 2, 3 | One carry with Arts Burst access; Ardelia covers sustain under Agony’s consumable ban |
| 3 | Zhuang Fangyi Electric | Perlica, Zhuang Fangyi, Arclight, Liino | 1, 2, 4 | Strong spread damage for Stage 1’s even-HP rule; Stage 4’s Level 4 Electrification on the boss rewards an Electric team |
| 4 | Arcane mob control | Arcane, Gilberta, Perlica, Akekuri | 3 (confirmed) | Gathers the bombers into one pile so they die or Stagger together; two of the four are free-to-play friendly |
| 5 | Yvonne hypercarry | Yvonne, Tangtang, Arcane, Xaihi | 3 | Burst damage that clears the fodder within its detonation timer |
| 6 | Mi Fu hybrid | Mi Fu, Ardelia, Gilberta, Rossi | 4 | Physical burst with two healers to survive the Conductant damage between resets |
Two selection rules matter more than the names:
For Stage 2, bring Breach, Crush or reliable Arts Burst. Without one of the three you have no Lightning Orbs, and five to seven undodgeable Thunder Strikes will end the run.
For Stage 3, value Stagger and grouping over single-target damage. Stagger pauses the bombs, grouping lets you break several at once, and the 1,000 SP you start with has to last the whole fight.
For gear, follow each operator’s recommendation in the gear sets database. Nothing in this series calls for a special set.
Clear Order by Player Type
Heavily invested accounts. Go straight to Agony on all four and finish before October 19. Expect retries on Stage 3, since the Glaiver enrage punishes a slow learning run, and on Stage 2 if your team has no reliable way to make orbs.
Mid-invested accounts. Clear all four on Normal first, which covers the event’s Normal missions, and make one Agony attempt for the “challenge” mission. Then work on Agony afterwards. Do Stage 4 Agony last; the Conductant damage between resets is the least forgiving of a thin roster.
Newer or lower-investment accounts. Four Normal clears plus one Agony attempt is a realistic goal for the event window. Start with Stage 3 on Normal, where SP comes as a fixed pool and the main skill is staggering the right targets. Leave Stage 1 for last, because it is the purest stat check of the four. The stages are permanent, so stopping at Normal costs you nothing except the trimmed medal.
Common Mistakes to Avoid
- Focus-firing in Tri-Aggelated Targeting on Agony. The first kill buffs every survivor. Bring their HP down together.
- Attacking the Ethereal beast in Feral Carnage of Shadow. Ethereal means immune and untargetable. Switch to whichever beast is solid.
- Ignoring the Lightning Orbs. Thunder Strike cannot be dodged. If you are not picking up orbs, you are just taking the hits.
- Letting the bombers’ timers run in Sudden Roar of Oblivion. Stagger pauses them. A Staggered Tuskbeast is not a threat.
- Spending your Stage 3 SP early on single targets. Nothing regenerates and Finishers refund nothing.
- Fighting Stage 3 slowly. The Glaiver’s enrage detonation wipes the squad.
- Hoarding battle skills in Arc of Shadow Flare. Each cast moves you toward the 4th-application reset, which gives the cooldowns back and Electrifies the boss.
- Picking teams by the Blightshades’ Electric resistance. Every stage gives enemies the same resistance against every element.
Rewards and Medals
Stage clears pay Mark of Perseverance, Advanced Cognitive Carrier, Arms INSP Set and Protohedron, as every series has. For scale, the previous series, Howlers of the Crag, paid 24,000 T-Creds, 3 Advanced Cognitive Carrier, 1 Mark of Perseverance, 8 Protohedron and 5 Arms INSP Set per stage, the same in Normal and Agony. We have not yet confirmed the Series 7 amounts against the game data.
Clearing all four stages on Normal earns the engraved medal, and clearing all four on Agony trims it. Monumental Etching: Shadow Marked adds 1,200 Oroberyl and an Advanced Progression Selection Crate I on top, until October 19 at 04:00 server time.
Watch List: What Would Change This Guide
- Arc of Shadow Flare on Normal. It is the one Series 7 stage whose Normal rules are not in the game data yet. If they differ from Agony by more than the usual bans, we will add it here.
- Per-stage reward quantities. We will replace the Howlers of the Crag benchmark with the Series 7 numbers once they are confirmed.
- The Heavy Sting α count in Stage 1. The stage name points to three, and clear footage shows several. We will pin the exact number.
- Agony meta. The team list is two days old. As more confirmed Agony clears come in, especially Stage 1 and Stage 4 without a limited carry, the list will change.
Final Read
Marked by Dark Shadows has a reputation as the hardest Umbral Monument series, and on a blind first attempt it might be. Read the rules first and it is closer to four puzzles with one answer each. Spread your damage in Stage 1. Make orbs in Stage 2. Use Stagger to stop the bomb timers in Stage 3. Cast into the reset in Stage 4. The stat checks are real, Stage 1 especially, but every stage also shows you exactly how it wants to be beaten.
Bank four Normal clears and one Agony attempt before October 19 at 04:00 to secure the Shadow Marked pay-out, then take the trimmed medal whenever you are ready. For the rest of the mode, the Umbral Monument hub guide covers every series. The previous series is in our Howlers of the Crag guide, and the full Version 1.5 schedule is in the Dreamscape of Wind and Snow update breakdown.
FAQ
When does Monumental Etching: Shadow Marked end? October 19, 2026 at 04:00 server time. It opened with the series on October 5 at 12:00 server time, a fixed 14-day window. The four Marked by Dark Shadows stages are permanent; only the event rewards expire.
What are the four Marked by Dark Shadows stages? In in-game order: Tri-Aggelated Targeting, Feral Carnage of Shadow, Sudden Roar of Oblivion, and Arc of Shadow Flare. Each has a Normal mode (recommended Lv. 60) and an Agony mode (Lv. 90) that unlocks after the Normal clear.
How do I survive the Thunder Strikes in Feral Carnage of Shadow? Thunder Strike cannot be dodged. Once the Rakerbeast Blightshade turns Ethereal it casts up to 5 of them on Normal and up to 7 on Agony at your controlled operator. Hit the Quillbeast Blightshade with Arts Burst, Breach, or Crush to make it drop Lightning Orbs. Each orb you pick up is a shield that blocks one Thunder Strike.
Why can’t I get SP in Sudden Roar of Oblivion? The stage turns off SP regeneration, and on Agony Final Strikes and Finishers also stop refunding SP. In exchange, every operator starts with 1,000 SP and a 1,000 Max SP. That pool is your whole budget for the fight, so spend it on skills that stagger or delete the self-detonating enemies.
How does the Electric Infliction loop in Arc of Shadow Flare work? Battle skill cooldowns are 60 seconds longer and every operator is Conductant, taking Electric DMG per Electric Infliction stack. Each battle skill you cast adds one stack to the whole squad. On the 4th application the stacks are dispelled, battle skill cooldowns reset, and the YSTF Captain Blightshade takes a Level 4 Electrification. Casting into the reset on purpose is the core of the stage.
Do Blightshades resist Electric damage in this series? By base data, most Blightshades take 0.65x Electric and 0.8x Physical damage. Every stage in this series, on Normal as well as Agony, also carries the rule that enemies have the same resistance against every element, so those base values should not decide your team. Build around each stage’s mechanic instead.
What are the rewards for Marked by Dark Shadows? Stage clears pay Mark of Perseverance, Advanced Cognitive Carrier, Arms INSP Set, and Protohedron. Clearing all four stages on Normal earns the engraved medal and clearing all four on Agony trims it. The Shadow Marked event adds 1,200 Oroberyl and an Advanced Progression Selection Crate I for its missions.
How do I unlock Umbral Monument? Complete the main mission Chapter I Process II: Paving the Way and reach Authority Level 30. Every Umbral Monument series, including Marked by Dark Shadows, lives in the same hub once that is done.
Enemy stats, stage rosters, recommended levels and mission text come from the Version 1.5 game data, cross-checked against our enemy database. Series and event dates come from the official Version 1.5 update announcement. Clear videos are embedded from YouTube.
Take a Break
Available on desktop